Subject Data Upload
Subject Data, such as demographics, labs, conditions, procedures, and medications, are easily uploaded into the LifeOmic Platform using the Subject Viewer Data Upload module.
-
Click on the Subjects tab on the left side of the LifeOmic Platform interface.
-
In the Subjects table, click on the subject of interest's row to access the Subject Viewer page.
-
Access the layout where you wish to add the Subject Data Upload:
-
If no layout exists, click the Create Layout button in the header and follow the directions here to add a new layout.
-
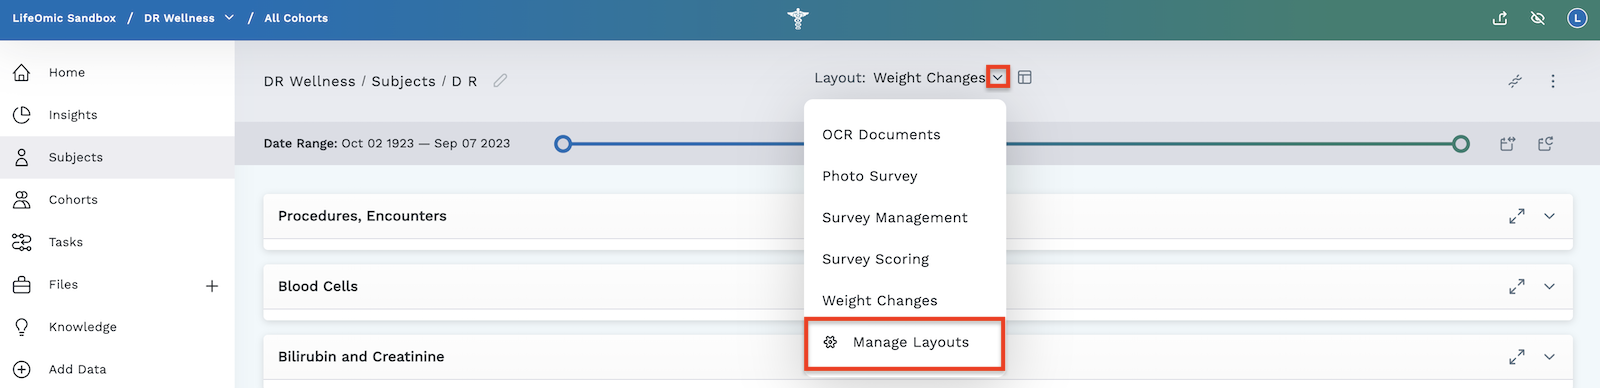
If a layout exists and you wish to add a new layout for the Subject Data Upload module, click the icon next to the Layout Name in the header, select Manage Layouts, then follow the directions here.
- Add to an existing layout by selecting the layout from the layout dropdown in the header and click the icon to edit the existing layout.
-
-
Click the button at the bottom right of the page to open the Add a Module page.
-
Select the Build Your Own tab.
-
Select Subject Data Upload from the modules.
-
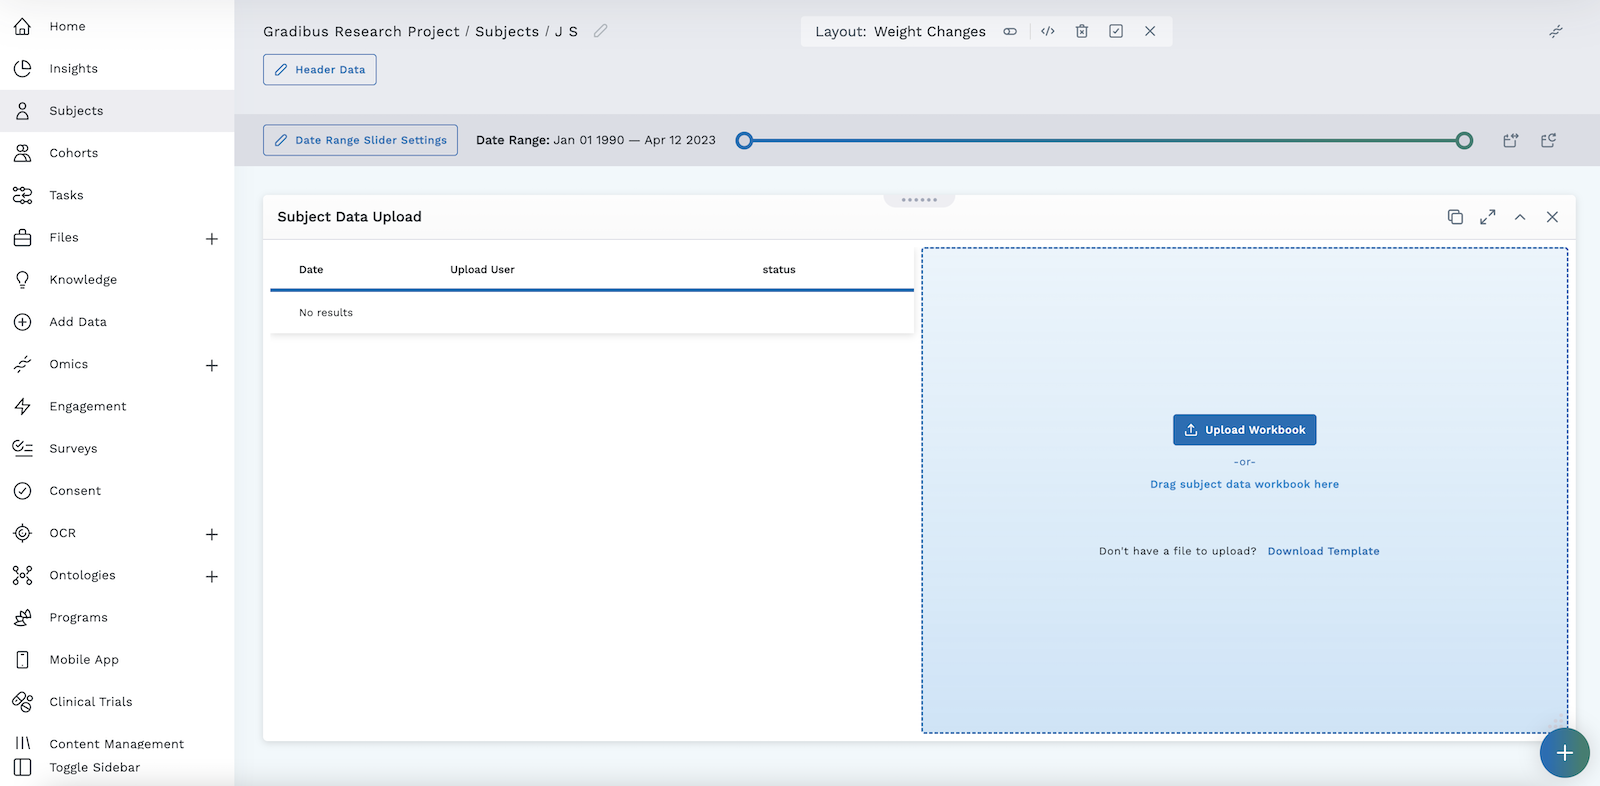
In the blue box on the right of the screen, select from:
- Upload Workbook
- Drag Subject Data Workbook here
- Download Template (if you don't have a file to upload). For more information on templates, click here.
-
Click the icon to save this module to your layout.
noteNavigating away from the module page before clicking the icon causes you to lose any work since your last save.
-
The table on the left side of this module auto-populates with information about the ingest (error, success, or processing).
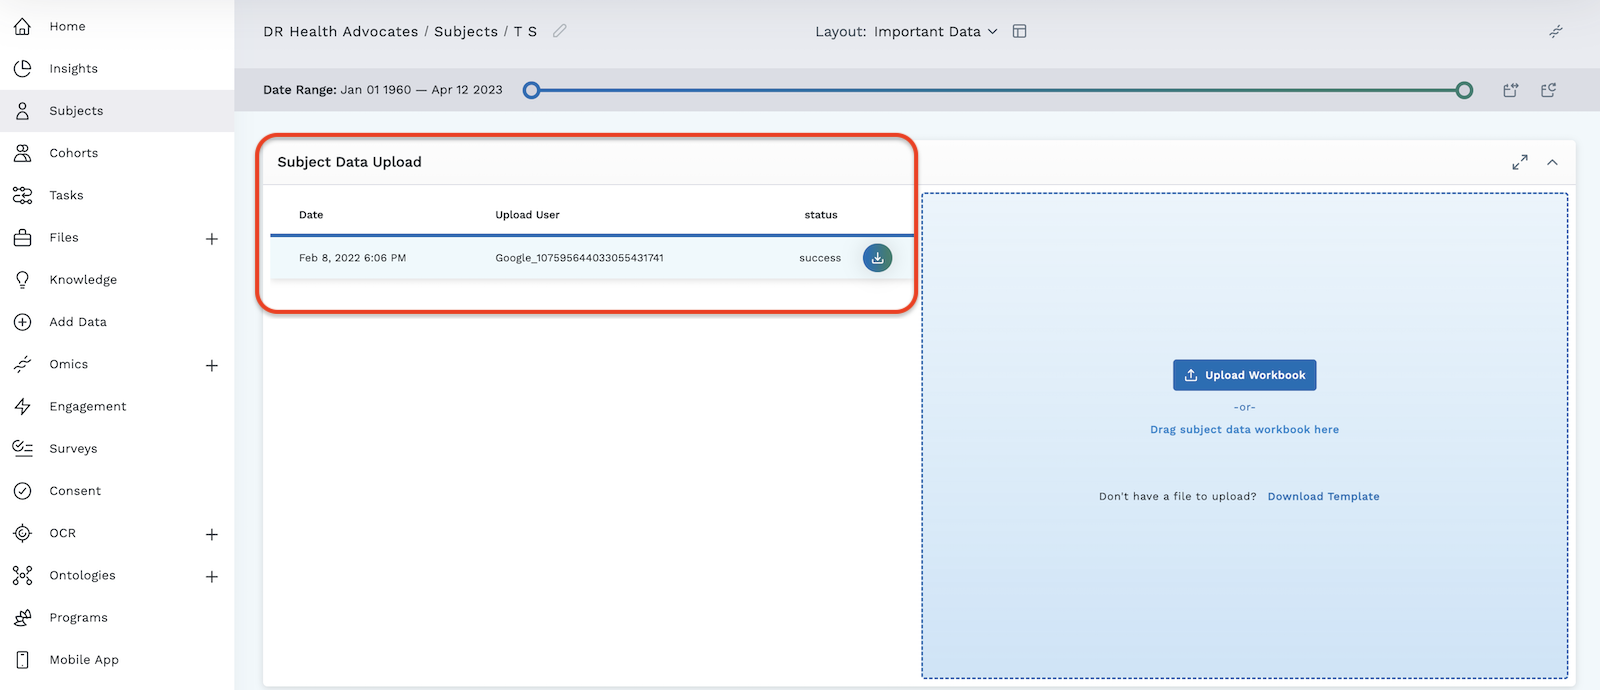
Uploads retry approximately every thirty seconds for up to five times.
If an error occurs:
-
Hover your mouse on the error and click the download icon that appears.
-
Make any corrections, respecting the formatting rules (noted in column headers at the top of the worksheet), and ensuring all required fields are complete. Required fields include:
- First and Last Name
- Phone Number Type (only needed if you include a phone number)
-
Save the worksheet in Excel.
-
Drag and drop/upload the file into the Subject Data Upload module (it overwrites the existing worksheet).
-
View your data in a module:
- Create a new layout or access an existing layout by selecting it from the layout dropdown in the header.
- Add table or graph modules to the layout and set any parameters requested.
- Save the module to your layout by clicking the found in the Layout tools in the header.
To view the workbook ingest logs or see the execution of this task running:
- Click on Tasks on the left of the LifeOmic Platform screen.
- Click on the workbook ingest file (in the table) you wish to view.
Subject Data Template
If no workbook Excel file exists to upload, download and complete a template to upload.
-
In the Subject Data Upload module, click the Download Template button in the blue box on the right side of the screen.
-
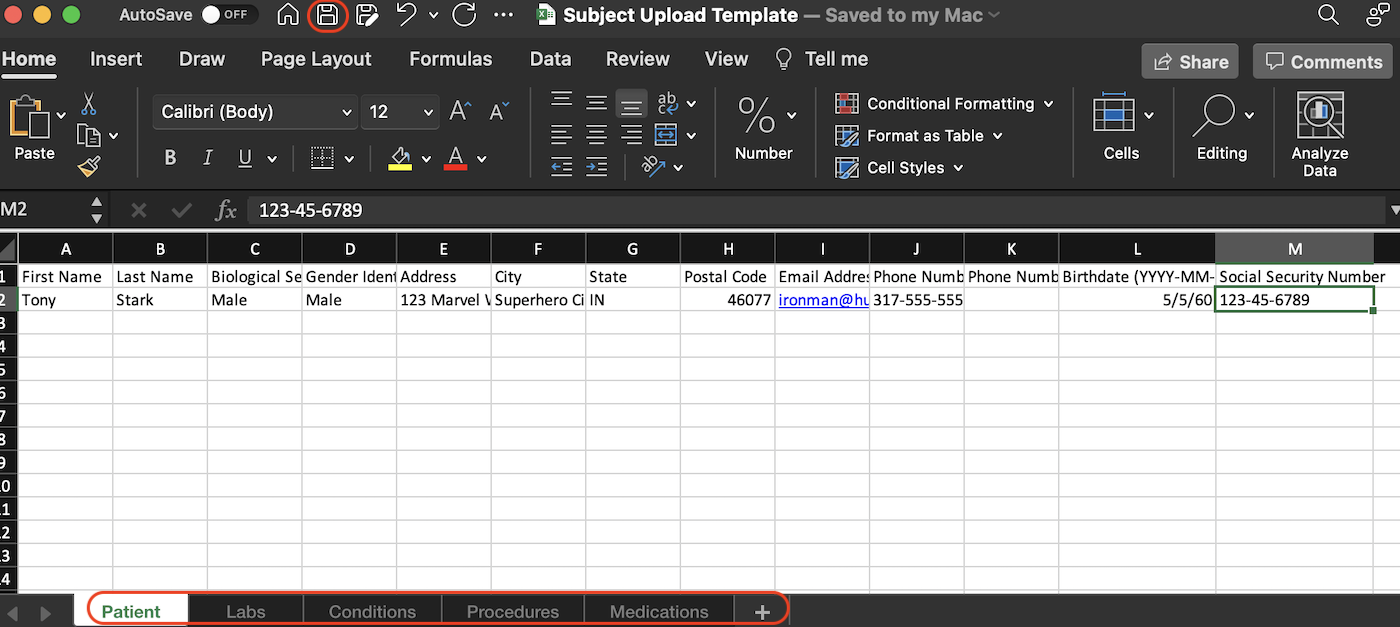
Fill in the data you wish to upload for that subject. Click or tab over to continue to the next cell. Click the tabs at the bottom of the Excel sheet to add data for the following categories:
- Patient Demographics
- Labs
- Conditions
- Procedures
- Medications
noteThe top line of the Excel sheet tells what data goes into each column and any formatting needed to properly import it into the LifeOmic Platform. First and Last name are required, however, if you include a phone number, you are required to add the phone number type (home, work, temp, old, or mobile).
-
Click Save.
-
Locate your saved .xlsx file in your downloads folder, then drag and drop it into the blue box on the right of the Subject Viewer Layout/Subject Data Upload module. You'll get an "Uploading Workbook" message followed by "Processing Workbook".
-
When it's complete, click the icon to save this module to your layout.
Navigating away from the module page before clicking the icon causes you to lose any work since your last save.
Delete Data Uploaded via Subject Data Upload Module
The best way to delete data ingested via the Subject Data Upload module is to upload a blank template. To do this:
-
Navigate to the table within the Subject Data Upload module in Subject Viewer.
-
Hover your mouse over the worksheet you wish to delete.
-
Click the icon. The downloaded file gets a file name that aligns with the patient identifier of the subject.
-
Delete any data you wish from the cells of the worksheet.
-
Click the icon to save the worksheet in Excel.
-
Drag to upload the saved file from your computer folder into the Subject Data Upload module. The blank worksheet overwrites previous uploaded worksheet data.