Subjects Overview
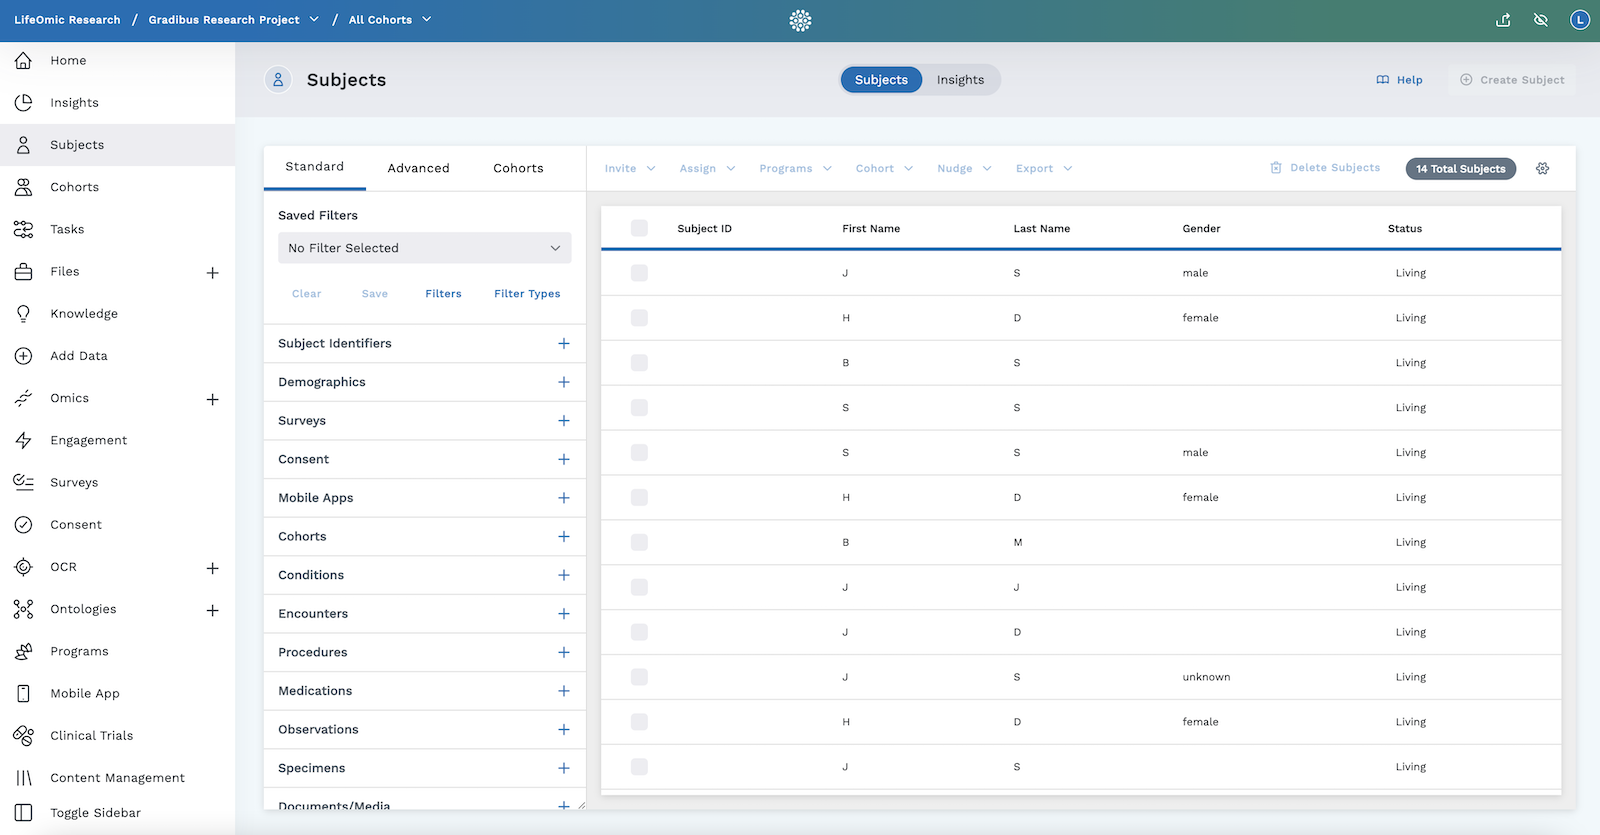
The Subjects page of the LifeOmic Platform allows you to search for any subjects within your project by using a filtering system. It is accessed by clicking on Subjects from the left side panel of the LifeOmic Platform user interface.
Subjects Layout
The Subjects tab consists of various filtering options, a results table (Subjects Table), action buttons, and other powerful options to help you manage the subjects in your project and monitor their data.
Filtering Options
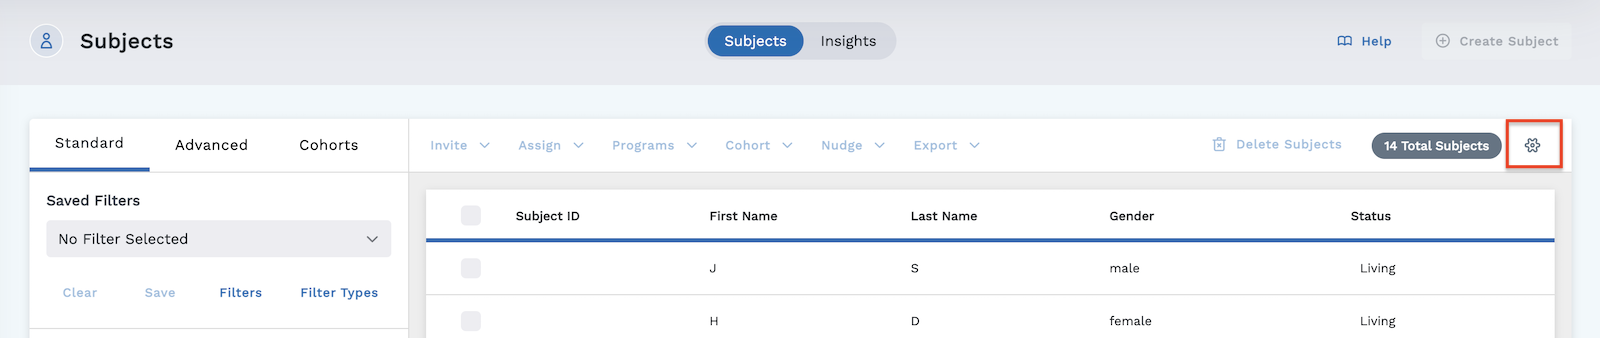
Filtering allows you to view the subjects from your project that match the parameters defined by the filters you've selected. Filtering options are found on the left side of the Subjects page and the results are shown in the Subjects table on the right of the screen. The colored oval above the Subjects Table tells how many subjects match your chosen filter(s). If no filters are chosen, the table shows all subjects in your project.
The Standard, Advanced, and Cohorts tabs on the left side of the Subjects screen each have their own set of filtering options.
-
Standard - The filter options in this tab build a simple filter with only one Operator. You can click checkboxes, select from dropdown menus, and input values to define these basic filters.
- Filters within the same filter category (such as birth sex = male + birth sex = female) are "Ored" (meaning, the Subjects table results show the male and female subjects).
- Filters across categories are "Anded" (for example, birth sex = male + living status = dead, the Subjects Table results would show the male subjects that are dead).
-
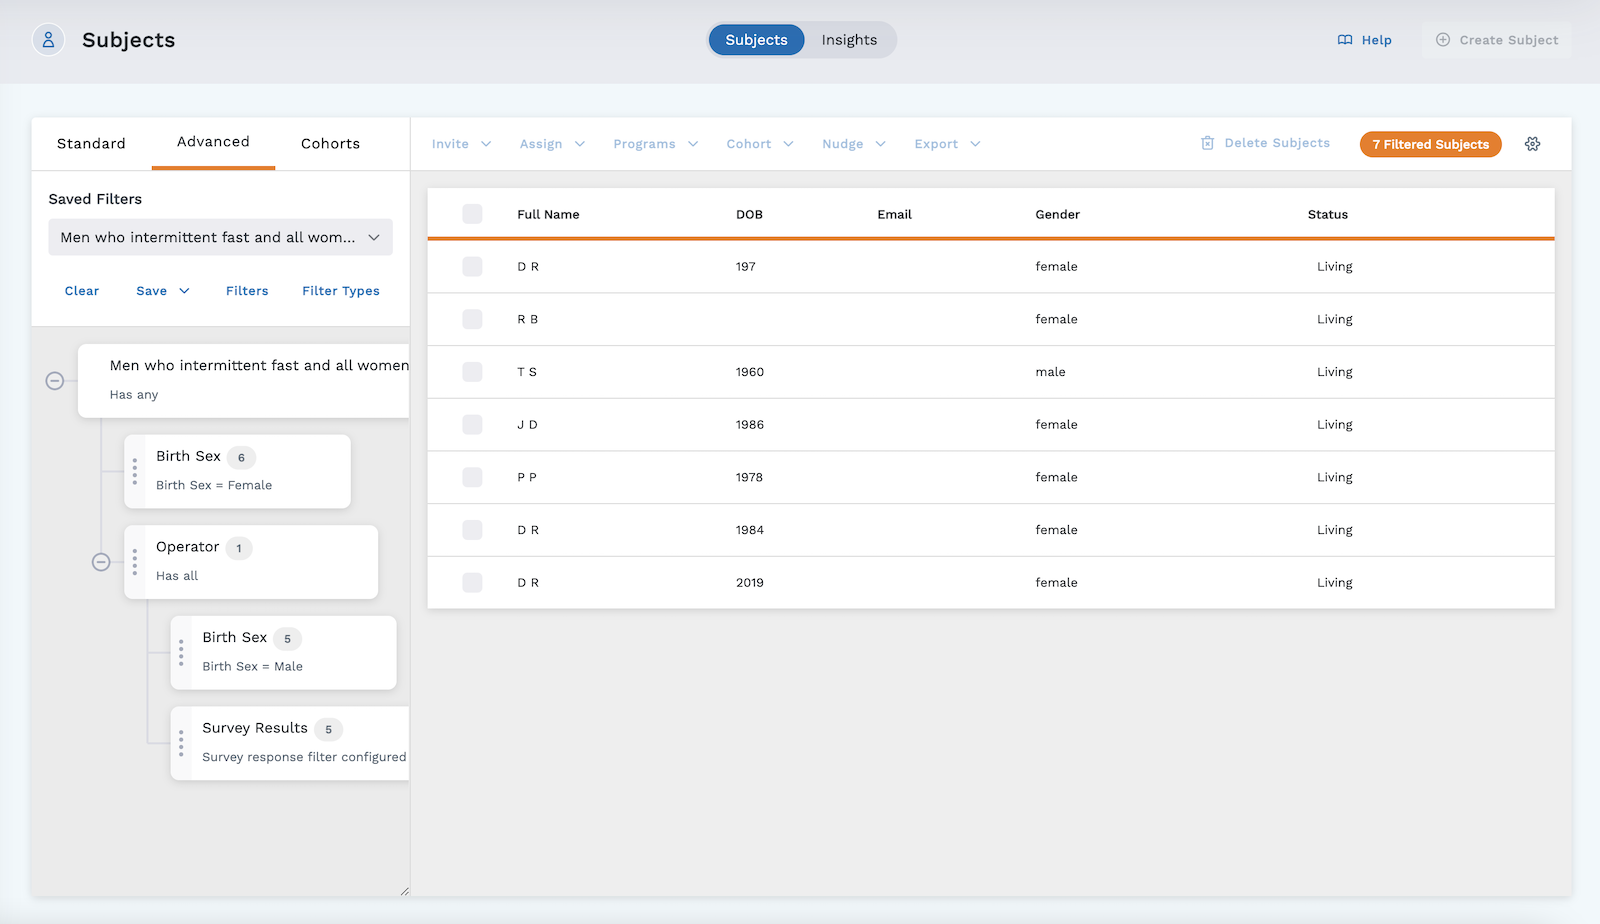
Advanced - The filter options in this tab allow you to build more complex filters with multiple Operators. This tab also includes the filter tree which you can adjust, adding more filters (nodes) and Operators, as well as adjusting the rules for the Operator (impacting the filters attached) to:
-
Has all (And) - Subjects in EVERY sub-filter (All subjects matching these filters)
-
Has any (Ored) - Subjects in ANY sub-filter (Subjects meet one filter or another)
-
Has none (Not) - Subjects NOT IN ANY sub-filter (Subjects do not match any filter)
-
-
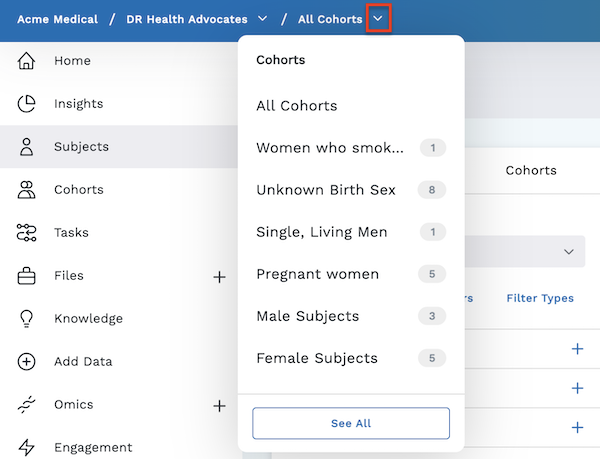
Cohorts - The options in this tab allow you to filter using existing cohorts, as well as update, create, or remove a cohort.
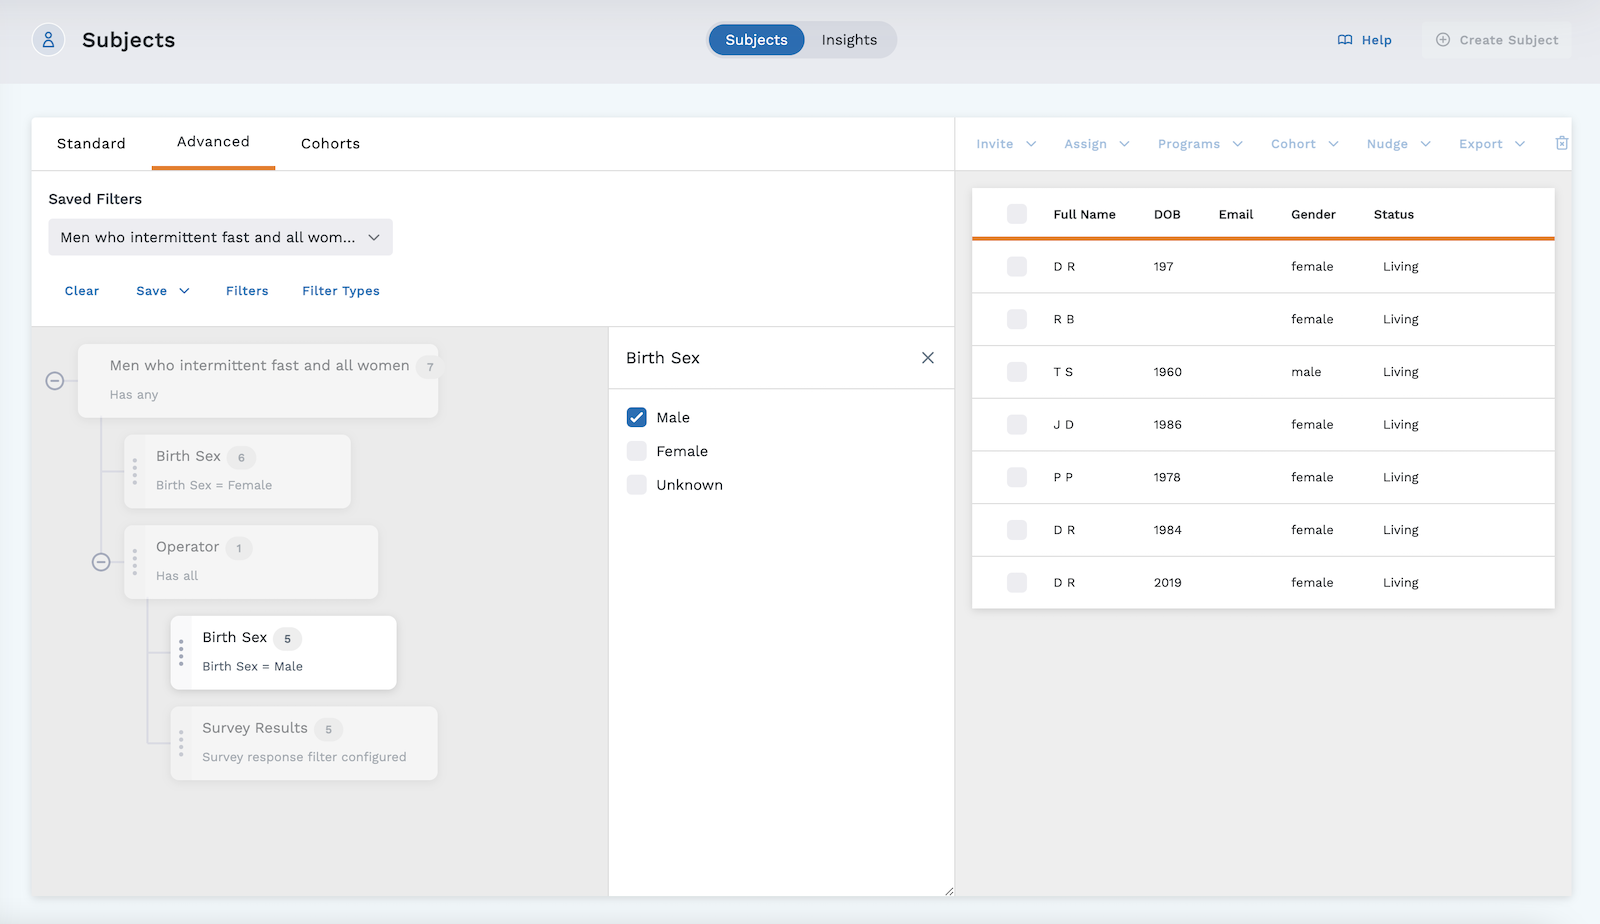
Filter categories can be expanded (clicking the "+" sign) to see more filtering options, or collapsed (clicking the "x").
When you select a filter (checkbox), the Subjects table automatically updates to show all subjects that match the filters selected and the number in the colored oval above the table updates to reflect the new filter. The number beside the filter category selected represents the number of subjects matching those filters.
You can set an unlimited amount of filters in Subjects.
Filters remain intact within the same browser, across different login sessions or even if you click away from that page.
Action Buttons
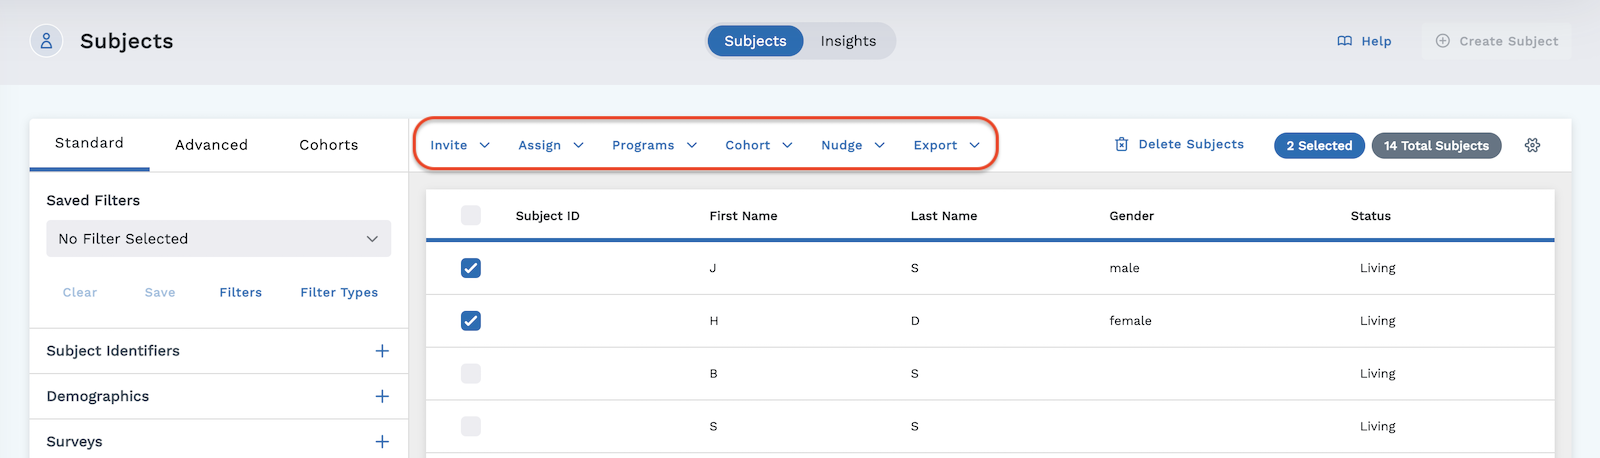
Action buttons are clickable buttons that perform an action on the selected subjects in your project. The buttons are located above the Subjects Table. Action buttons are only accessible once you select at least one subject.
To use an Action Button:
-
In the Subjects table, select the subjects you want to perform the the action on by clicking the checkbox beside their name. You can also select all subjects in the table by clicking the checkbox in the header of the table.
-
Click the Action Button that corresponds with the action you wish to perform.
-
Invite - A User must be invited to a project and accept it, linking their email to the account within the LifeOmic Platform, in order for you to be able to assign things like surveys to them manually, as well as send them notifications and reminders. They can be invited with the LifeOmic Patient Engagement app or LO-ME. In the LifeOmic Platform app, clicking the Invite action button allows you to choose from:
- Invite via the mobile app (Android/iOS) - can sync mobile data if the subject consents
- Invite via the LifeOmic Platform web app - collects demographic data but not data from the mobile app
- Uninvite - uninvites the selected subjects from the project (all data is retained)
Subjects invited with the Patient Engagement app receive an invitation to the project. This step alone does NOT communicate their wearable data to the LifeOmic Platform. To replicate their data, you must invite them to an engagement flow with a consent. They must consent to sync their mobile data. It will not upload to the LifeOmic Platform automatically. Visit Syncing Subjects' Mobile Data with the LifeOmic Platform Using Engagement Flow for more details.
Subjects invited via the Invite Action button receive an email with an invite to create an account. Once they create an account with the LifeOmic Platform they will be presented with:
-
The project's consent (if one exists) to view and agree to. A consent must exist for mobile data to replicate to the LifeOmic Platform project.
-
Demographics questions to complete.
Surveys in the project are not automatically assigned.
noteInvites expire after thirty days. Once it expires, subjects receive a new invitation.
- Assign
- Assign Survey
- Assign Consent
- Add to Engagement Flow - If Engagement Flow has been enabled, this option allows other users to add subjects to the Engagement Flow process
noteWhen Auto-Add is enabled for Engagement Flow, any subjects created (with email address) are invited to the project, then presented with the consent (if one exists) and demographic questions. Any surveys in the flow are assigned to them as well.
Existing subjects added prior to enabling Engagement Flow's Auto-Add are NOT automatically added to the flow. Add these subjects using the Assign/Add to Engagement Flow action button. Any surveys assigned to the flow not previously assigned to them are assigned.
-
- Enroll/Resume - If you enroll someone not already in the project, they will receive a project invite and the consent in their Today tile before they can see program activities. You can schedule their enrollment to start on a date in the future by toggling Schedule Enrollment on, then selecting the desired enrollment date.
- Disenroll - Multiple users can be selected and multiple programs can be selected for the disenroll action. Disenroll removes programs and activities from their Today tile (as long as they have not re-enrolled yet). Disenroll also removes the user from the circle. For users with a paid subscription, disenroll cancels their subscription.
- Pause - They remain active in their subscription (not cancelled), they can see and complete previous activities, and they remain in the circle. The only difference between a paused participant and enrolled participant is paused participants stop receiving new activities in their Today tile while paused. Once they Resume the program, they will begin receiving activities again.
- Restart Active Course
tipDisenroll/Re-enroll vs Restart Active Course:
If a user disenrolls (and the user, patient, program, or account are not deleted) the user's progress is saved. If they re-enroll, they can pick up exactly where they'd left off and see the content related to the course version they were enrolled in.
If a user restarts an active course, it deletes their progress in the active course. They start over at Day 1 of the latest published version of that course. This action is useful if you want your subjects to work on an updated version of the program since only newly added subjects see the updated version.
-
Cohort
- Create Cohort
- Add to Cohort
- Remove from Cohort
-
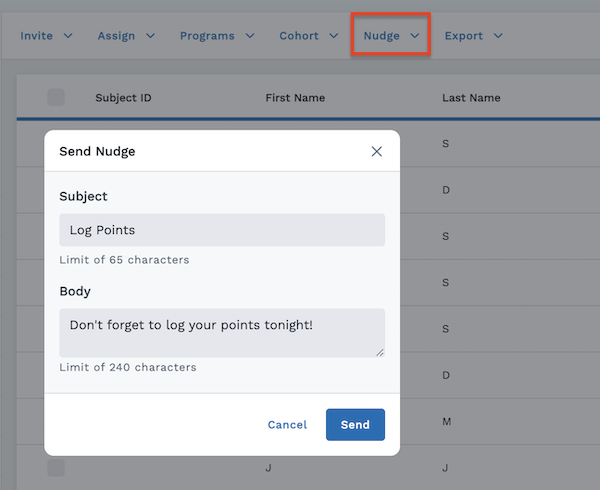
Nudge - A nudge is a one-time, custom reminder sent to your users. It is generic and not attached to a survey (for example "Remember to log your points tonight!")
- Send Email - Allows you to write a subject and message to a subject via email
- Send Notification - Allows you to write a subject and message to a subject via push notification in the mobile app
-
Export - Export Demographics - Permitted users can export the subject demographics in a .CSV file (you can toggle a button to mask user data in the window that opens)
Access ControlTo export demographics in a project, you must have downloadFile>Access privileges. To grant privileges, see Access Control.
- Delete Subject - (this cannot be undone) Permitted users can delete a subject. You are asked a challenge question to ensure you don't accidentally delete a subject as this cannot be undone. Multiple subjects can be deleted at one time, simply by selecting multiple subjects then clicking "Delete Subject"
Access ControlTo delete users in a project, you must have Delete Data>Access privileges. To grant privileges, see Access Control.
-
Insights
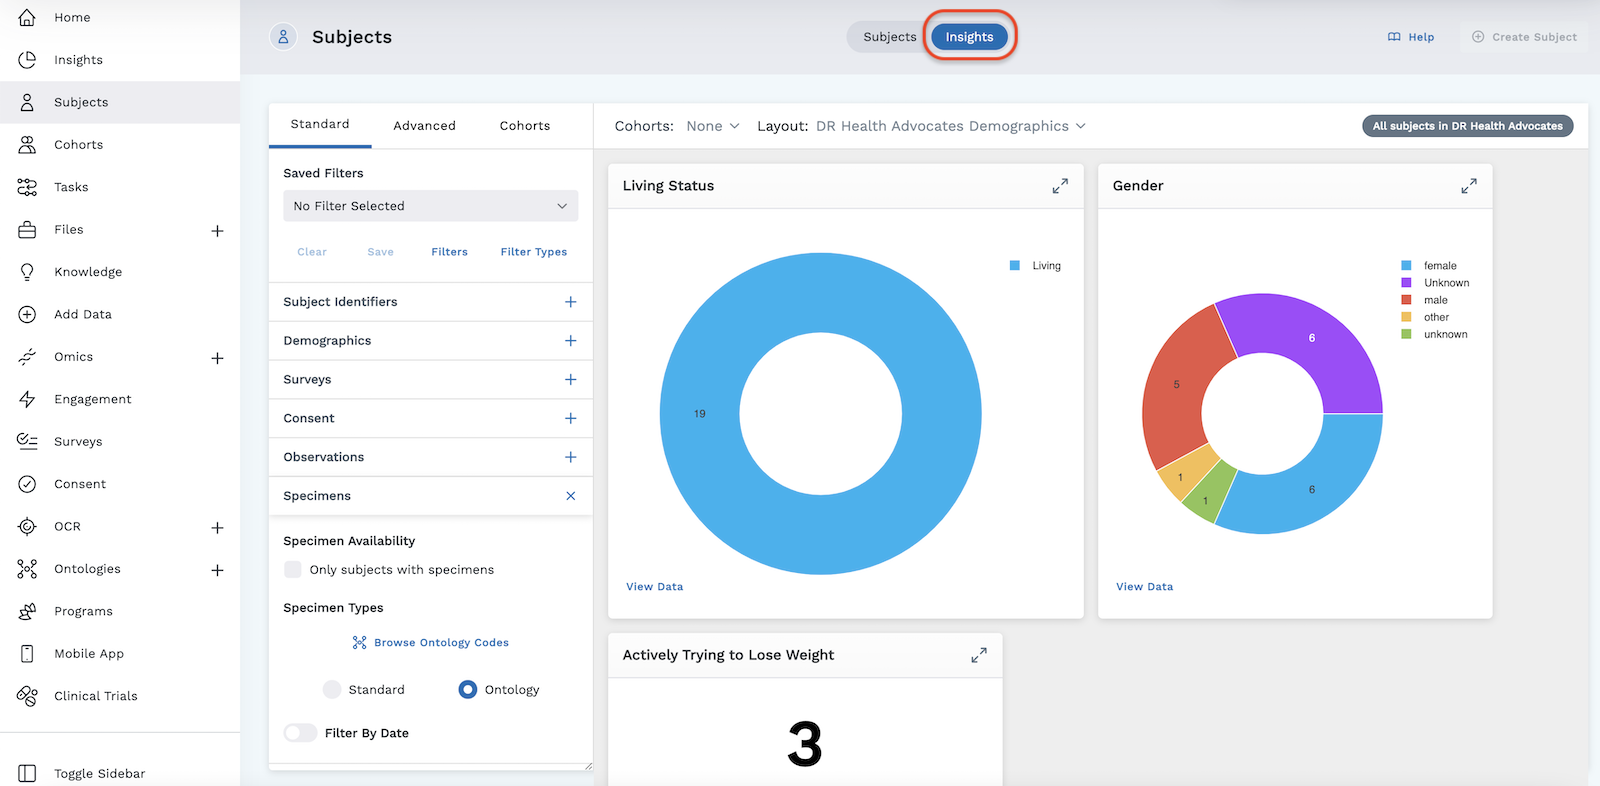
The Insights tab, found in the header of Subjects (seen below), lets you visualize the data of the filtered subjects in graphs. While similar to the Insights tab on the side bar of the LifeOmic Platform interface, there are some key differences.
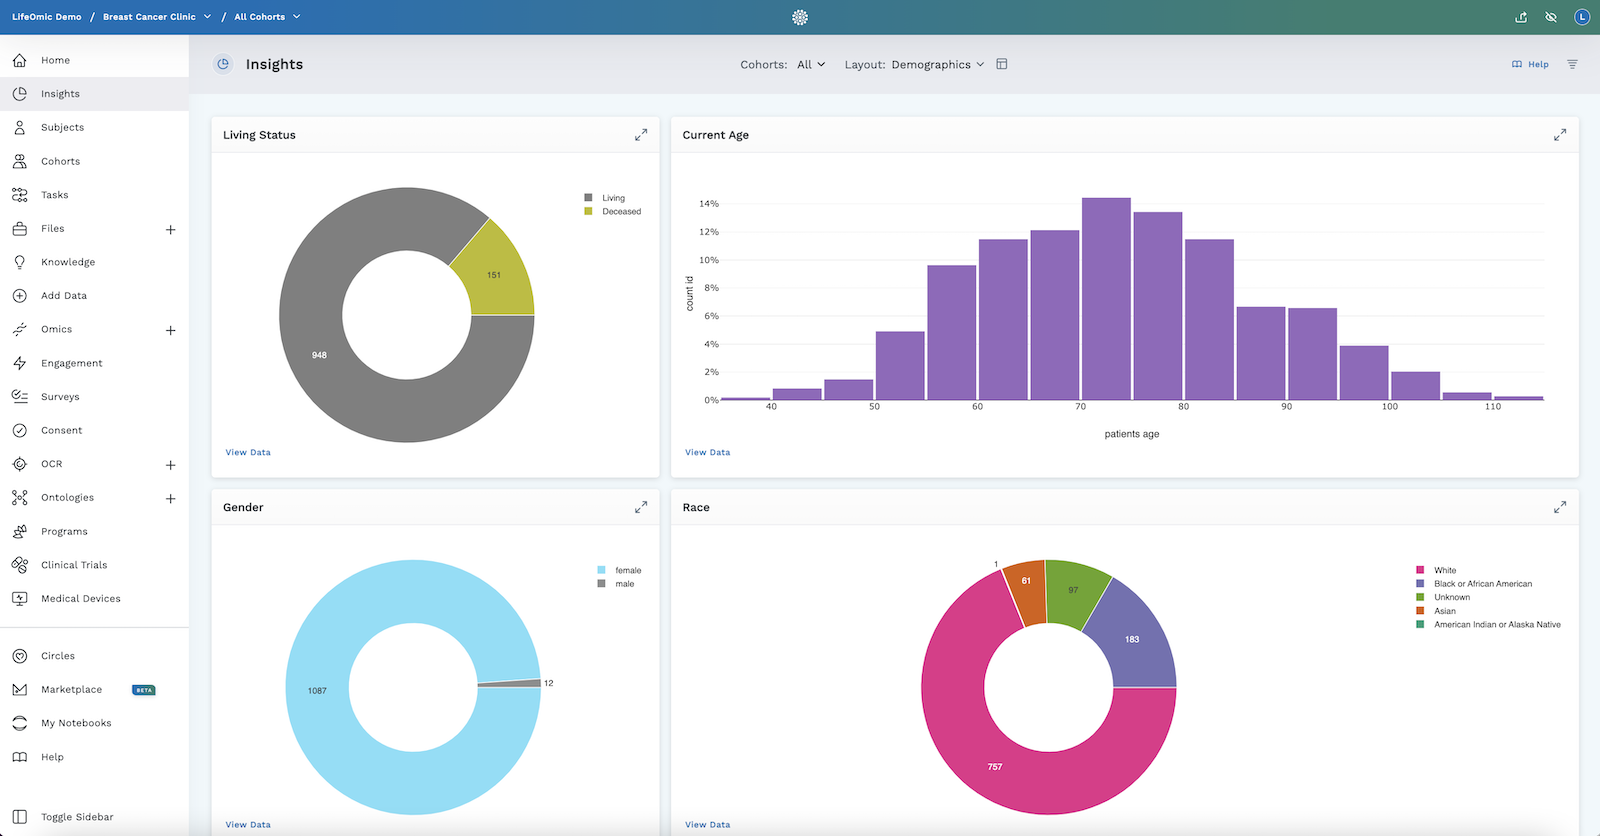
The side bar Insights is mainly useful if you wish to make new custom layouts/graphs to display your patient data. You can only use Cohorts to see a collection of data from various patients. Filters and Saved Filters are not available in the sidebar Insights page.
The Insights tab within Subjects allows you to use Cohorts, filters, and Saved Filters to select the subjects whose data you wish to visualize in Insights. The one limitation of this is that users cannot create custom graphs/layouts. All projects have a demographic layout available to view, and if other layouts exist for the project (created in Insights by users with ABAC privileges allowing them to create layouts), they are available as a dropdown selection.
Create a Subject

You can add a new subject into your project by clicking the Create Subject button at the top right of the page. This option is only available in unmasked mode .
If you try to click Create Subject while in masked mode , a window opens and alerts you that you must be in unmasked mode to complete this action. To switch from masked mode to unmasked mode , simply click the eye icon in the top right corner of the screen.
If a cohort is selected from the cohort picker at the top of the screen, the subject is added to that cohort.
Once you click the Create Subject button, a new screen opens where you can enter your subject's information. You can enter the following information to identify your subject:
- Subject ID
- Medical Record Number (MRN)
- First Name (required)
- Last Name (required)
- Biological Sex
- Gender Identity
- Race
- Address
- City
- Zip Code
- State/Region/Province
- Country
- Phone Number
- Date of Birth
- Date of Death
- Social Security Number
All required information must be entered in order to save the demographics. Hit the blue Save button to finished adding the subject. Your subject will now appear in the Subjects Table.
Subjects Table
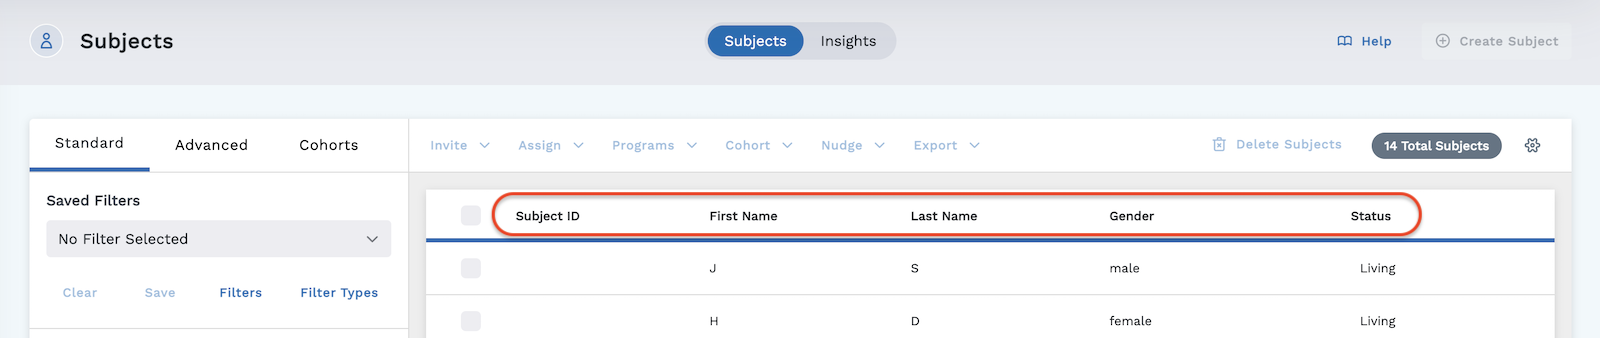
The Subjects Table is found on the right side of the Subjects screen. This table displays any subjects in the current project that meet the filtering criteria you've selected.
Configuring the Subjects Table
Settings for the Subjects Table (such as selecting what columns are visible to users) requires the Administer Layouts permission. This permission is not contained in the default Administrator privileges. To add this permission, see Create a Custom Policy for Access Control.
To configure the Subjects Table:
-
Click the settings gear icon in the top right corner of the Subjects Table.
-
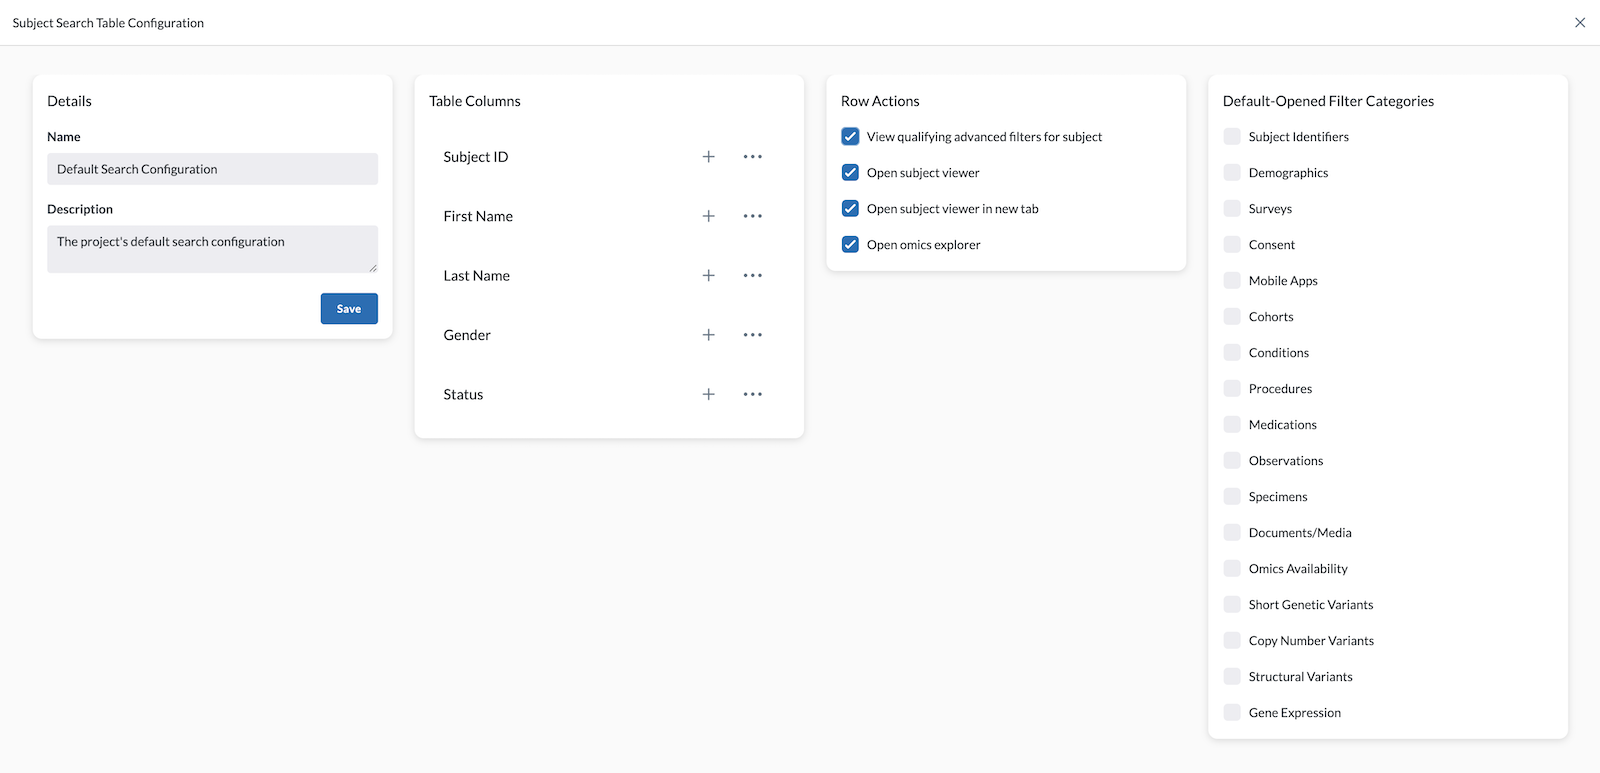
The Subjects Table Configuration page opens.
 This
page includes options to:
This
page includes options to:- Edit search configuration details
- Configure the Table Columns
- Select which Row Actions you wish to display
- Select any default-opened filter categories
Table Columns
The Table Columns of the Subjects Table can be modified by permitted users to display only the information they select.
Settings for the Subjects Table (such as selecting what columns are visible to users) can be configured by users with Administer Layouts> Access. To grant control privileges, see Access Control.
Add a Table Column
-
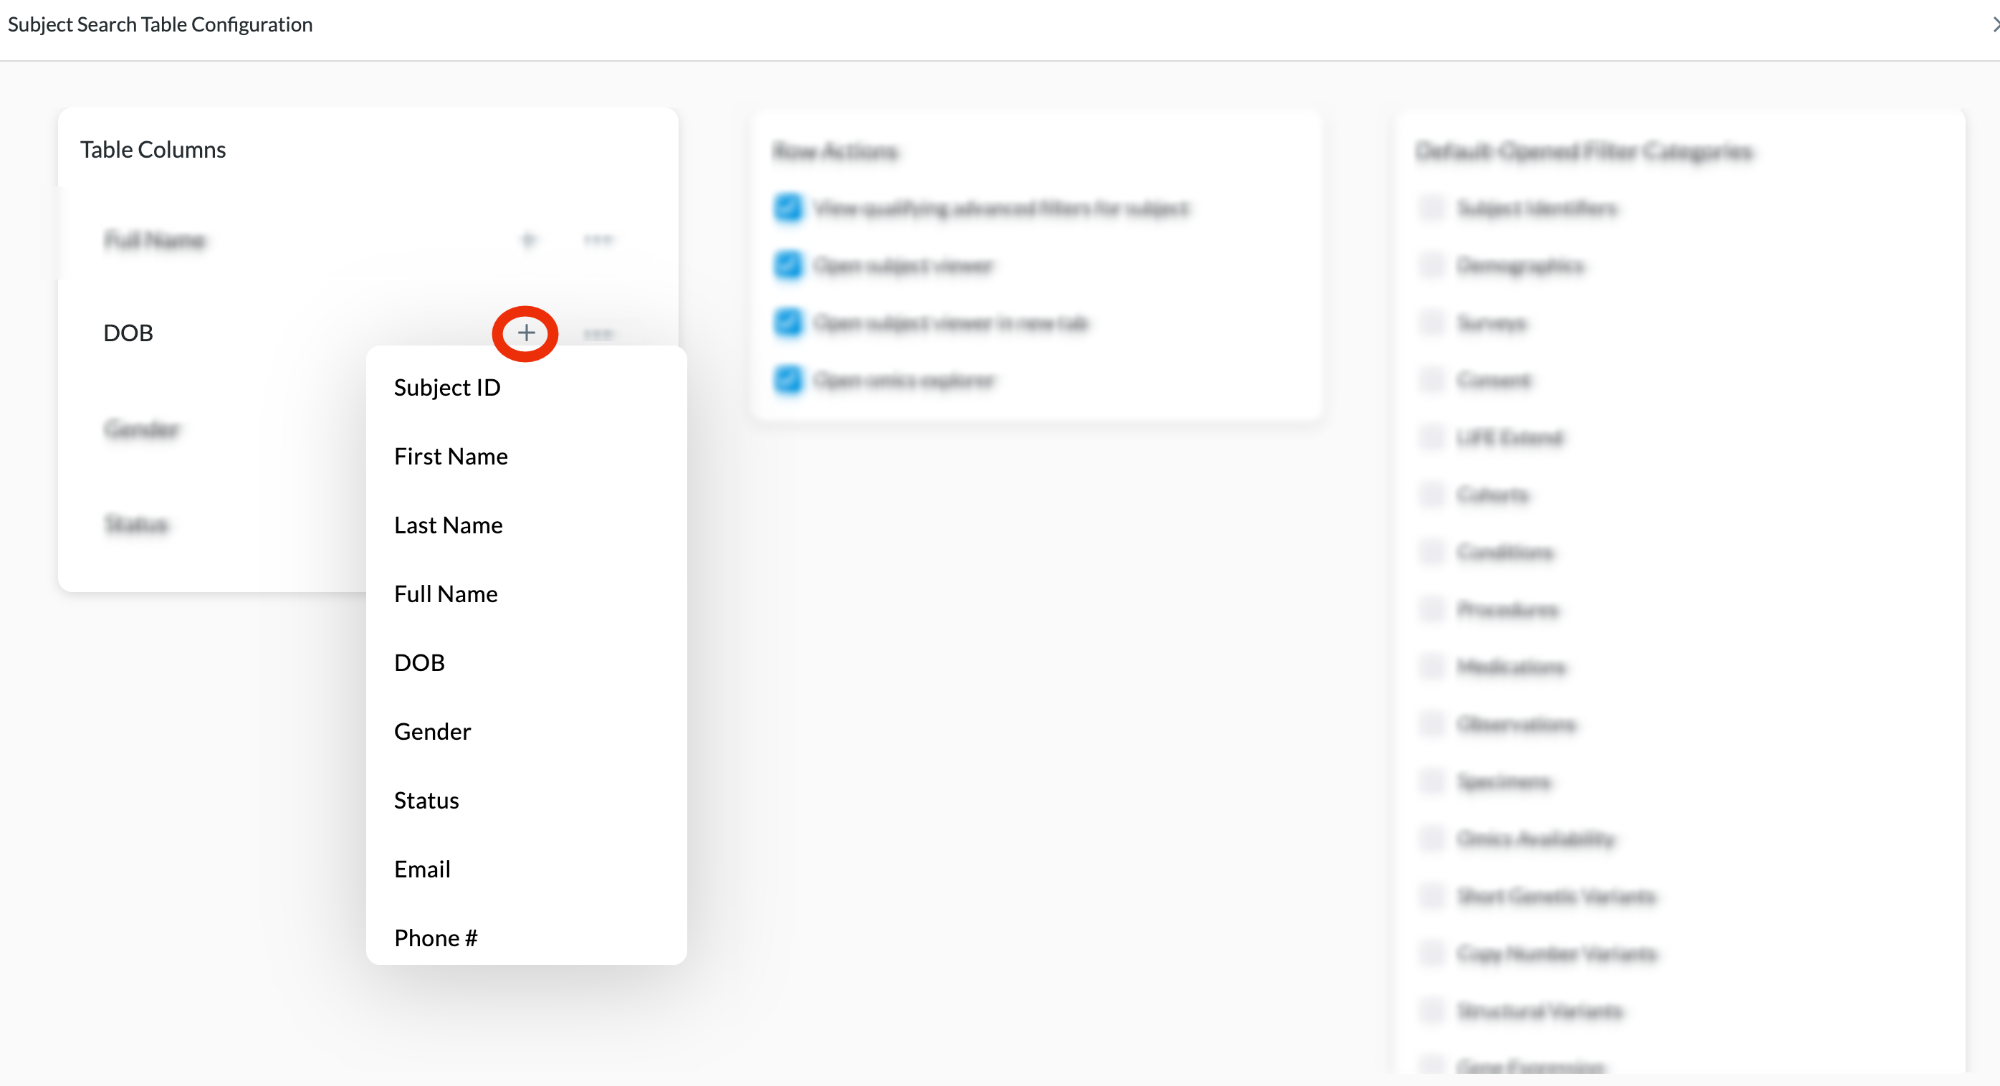
Determine where you want the new column to be located within the table and click the plus sign "+" next to the column above where you want the new column to be located (in the Subjects Table the new column is placed to the right of the column in which you clicked the "+").
-
From the list that opens, select your new column. Options include:
- Subject ID
- First Name
- Last Name
- Full Name
- DOB
- Age (babies are listed as weeks, toddlers are given as months or years and months, older kids and adults are rounded up to years)
- Gender
- Gender Identity
- Status
- Phone #
- SS #
- JMES Path
-
Click the "X" in the top right of the Subjects Table Configuration to close it. The Subjects Table now includes your new column and any data affiliated with it.
Edit, Move, or Delete a Column
Permitted users can rearrange, rename, or delete table columns.
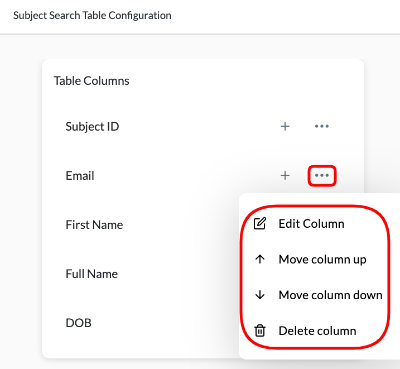
-
Click on the ellipses "..." beside the table column name you wish to edit, move, or delete.
-
From the list that opens, select from:
- Edit Column – Lets you edit the name of the column header
- Move Column Up – The column changes places with the column above it
- Move Column Down – The column changes places with the column below it
- Delete Column – Removes the column from the table
Row Actions
Row Actions are the buttons to the right of each subject in the Subjects table. Clicking them takes you to different locations regarding that user in the LifeOmic Platform.
Settings for Row Actions and other viewing options can be configured by users with the Administer Layouts privilege. To grant control privileges, see Access Control.
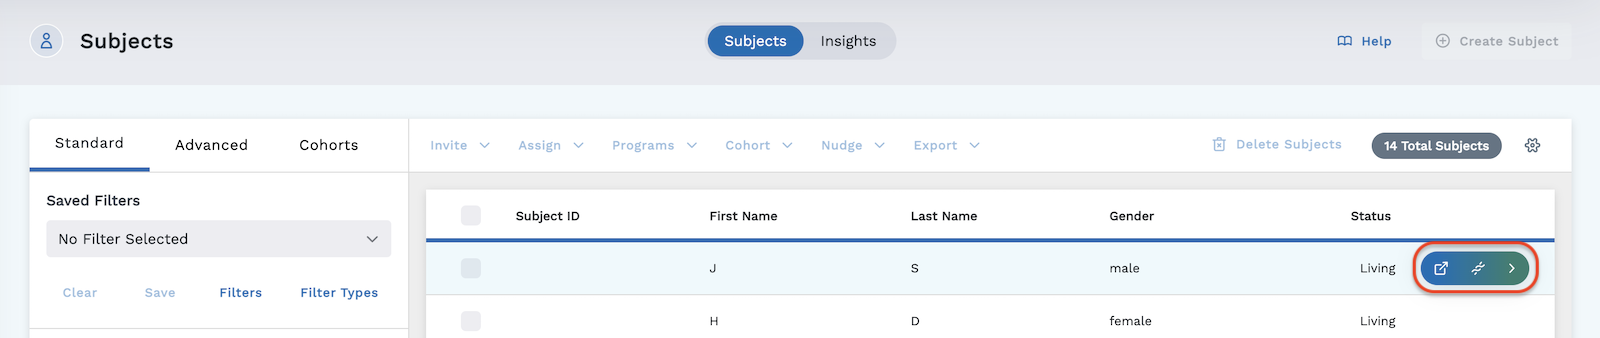
Options include:
- View in Subject Viewer in a new tab
- View in Omics Explorer
- View in Subject Viewer in current tab