Medical Devices
The LifeOmic Platform collects, stores, and analyzes data from registered medical devices. For more information, see Medical Devices in the LifeOmic Dev Center.
View Medical Devices and Medical Device Data
-
On the left side of the screen, click the Medical Devices tab to view all medical devices.
-
To narrow your results, enter information in the Device Filters fields.
-
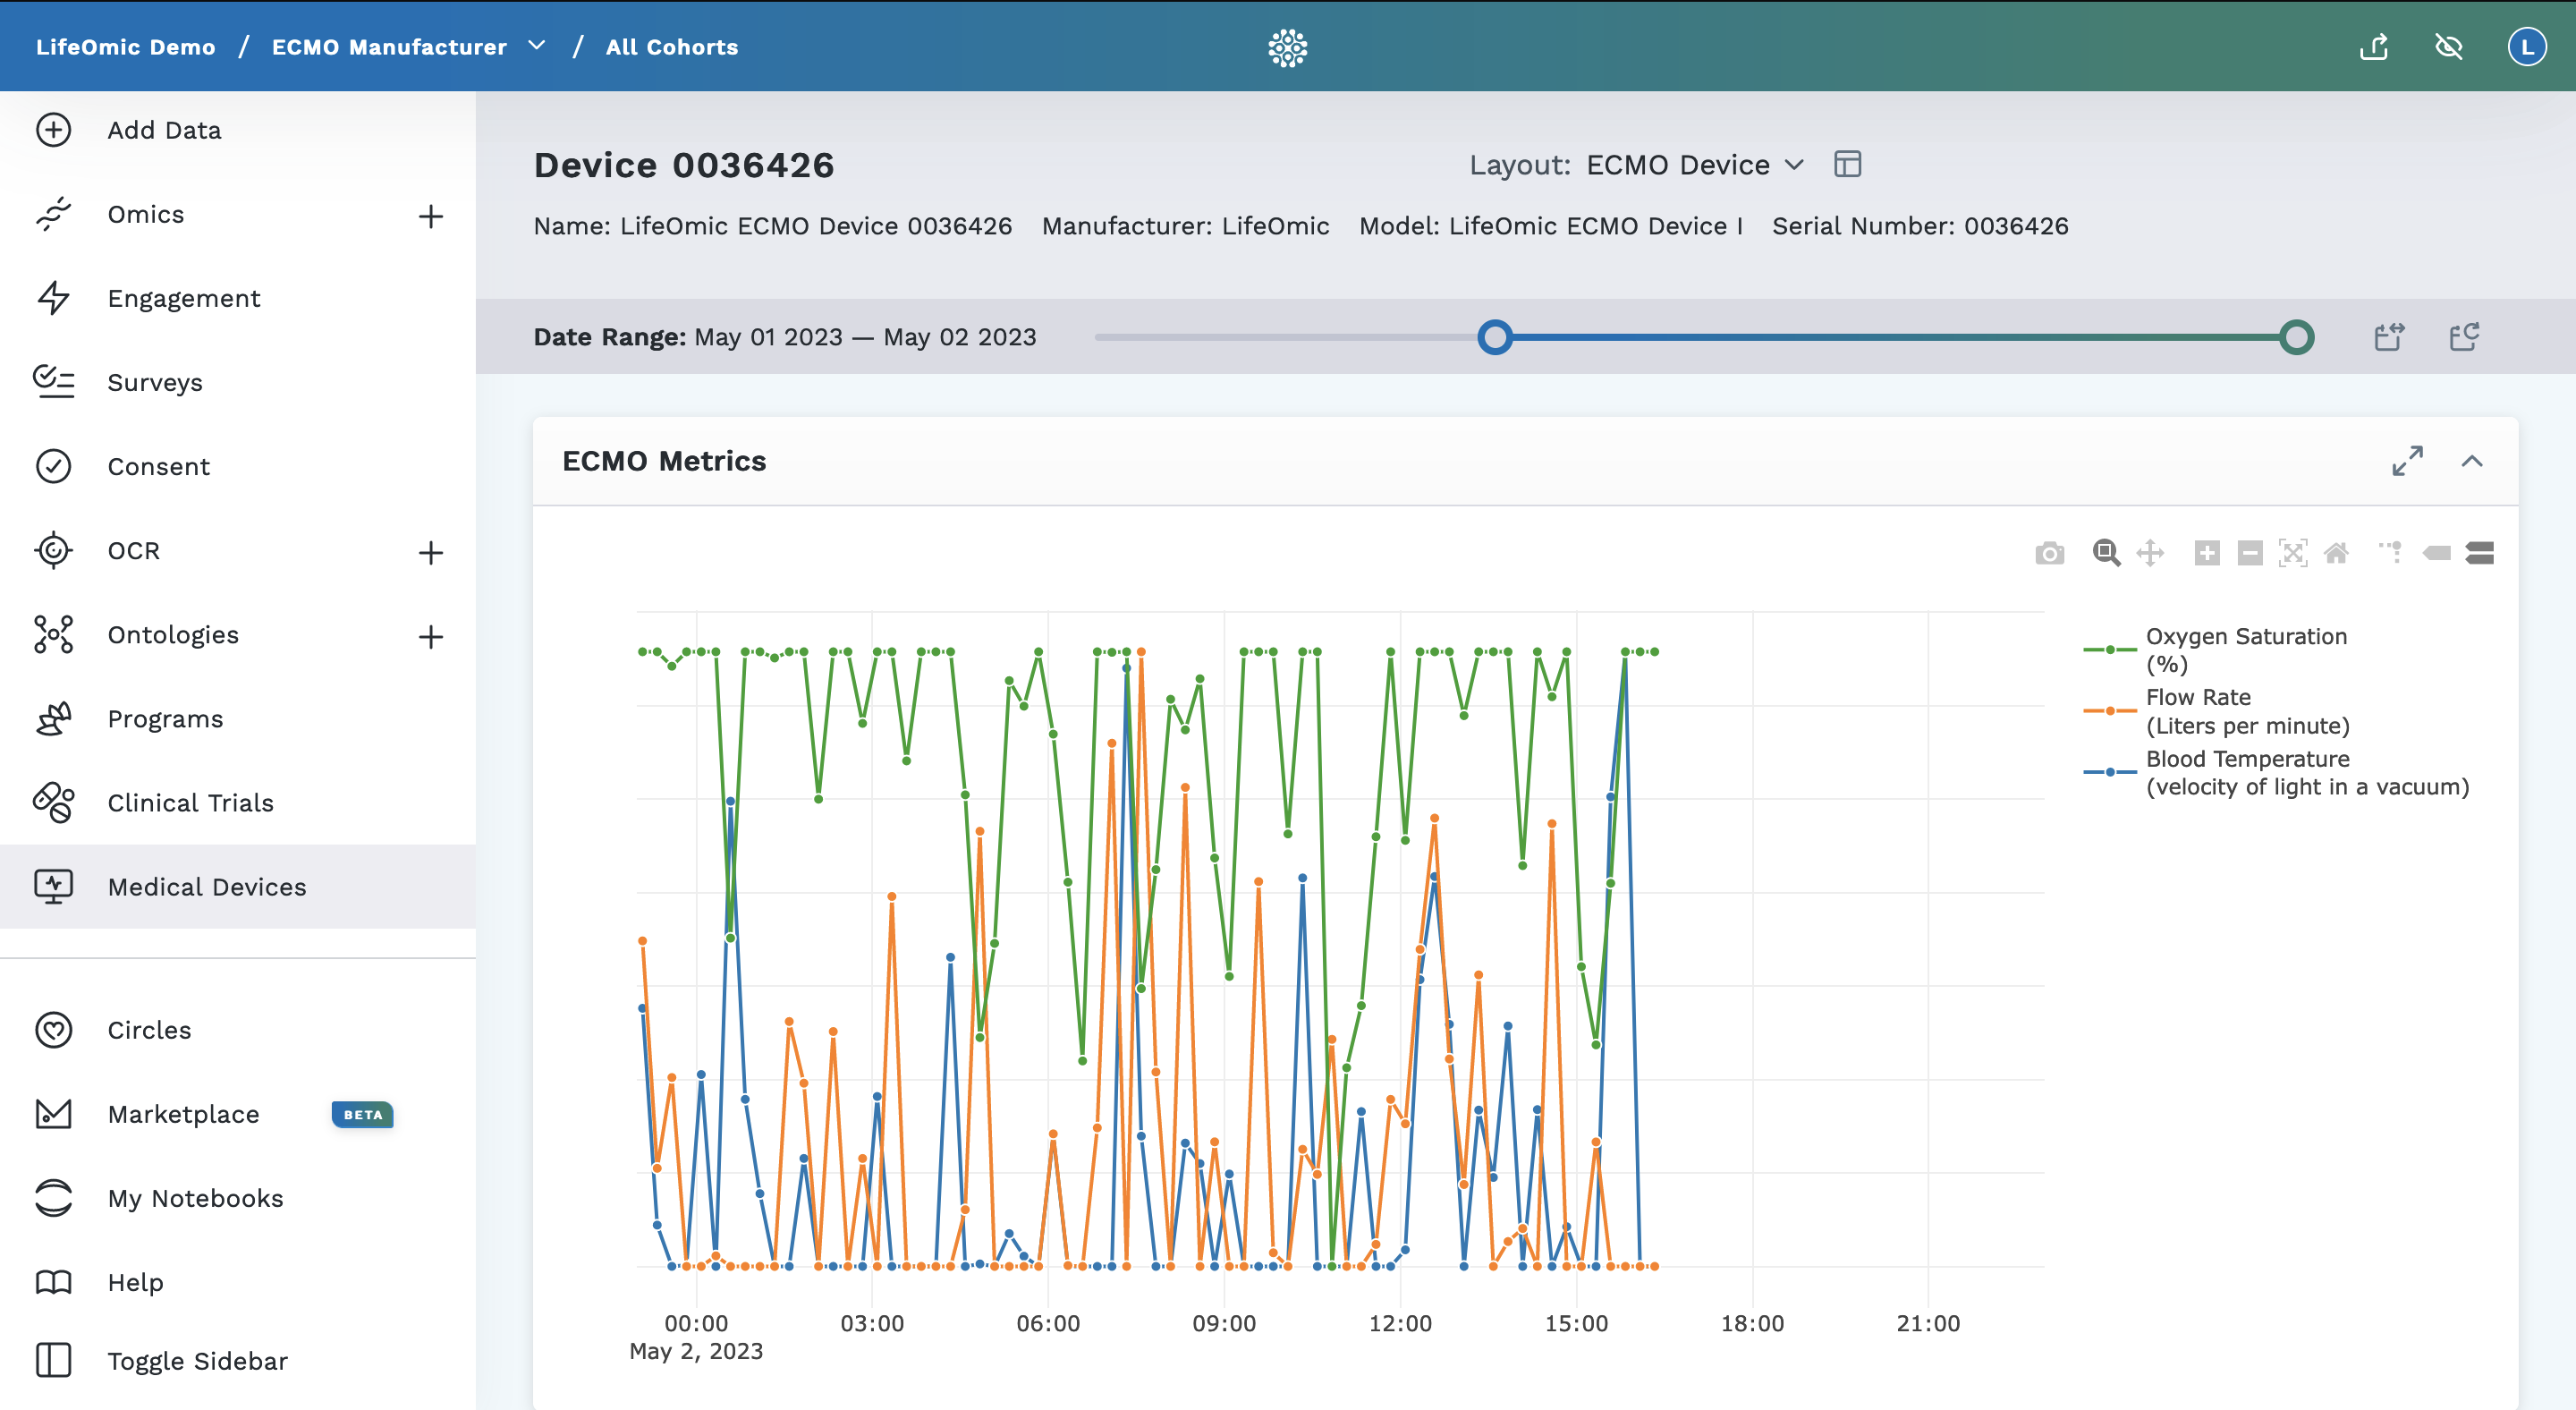
Click anywhere on a device row to view the device details page.
-
To configure the device details page layout, see Add a Subject View Layout.
Provision Medical Devices for the LifeOmic Platform
The LifeOmic Platform allows developers to create a claim certificate for provisioning a fleet of devices. Any device that has a claim certificate may provision and claim a device specific certificate. Check out the open source starters repository to see how devices can exchange a claim certificate for a device specific certificate.
Follow this procedure to create and download a claim certificate from the LifeOmic Platform.
A claim certificate is composed of two files, a PEM file and a private key file.
- On the left side of the screen, click the Medical Devices tab.
- Click the Provisioning button.
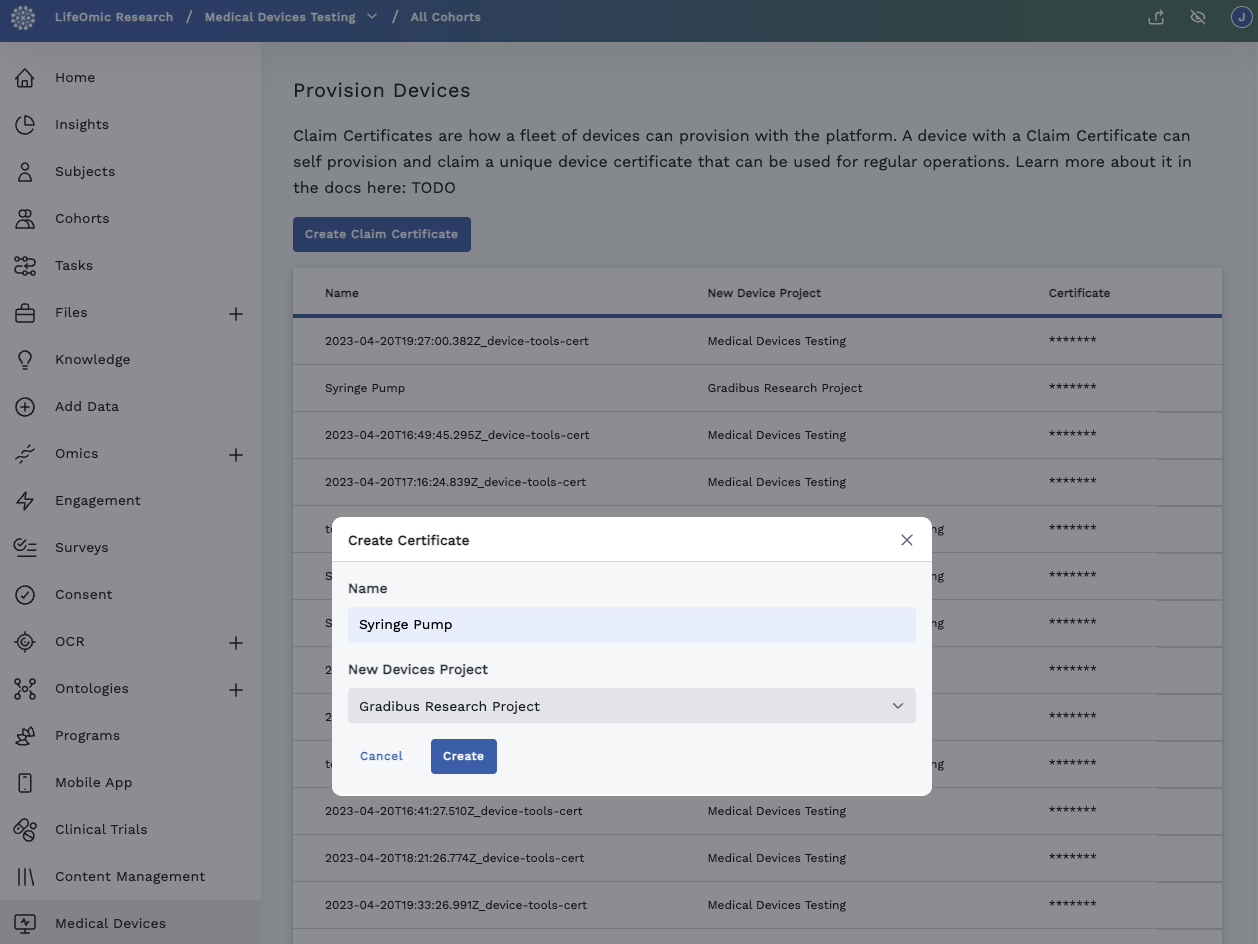
- On the Provision Devices screen, click the Create Claim Certificate.
- In the Create Certificate dialog, enter a general name for the device category, such as Infusion Pump. Also select the project or dataset that will contain your devices.
If you need a new project, complete the Create a Project procedure.
-
Click Create.
-
On the New Registration Certificate dialog, click Download Certificate and Download Key. You will need to access these .key and .pem files when you program your devices.
-
To program your devices, complete the Registering Your Devices section in the Developer Center.
Create Device Group
The LifeOmic Platform allows you to create device groups for your medical devices. Device groups allow you to sub-divide the devices included in a project. You apply firmware updates to specific device groups.
- On the left side of the screen, click the Medical Devices tab.
- Click the Device Groups tab.
- On the Device Groups screen, click Create Device Group.
- Enter a name under Device group Name. The name must be unique to the project.
- Click Device to reveal the filter fields.
- Use the fields and drop-down lists to define a group of devices. A preview of the group is displayed in the right panel. You can add multiple device tags to the filter. Device tags are based on device information defined in the FHIR dataset.
- Click Create.
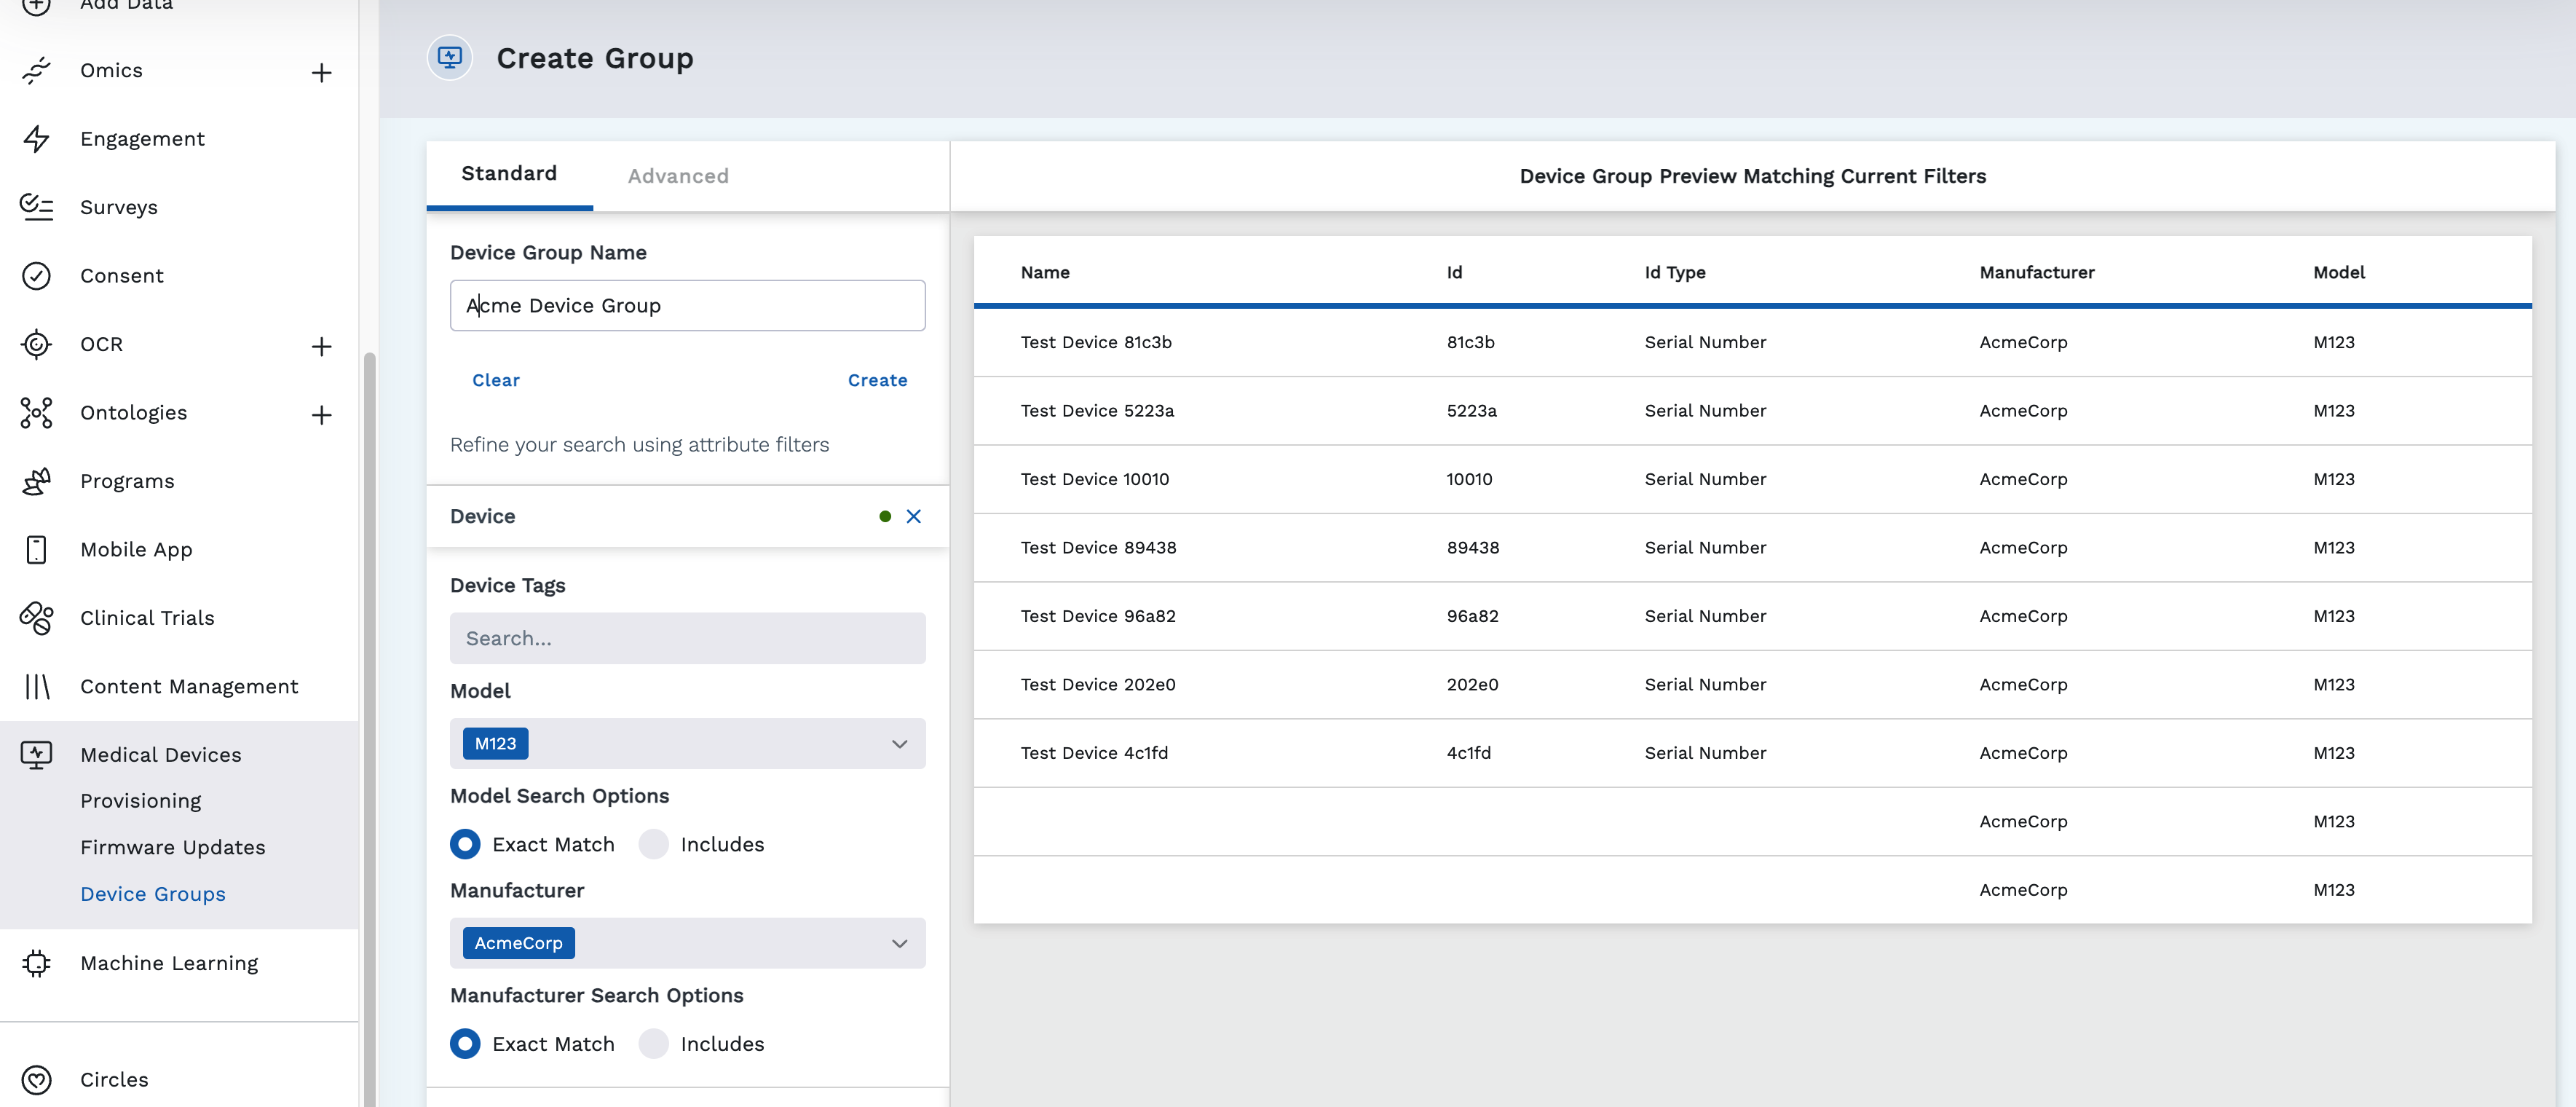 The new device group appears on the list on the Device Groups page.
Update and Deploy Firmware
The LifeOmic Platform allows you to update the firmware on medical devices.
- On the left side of the screen, click the Medical Devices tab.
- Click the Firmware Updates tab.
- On the Firmware Updates screen, click Upload New Firmware.
- In the Upload New Firmware dialog, enter a name for the firmware.
- Click Select File and navigate to your firmware file.
- Click Open. The firmware uploads and appears on the Firmware Updates page.
- Click on the firmware listing.
- Click Deploy Firmware.
- In the New Firmware Deployment dialog, under Select a Group, choose which device group to target.
- Click Deploy Firmware. Status badges appear and track the progress of the firmware deployment.
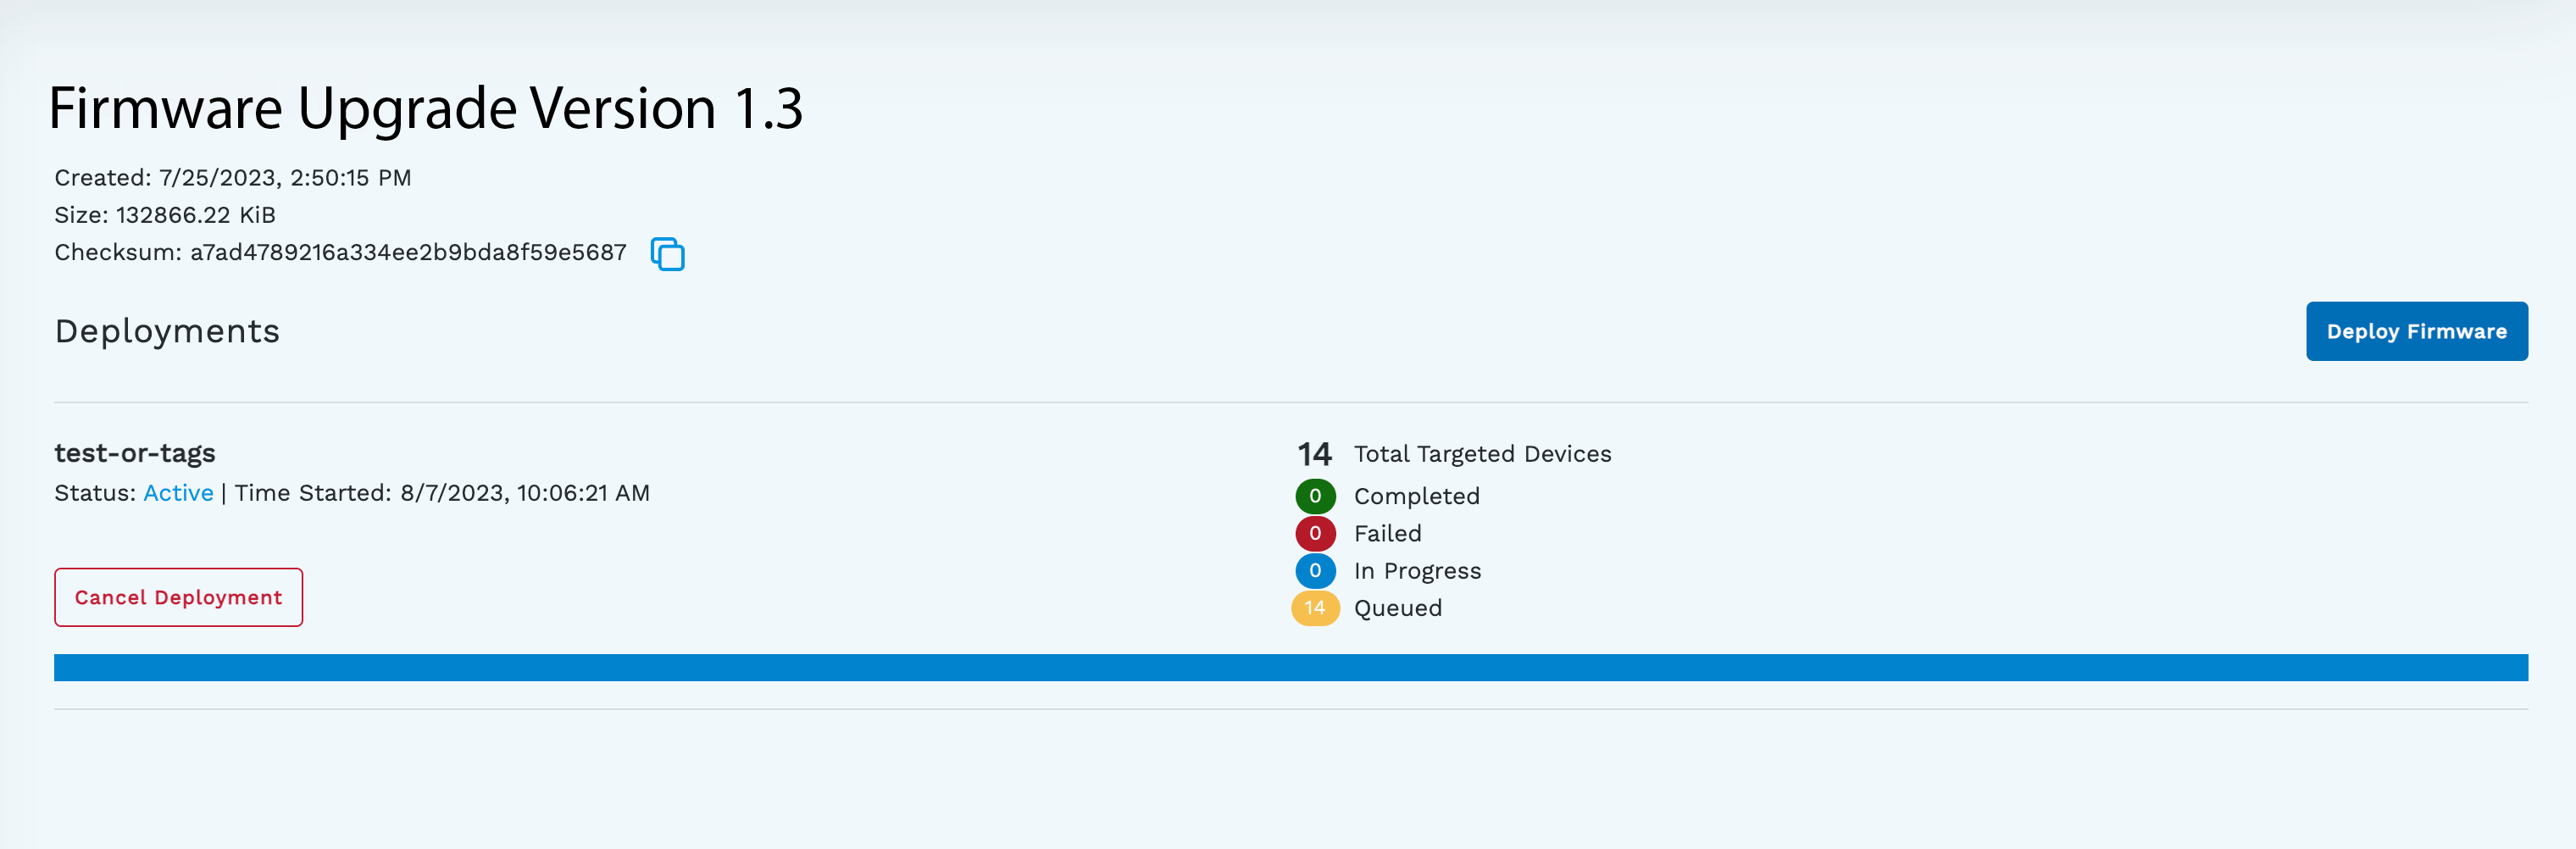
Device groups are dynamic, and firmware upgrades deploy in perpetuity (until cancelled). If a device is added to a group after firmware is deployed, the firmware deploys again to update the newly added device.