Files Overview
The LifeOmic Platform offers multiple ways to load files and data into the platform. The simplest method is to use the Add Files button in the LifeOmic platform app. The additional methods are more suited to developers and advanced users.
- Add File button in the LifeOmic Platform App - Add a file to the LifeOmic Platform with the Add File button in the app.
- SFTP upload to a Project in the LifeOmic Platform - Create a location in a project that allows the transfer of files into a project over SFTP in the app.
- Transfer Amazon S3 Files with the LifeOmic Platform App - Configure direct S3 to S3 transfers in the LifeOmic Platform app.
- Files API - Use the HTTPS API to upload data with TLS.
- LifeOmic CLI - Use a command-line interface to upload data through the API.
- SDK for Python - Use Python to upload data through the API.
For more information, see the Files FAQ.
Add a File
Add a file with the LifeOmic Platform app.
-
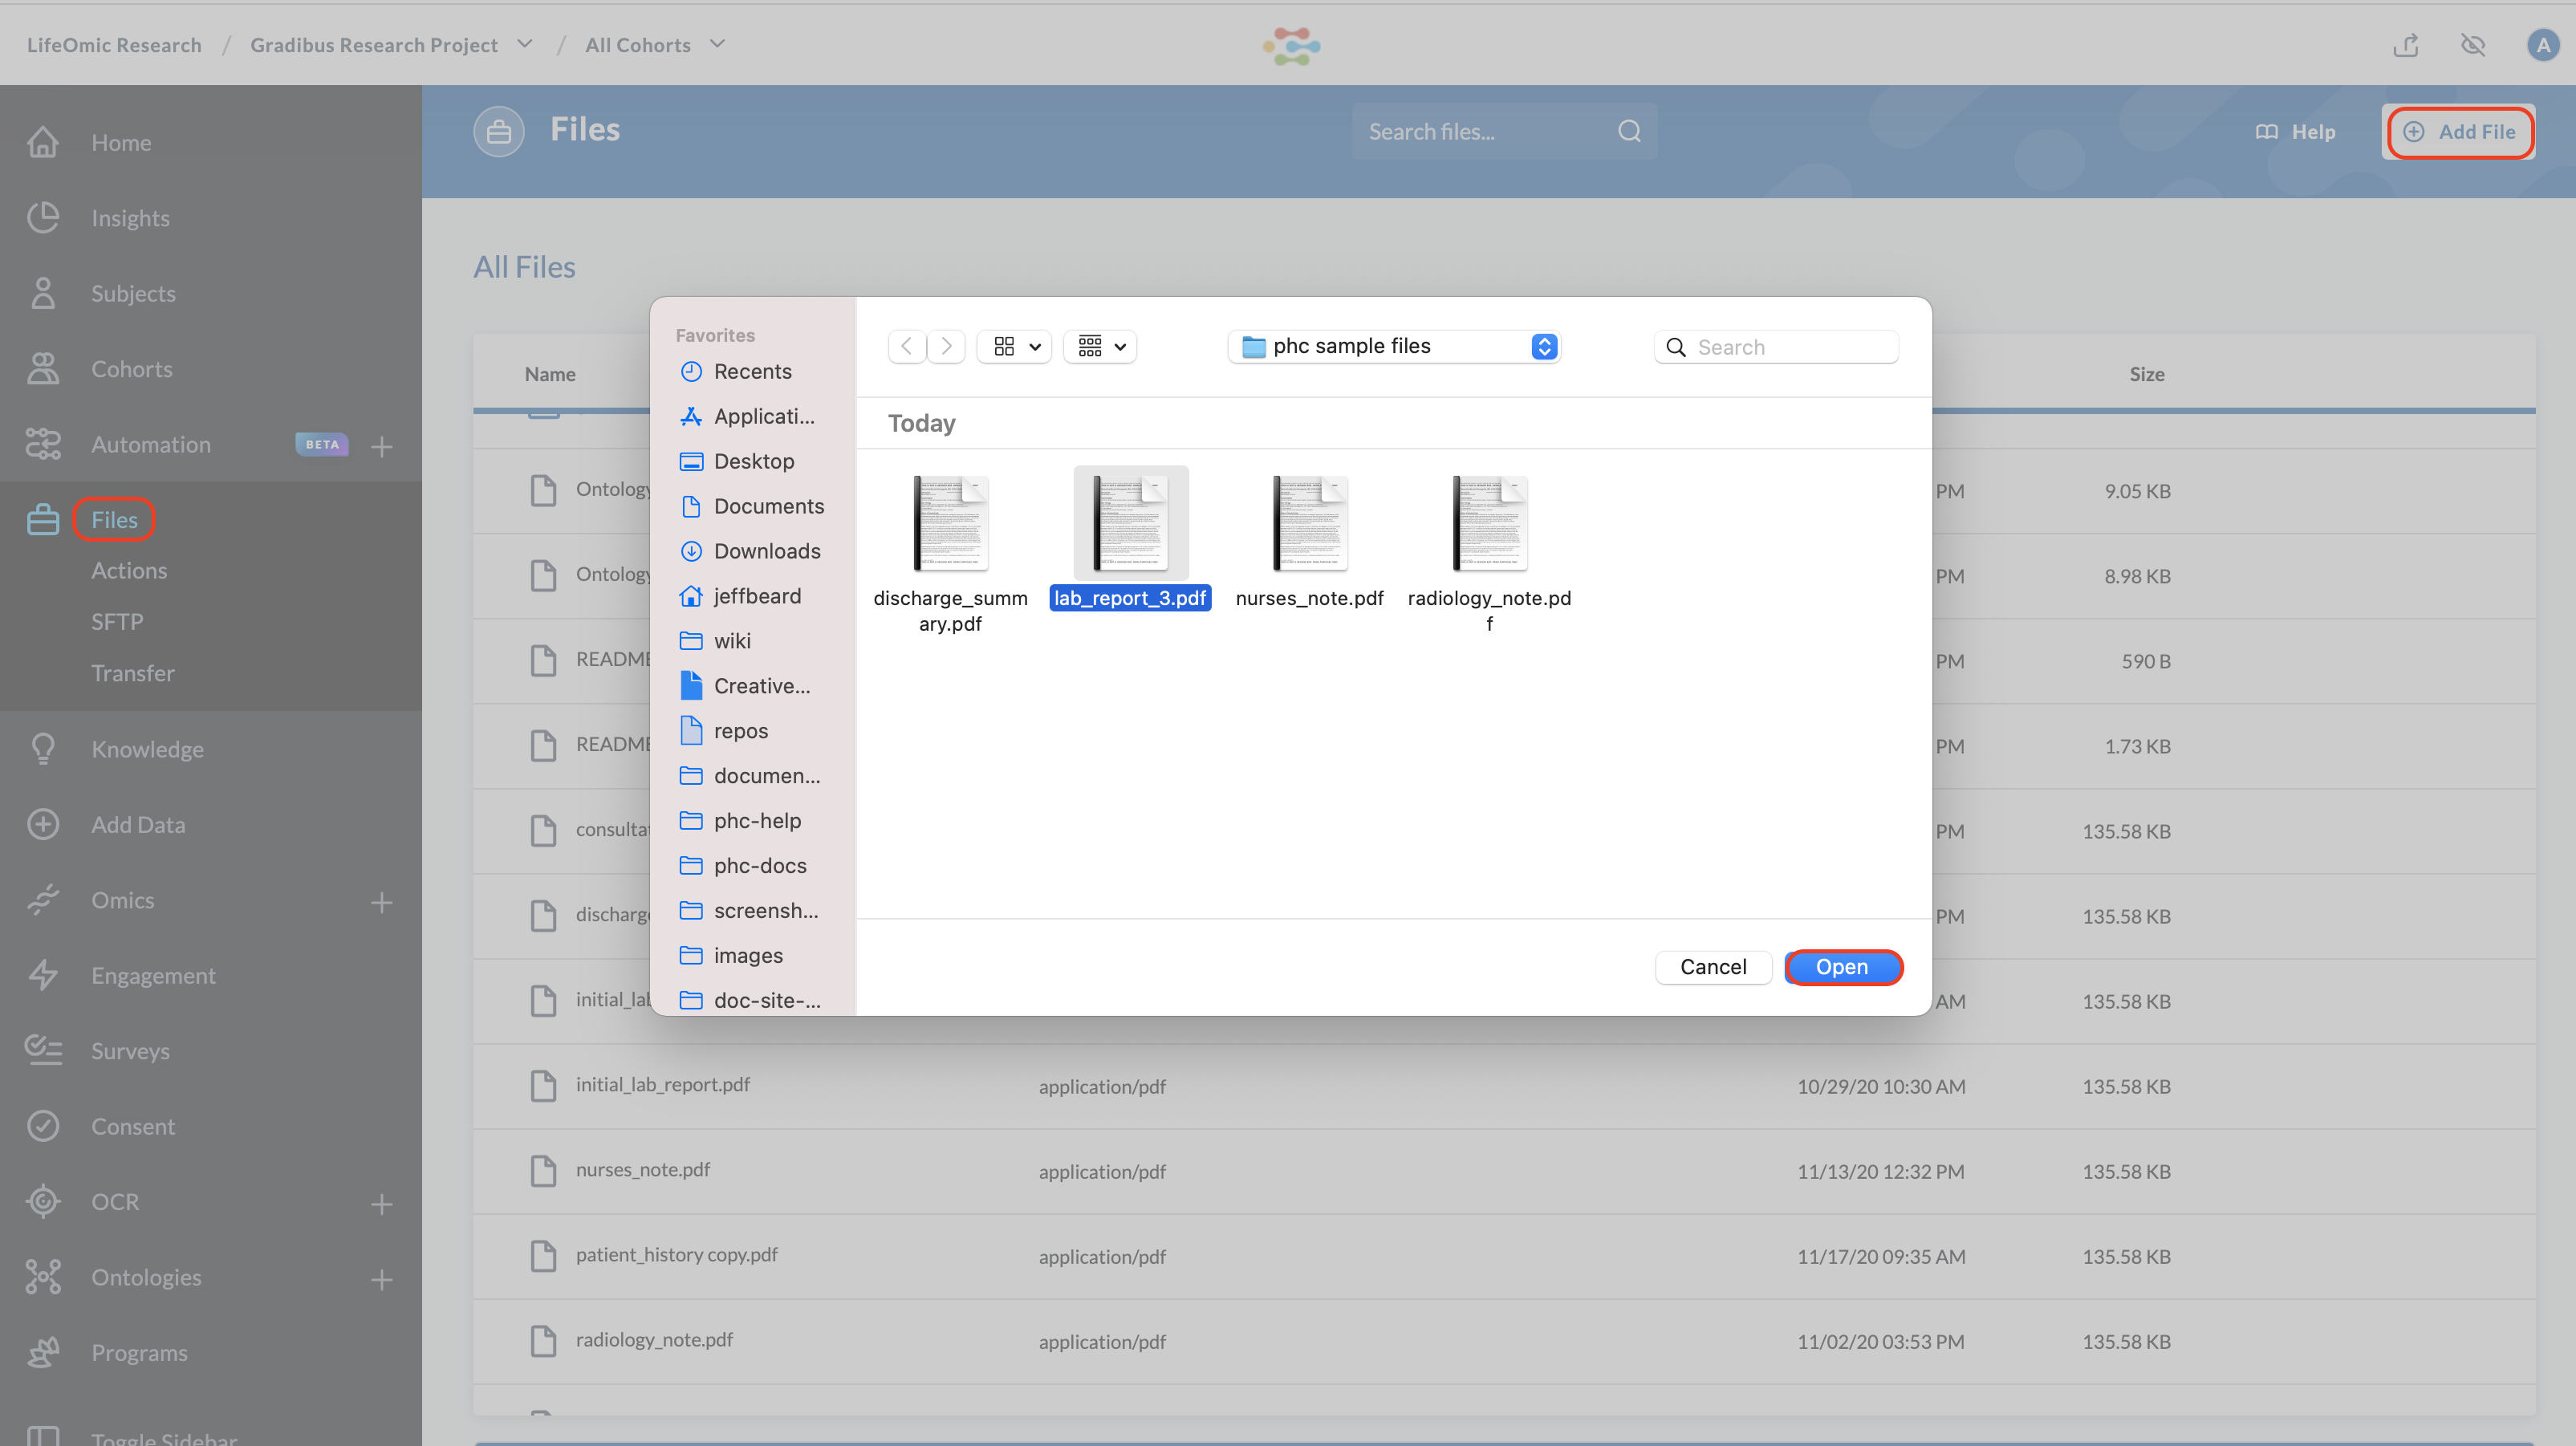
On the left side, click the Files tab.
-
Click Add File to open the dialog box.
-
Navigate to the desired file and click Open.
-
Confirm that the file appears in the list of All Files.
Note: The LifeOmic Platform will not upload a file with the same name as an existing file.

Renaming a File
Files can be renamed. Besides being able to customize the name, renaming allows the user to place the file in a folder.
To rename a file:
-
Hover your cursor over the file name until the purple toolbar appears.
-
Click the rename icon .

-
In the window that opens, the existing file name is displayed. Simply click in the text box and edit the name.
-
Click Save.
Folders
Files can be organized into folders. When a file is added, it comes in at the root level.
Placing a File into a Folder
-
Hover your cursor over the file name until the purple toolbar appears.
-
Click the rename icon .

-
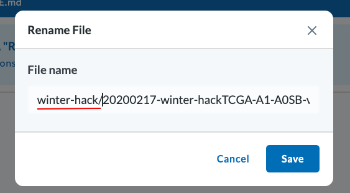
In the window that opens, the existing file name is displayed. Simply click in the text box and edit the name using the following format: folder_name/file_name. The folder name can be a new name or it can be the name of an existing folder. In the example below, we created a new folder by adding "winter_hack/" in front of the file name.

-
Click Save.
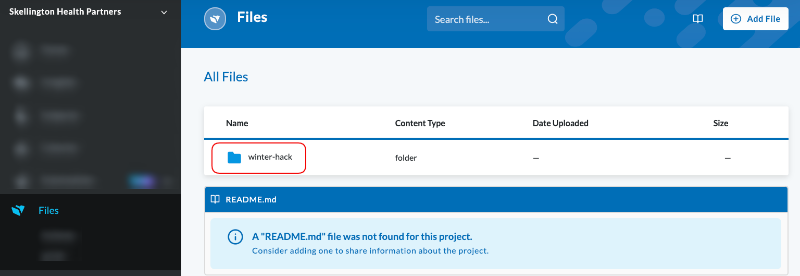
The image below shows our new folder was successfully created and our file is located inside of it.

You can go several levels deep with folders, simply by adding more folder_name/ before the existing folder path. In the example below, we typed in the file name test/winter-hack/20200217-winter-hackTCGA-A1-A0SB-variant(1).

Moving a File out of a Folder and back to the Root Level
- Follow the steps for renaming a file and rename it with a leading /, such as /file_name.
- Click Save.
While there is no way to delete a folder, empty directories will disappear within a day.