Project Overview
A project is a container used to store a dataset. It can be comprised of various health or genomic data for one or many subjects. An account can have one or many projects, and projects can be used to separate datasets for access control or general data-organization purposes.
A project may also be created within an account to collect an informed consent from subjects and nothing else, as the LifeOmic Platform is FDA 21 CFR Part 11 compliant.
Project Home Page
To go to the Project Home page, click the Home tab on the left side of the LifeOmic Platform interface. For more information, see Project Home Page.
Create a Project
-
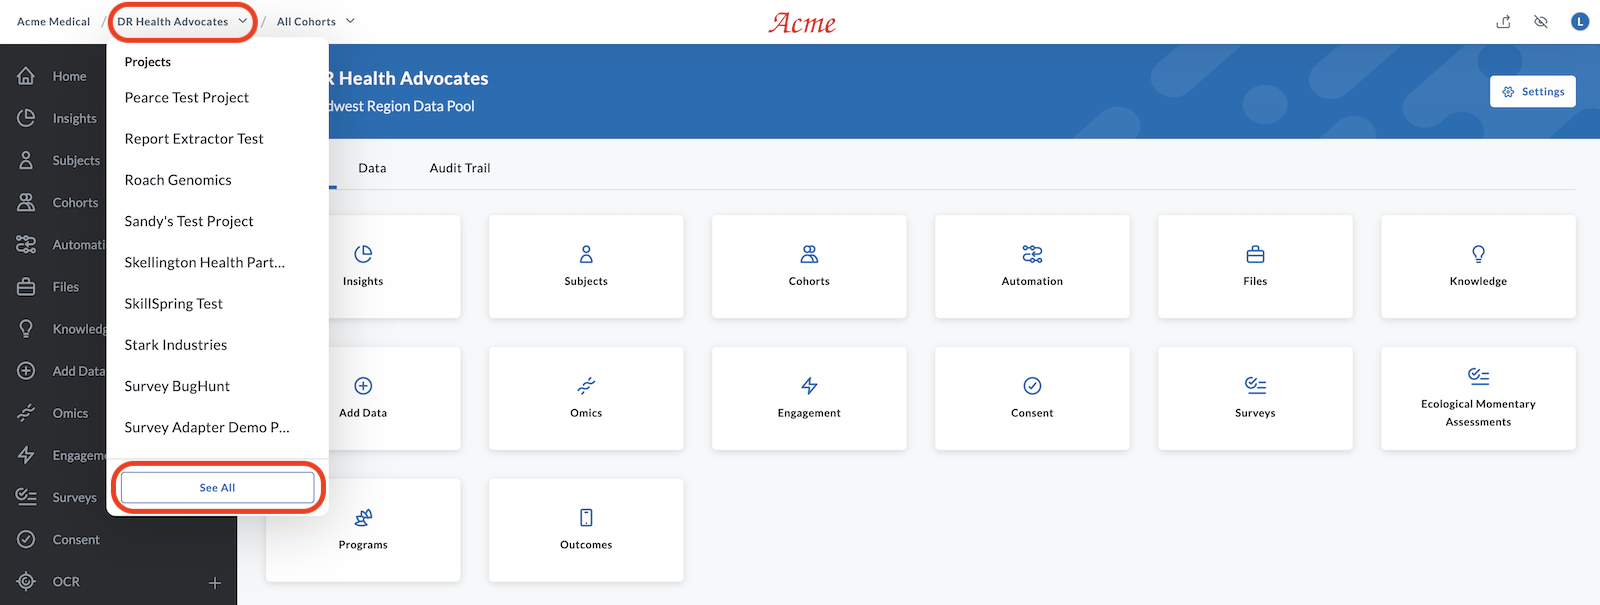
Click the Project name in the upper left corner of the screen to open the drop down menu.
-
At the bottom of the drop down menu, click See All.
-
In the top right corner of the screen, click Add Project.

-
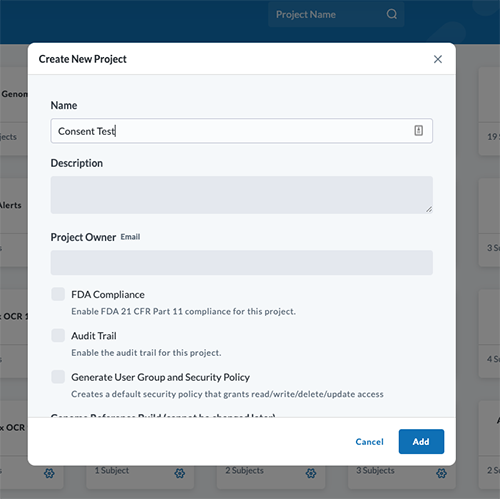
In the dialog box that opens, fill out the following:
-
Name the project. (In the example pictured above, we named our project "Consent Test".)
-
Add a description (optional).
-
Add a Project Owner email address to override email being sent to the account owner by default (optional). For example, you may want email from a specific project to go to a mailing list of people working on that project instead of the general PHC account owner.
-
Check FDA Compliance if you are using the PHC Consent feature to manage 21 CFR Part 11 compliance. If you are using another method to manage consent or if you are using OCR to import medical records with an existing form of consent, you do not need to check this box.
-
If you wish to enable Audit Trail click this checkbox. If Audit Trail is enabled, the LifeOmic Platform tracks changes made to the FHIR data within your project.
-
Check Generate User Group and Security Policy to create basic, default ABAC security policies. For more information on these default policies, see Default ABAC Policies in Access Control.
-
Select the appropriate reference build for your genomic data. If your project will not have any genomic data loaded, you can leave the Genome Research Build selection unchanged.
-
Provide any MRN customization. There are cases where a subject can have multiple MRNs issued, and using an MRN type coding (http://hl7.org/fhir/v2/0203, MR) may result in ambiguity. To avoid any ambiguity, each project can be configured with an MRN OID. This setting ensures SMART on FHIR integration searches for the MRN properly.
-
Enter a Short Name (optional). This is only needed if the regular project name is auto-generated and too long and unwieldy for convenient use. Note: The short name must be lowercase (can include numbers and hyphens) with no spaces, for example, colon-cancer-study.
-
Click Add.
-
-
To access your new project, click on the newly created project via the left-hand navigation or the tile in the middle of the screen.
Delete a Project
-
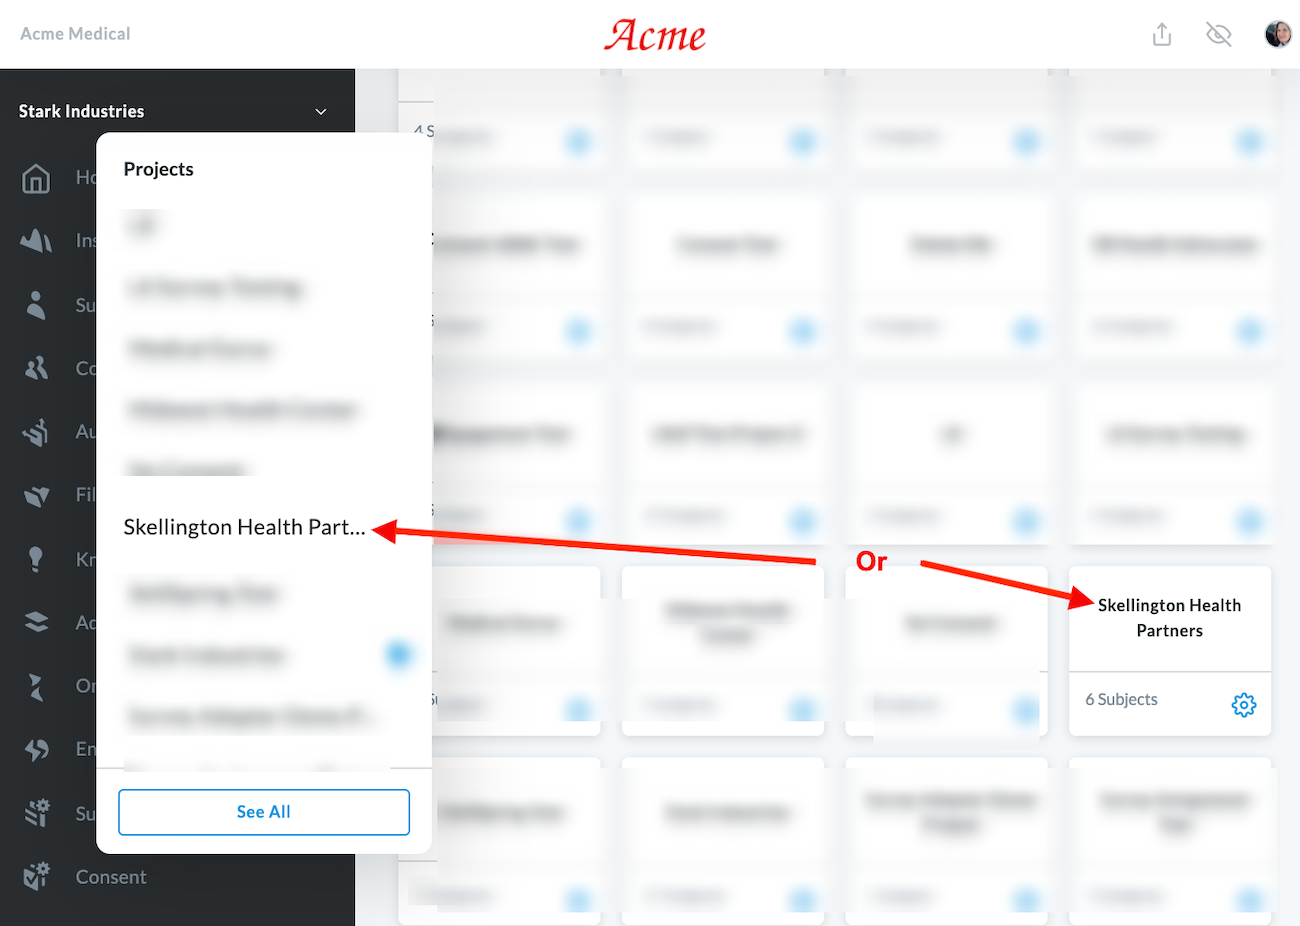
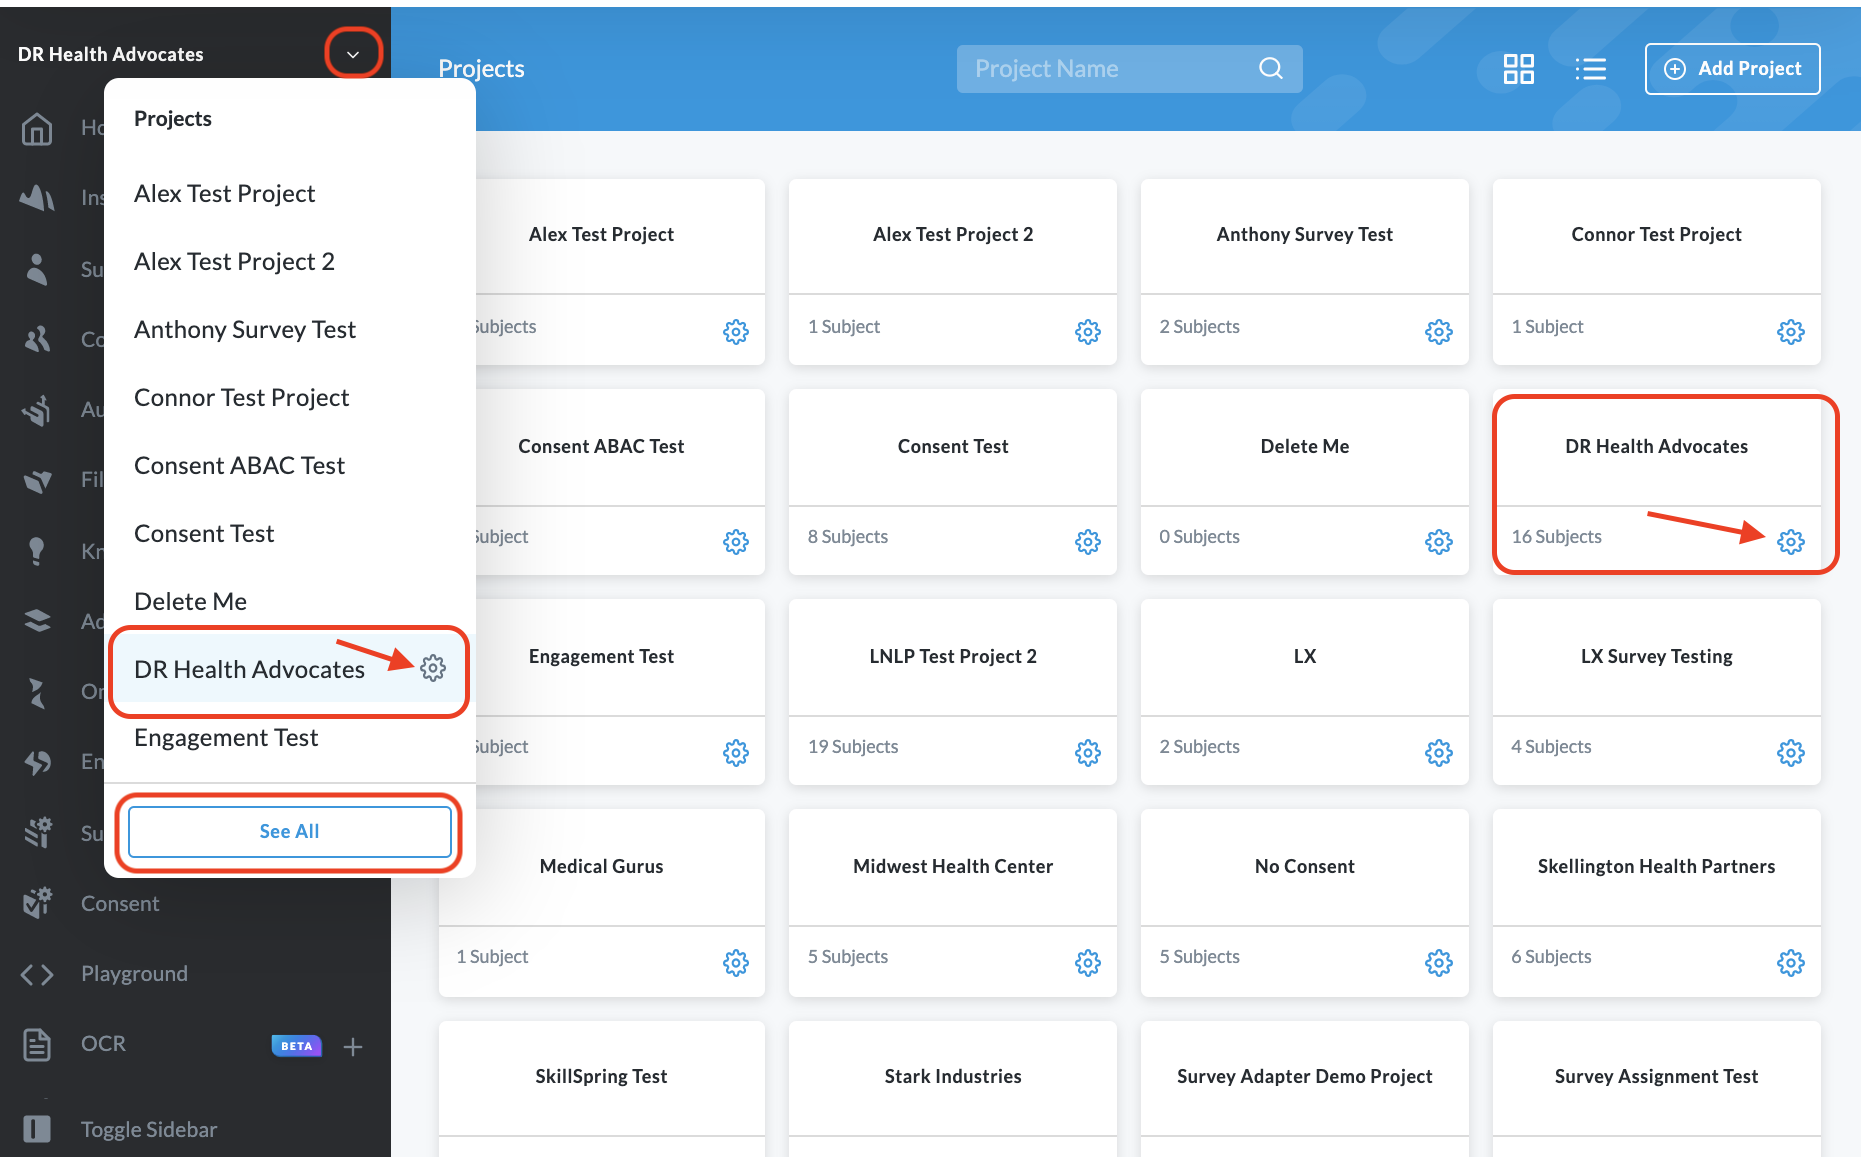
At the top left of the LifeOmic Platform interface, click the expand chevron beside the project name.
-
Scroll through the Projects dropdown menu that opens and find your project.
-
Click the gear icon that appears to the right of the project name.
-
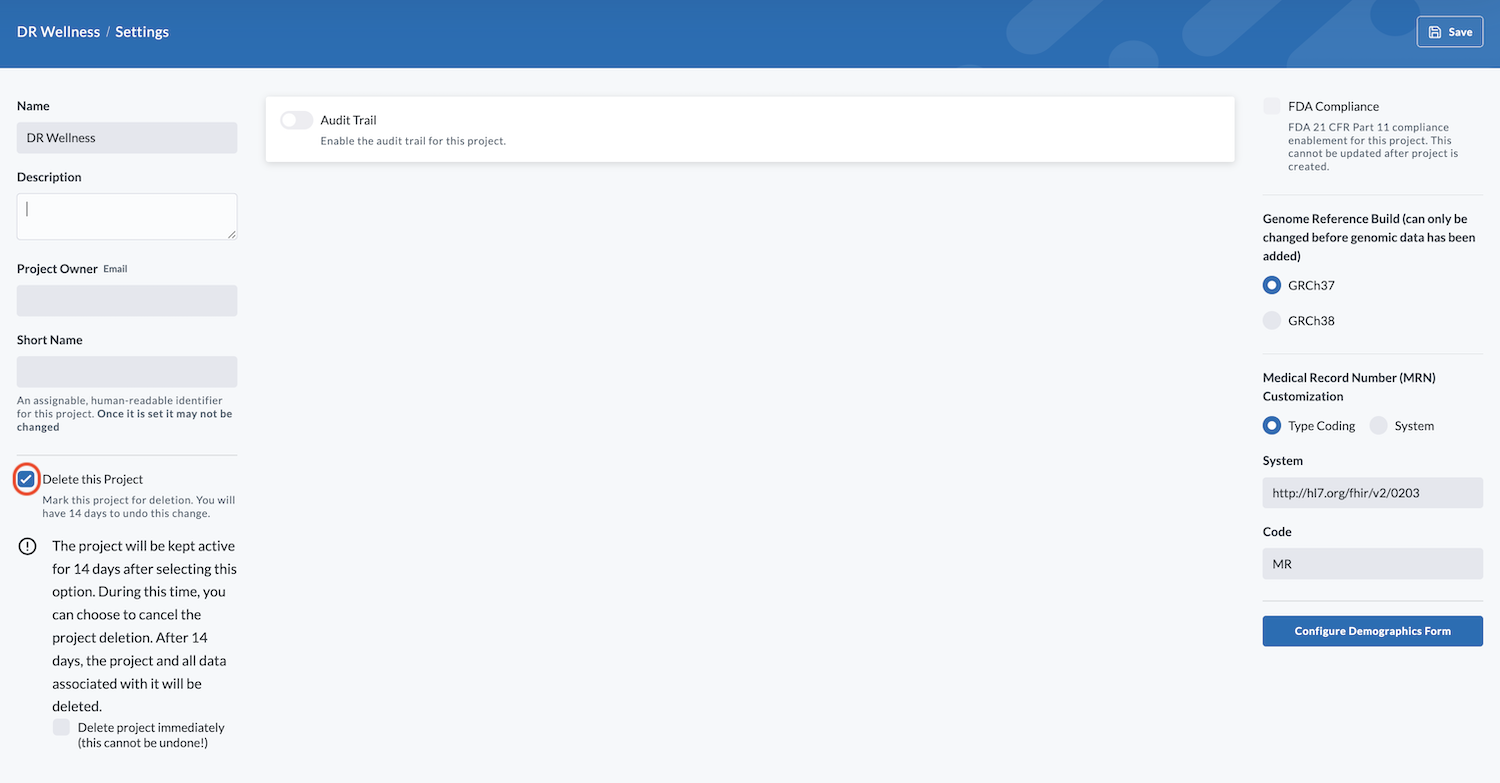
Click the Delete this Project checkbox.
By default, the project remains active for 14 days before the actual deletion. The best practice is to allow the default period to expire. Click the Delete project immediately checkbox to override the delay period. This cannot be undone.
How to Access the Project Settings Page
-
At the top left of the LifeOmic Platform interface, click the expand chevron beside the project name.
-
Scroll through the Projects dropdown menu that opens and find your project.
-
Click the gear icon that appears to the right of the project name.
Alternatively, you can click See All on the bottom of the dropdown menu to open the Projects page, find the project, then click the gear icon beside the name.
Project Settings Page
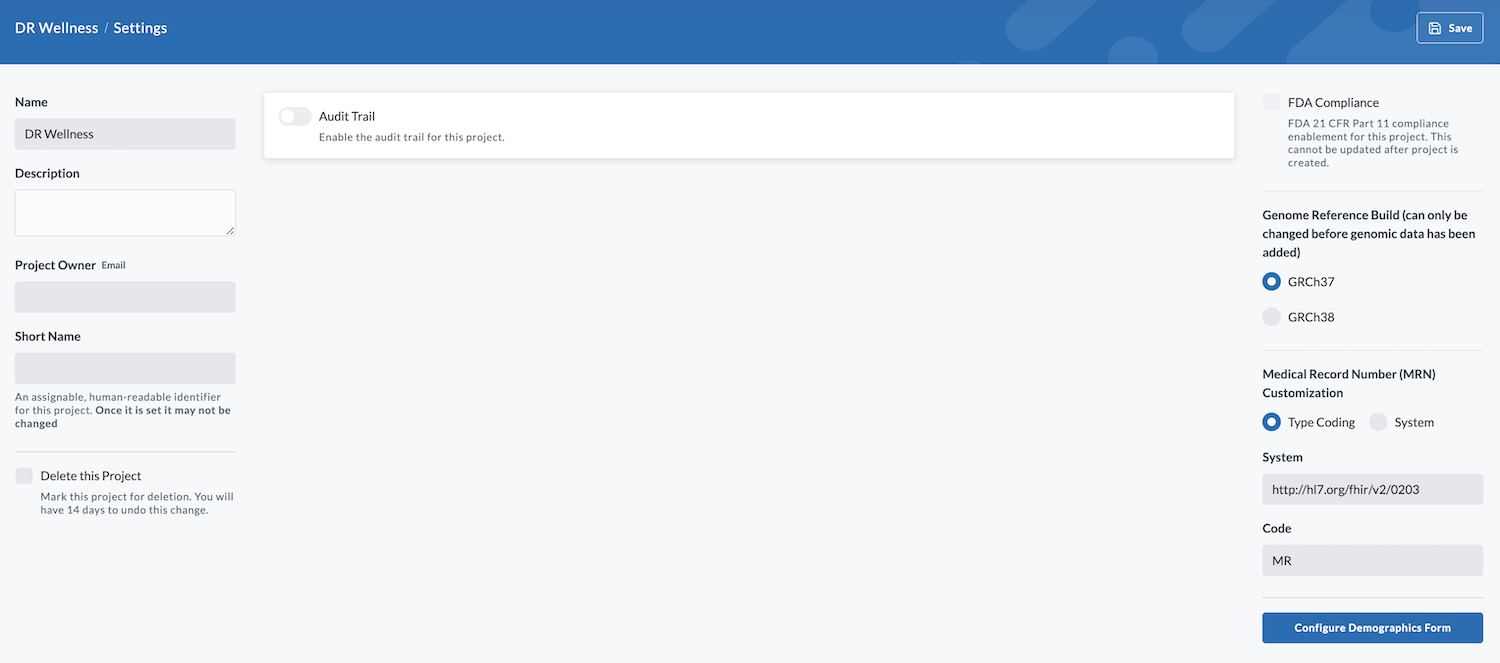
Project settings coexist with the Audit Trail on the same page, but they are unrelated to each other.
Project Settings include:
-
Name (project name)
-
Description
-
Project Owner (email)
-
Short Name – An assignable, human-readable identifier for this project. This cannot be changed once it is set.
-
Delete this Project toggle – Mark this project for deletion, you will have 14 days to undo this change
-
FDA Compliance checkbox - Can only be used when creating a new project and cannot be updated after project creation
-
Genome Reference Build (can only be changed before genomic data is added)
- GRCh37
- GRCh38
-
MRN Customization - Each project can be configured with an MRN OID to avoid any ambiguity with multiple MRNs. Use this setting to ensure that SMART on FHIR integration searches for the MRN properly.
-
Configure Demographics Form button - Click the blue button in the bottom right to customize which demographic form fields are visible in the subject viewer in your project.
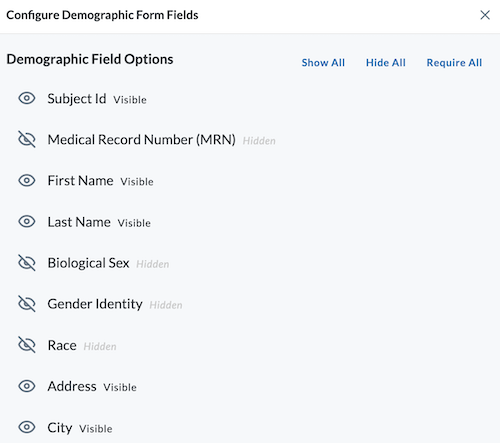
Click the field to make it visible or hidden . You also have the options to show all, hide all, or require all fields. Scroll down to see all the field options. You must click both the blue Save button at the bottom of the demographics form and the Save button at the top right of the settings page to save your changes.
- Audit Trail toggle - Audit Trail may be enabled when you create a project, or enabled within the project settings. Once enabled, the LifeOmic Platform begins tracking changes made to the FHIR data within your project.