Ontologies Overview
The LifeOmic Platform supports both domain and process ontologies. Domain ontologies are complex, multi-relational knowledge domains, such as a tree of complex cancer information. Process ontologies are simple lists, such as codes and definitions.
Ontologies are obtained through the ontologies marketplace and can be shared at the project, account, or public level. Two public ontologies are available in the LifeOmic Platform by default, the SNOMED CT Body Structures and the All LOINC Codes. For more information on the SNOMED CT Body Structures, see the FHIR Value Set. For more information on the LOINC codes, see the LOINC Document Ontology. To access these ontologies in the ontologies marketplace, complete the Load and Use the Default Ontologies procedure.
In addition to loading an ontology from marketplace, users can create a custom ontology, which is a subset of an existing process ontology. The custom ontology is available as a filter option in Subjects and can make your work easier. For example, the complete LOINC codes ontology available in the LifeOmic Platform contains close to 100,000 codes. A user may commonly use only twenty of these codes for their specific project. Creating a custom ontology of the twenty needed codes makes selecting codes much more efficient. You can also add or subtract concepts from a custom ontology as your needs change. For more information, see the Create a Custom Ontology procedure.
For more complex ontology creation, check out the LifeOmic sponsored open source project TermLink. It provides an engine for transforming open source terminologies, like SNOMED CT, LOINC, and RxNorm.
To learn more about working with ontologies using the API and the CLI, see the LifeOmic Ontologies Service and the OCR API Reference.
User needs to belong to the default Admin group or have those permissions to complete this procedure. To add a user to the default Admin group, complete the Add a user to a group with the Users tab procedure.
Load and Use the Default Ontologies
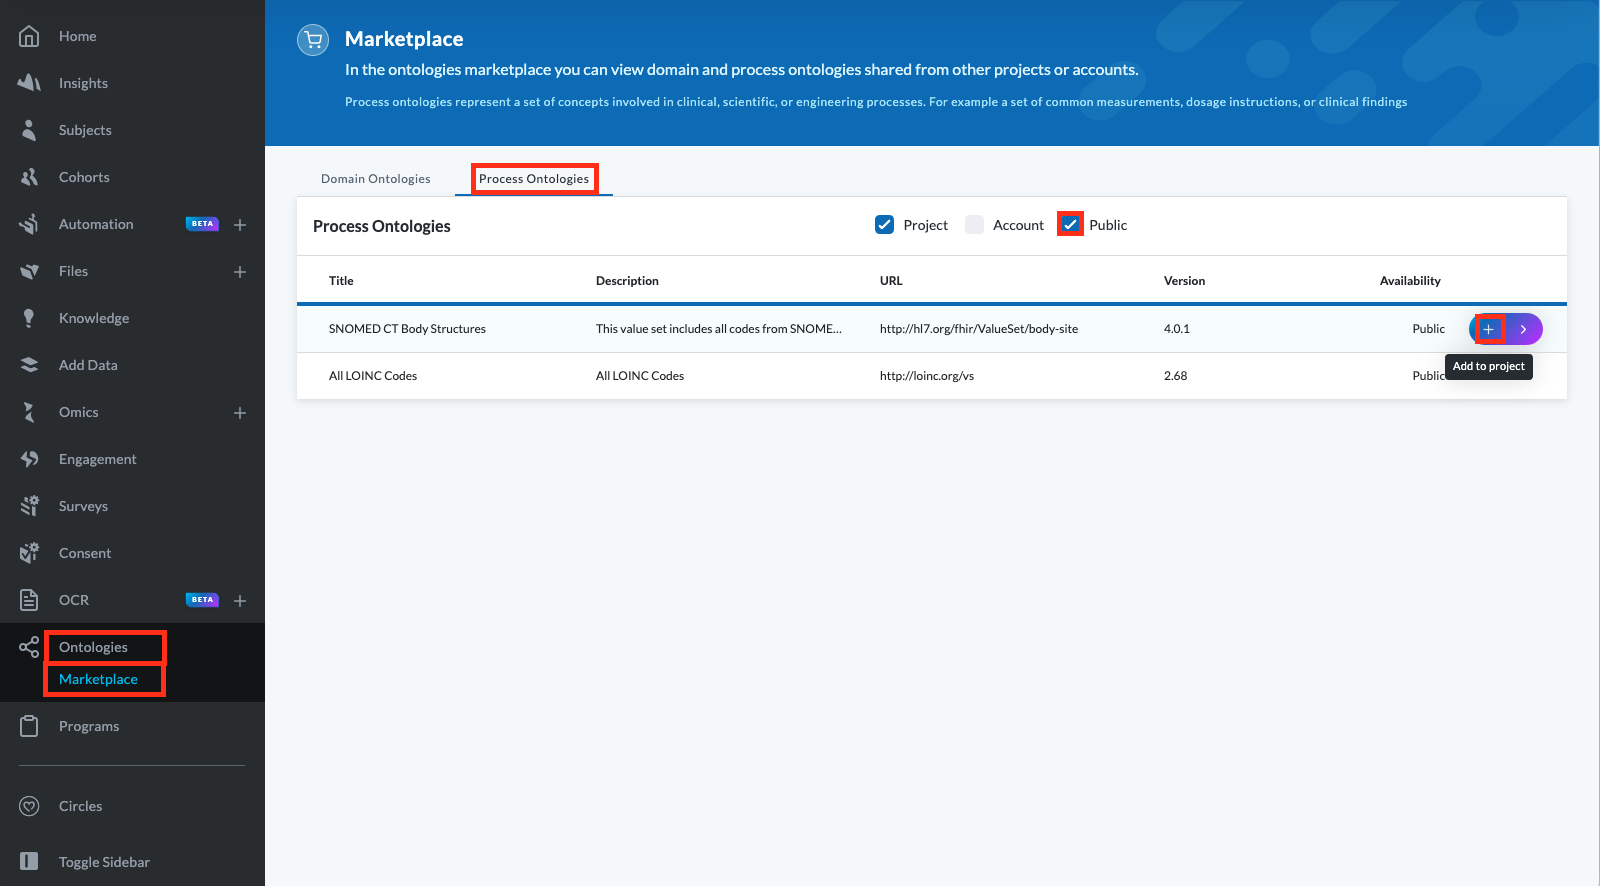
- On the left side menu, click Ontologies and click Marketplace.
- Click the Process Ontologies tab and the Public checkbox.
- Mouse over the row for the process ontology to reveal the menu and click the icon to add the ontology to your project.
- Click Confirm on the Add ontology to project? dialog.
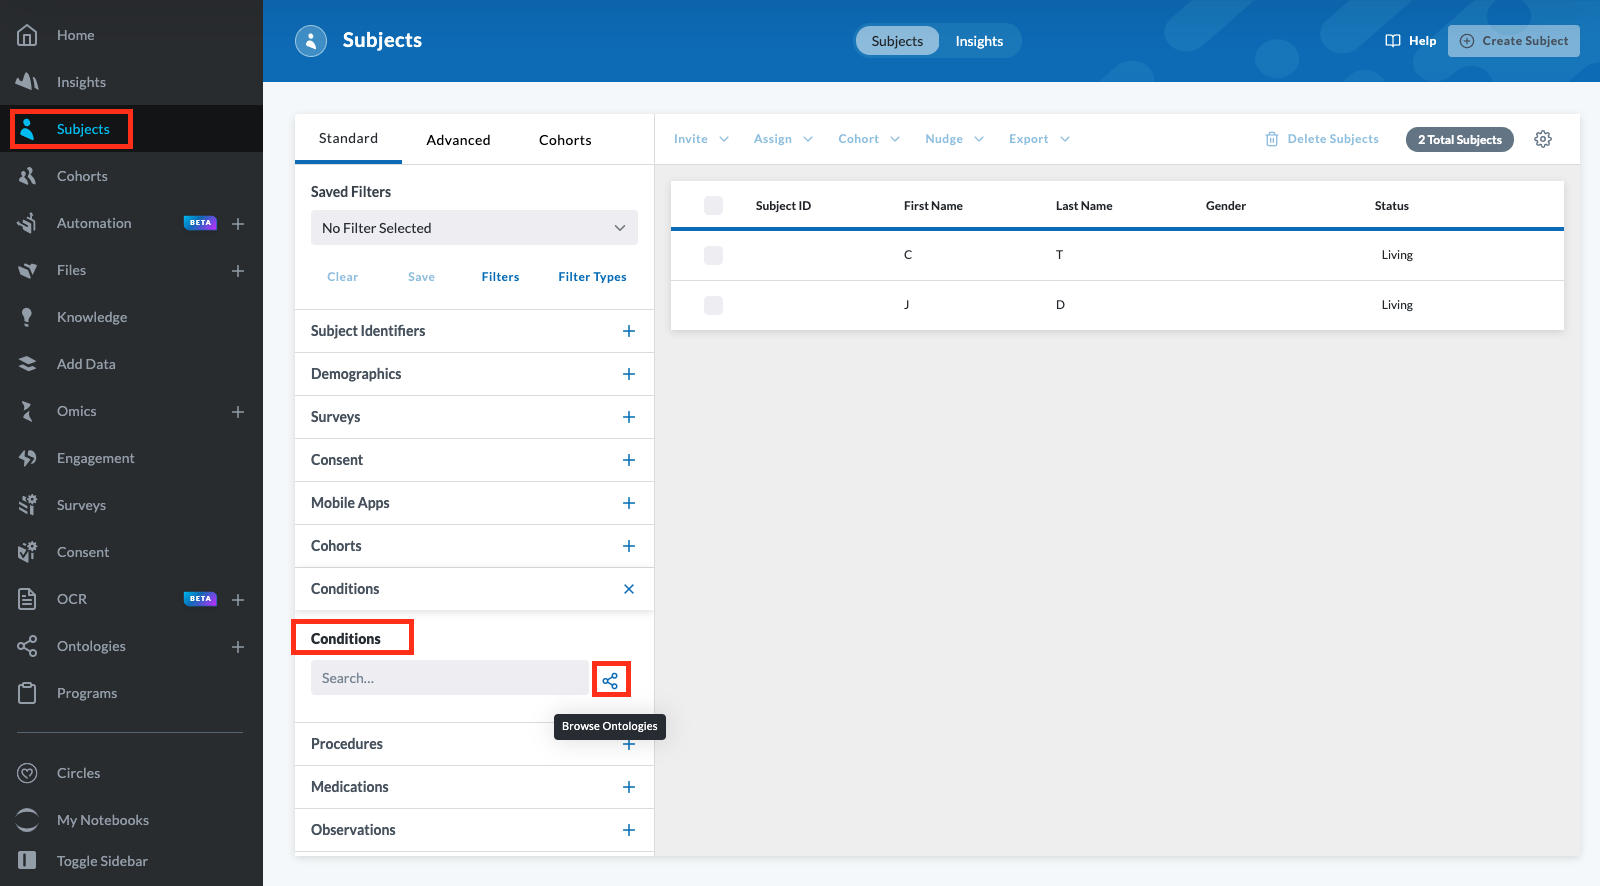
- To confirm the addition of the ontology, click the Subjects tab on the left side menu.
- Click the Conditions filter and the Browse Ontologies icon.
- Click the Process Ontologies tab to confirm the ontology is loaded and click the ontology row to view the ontology concepts.

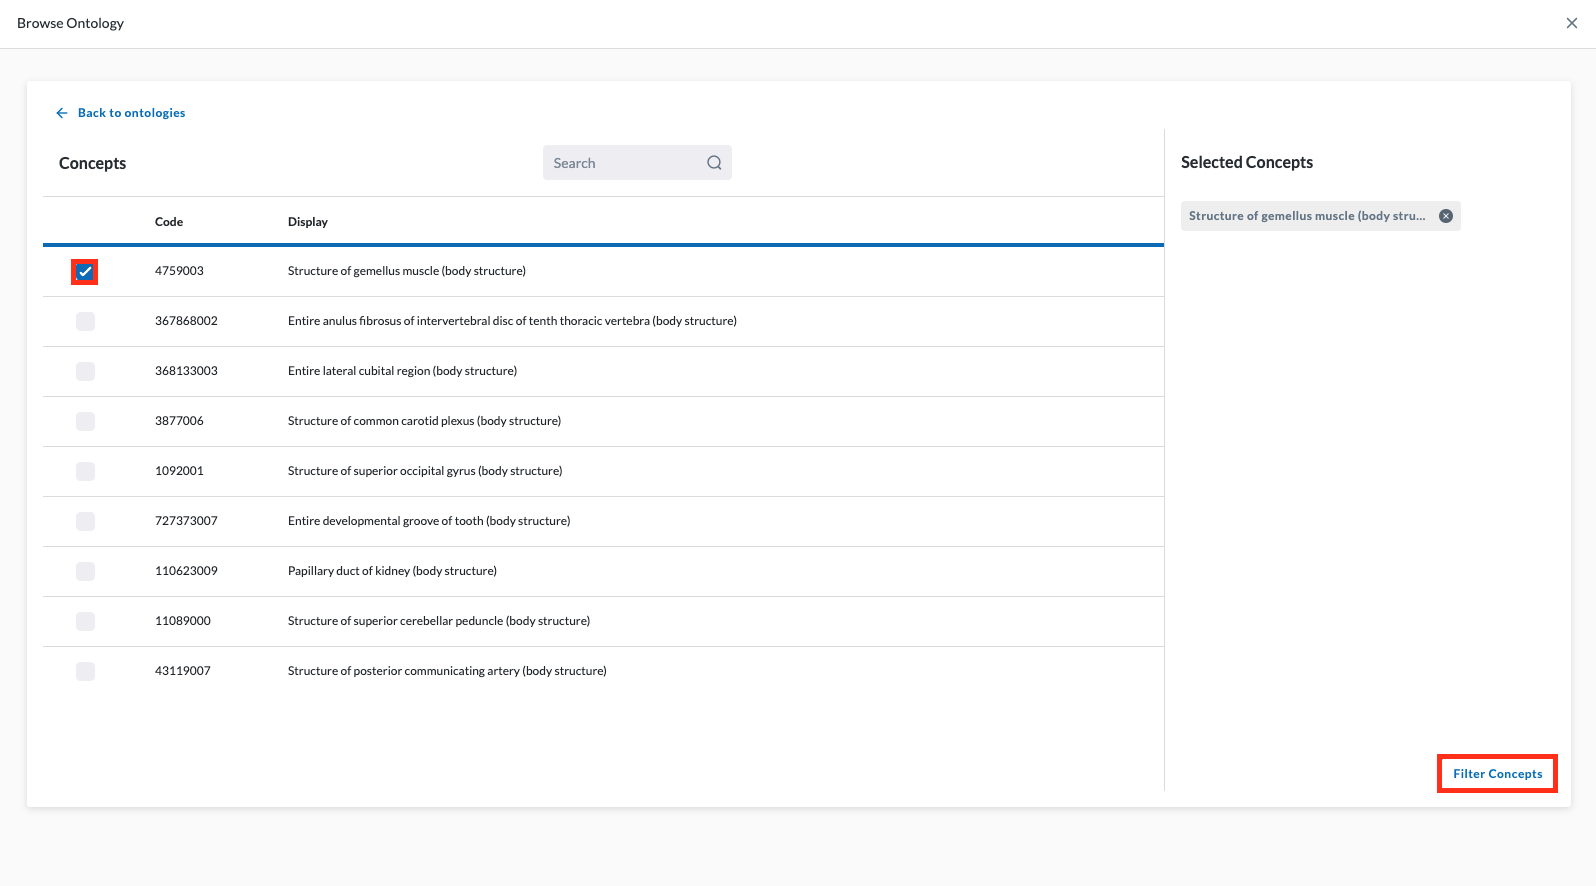
- To filter subjects with a concept, click a box to select an ontology concept and click Filter Concepts. To create a permanent filter from your concepts, click Save on the Subjects screen.
Create a Custom Ontology
Note: This procedure creates a custom process ontology, but you can follow the same basic steps under the Domain Ontologies tab to create a custom domain ontology.
- On the left side menu, click Ontologies.
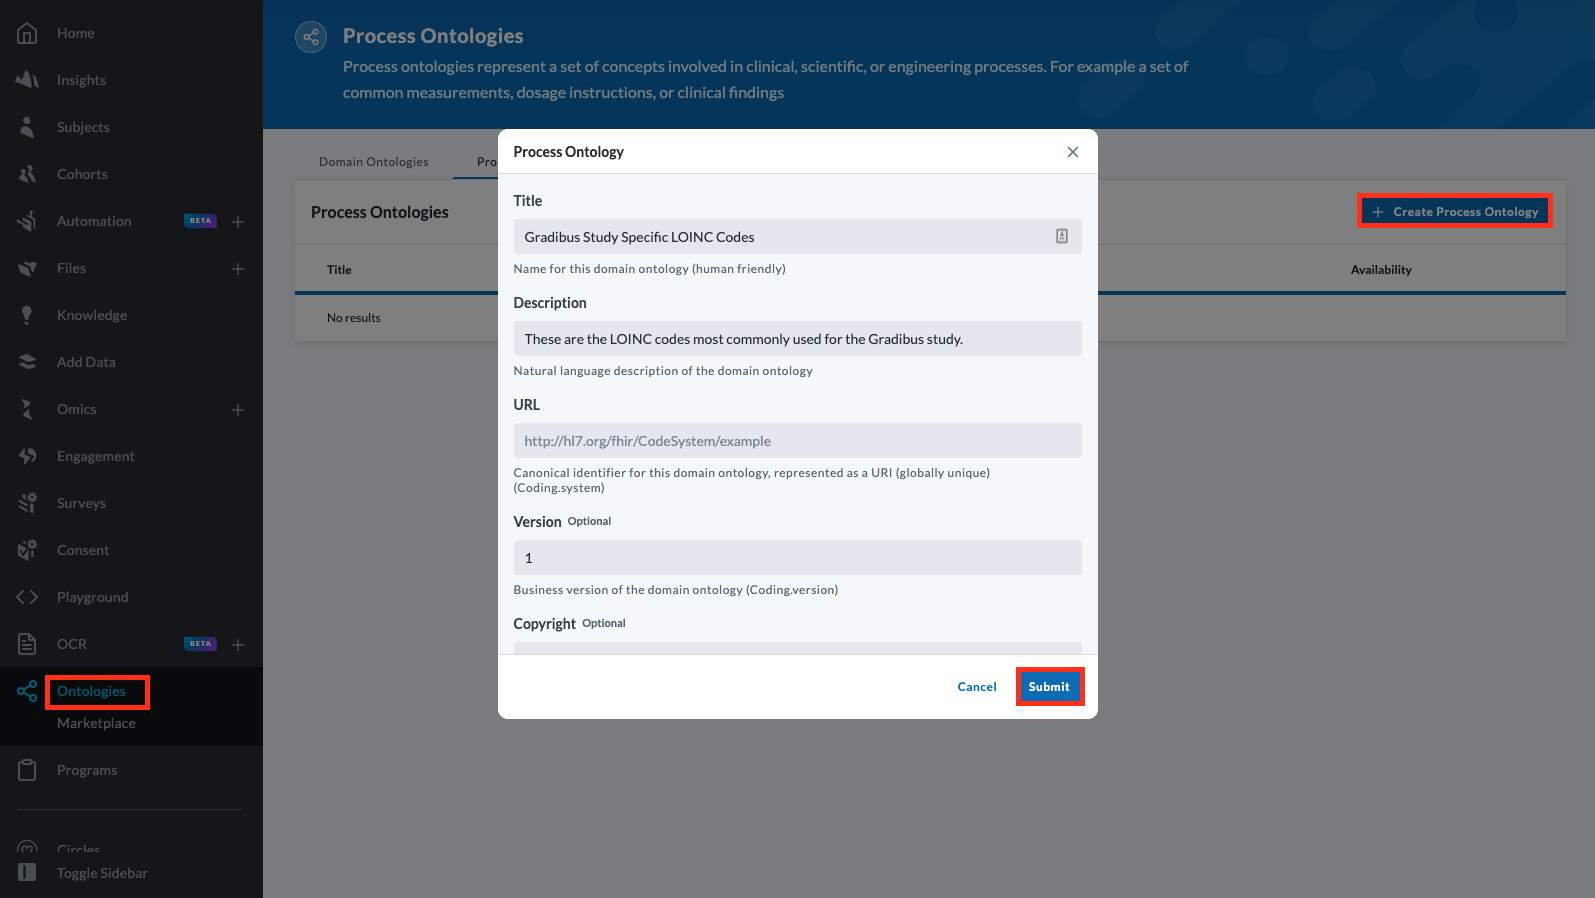
- Click the + Create Process Ontology button.
- On the Domain Ontology form that appears, fill out the relevant fields and click Submit.
- On the Managed Ontologies screen, click + Add Concepts.
- On the Browse Ontology screen, click the parent ontology you want. If no ontologies are available complete the Load and Use the Default Ontologies procedure.
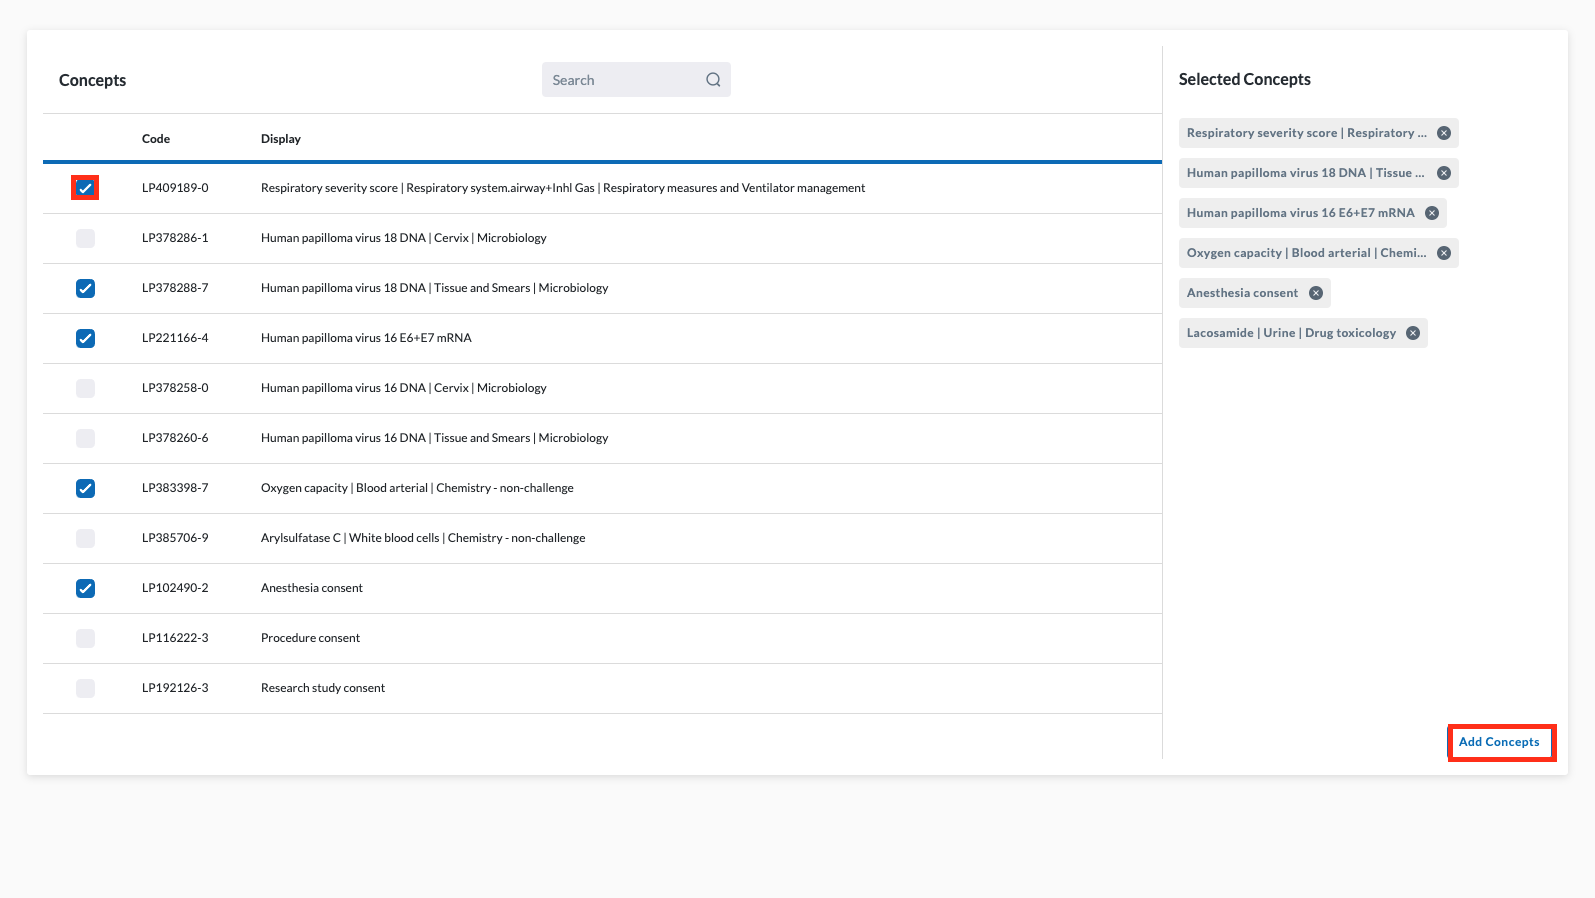
- On the Browse Ontology screen, search and scroll to find the concepts you want to include and click the concept checkboxes.
- Click Add Concepts.
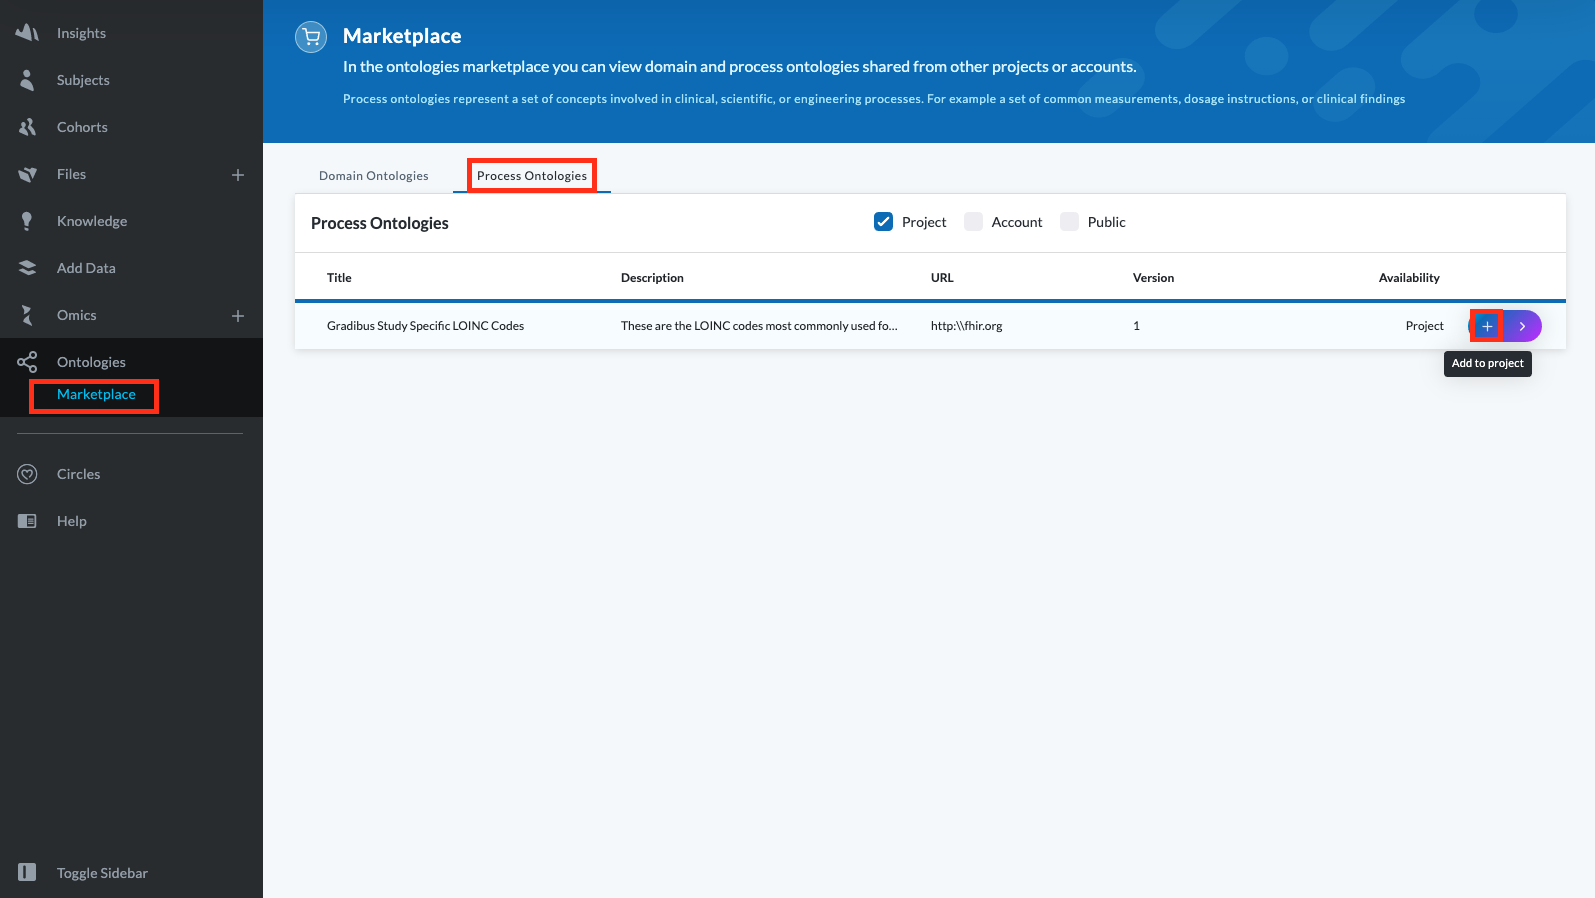
- Click the Marketplace tab on the left side of the screen.
- Click the Process Ontologies tab and mouse over the ontology row to display and click the Add to project icon.
- Click Confirm on the confirmation dialog that appears.
- To confirm the addition of the custom ontology, click the Subjects tab on the left side menu.
- Click the Conditions filter and the Browse Ontologies icon.
- Click the Process Ontologies tab to confirm the custom ontology is loaded and click the ontology row to view the ontology concepts.
- To use a concept as a subjects filter, click a box to select an ontology concept and click Filter Concepts.
Browse the Graph and Tree Views for a Domain Ontology
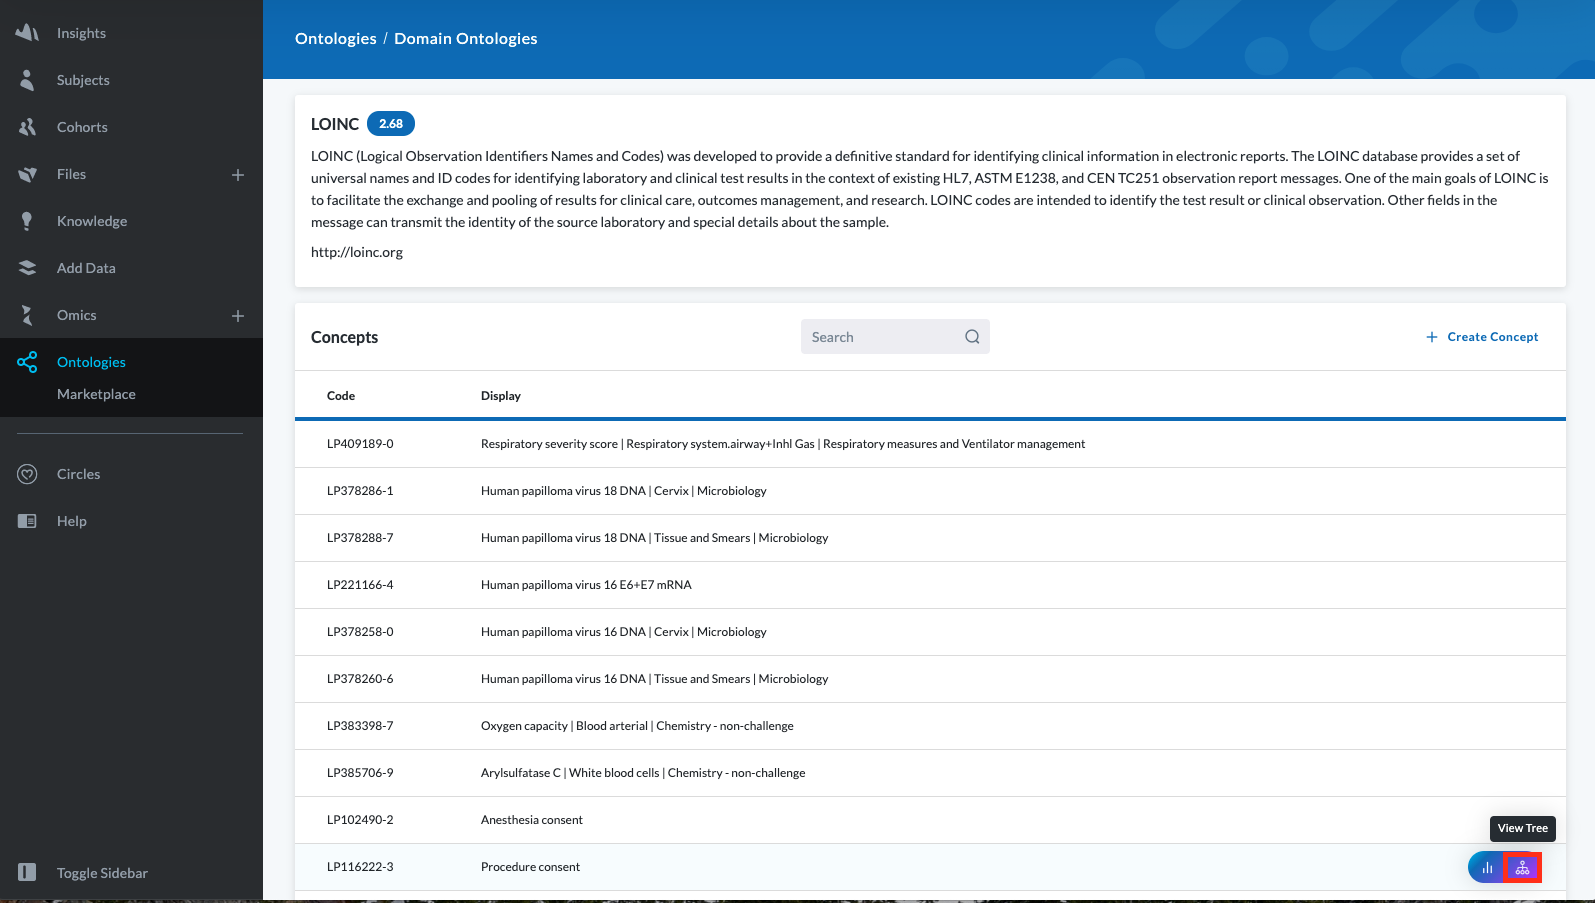
- On the left side menu, click Ontologies.
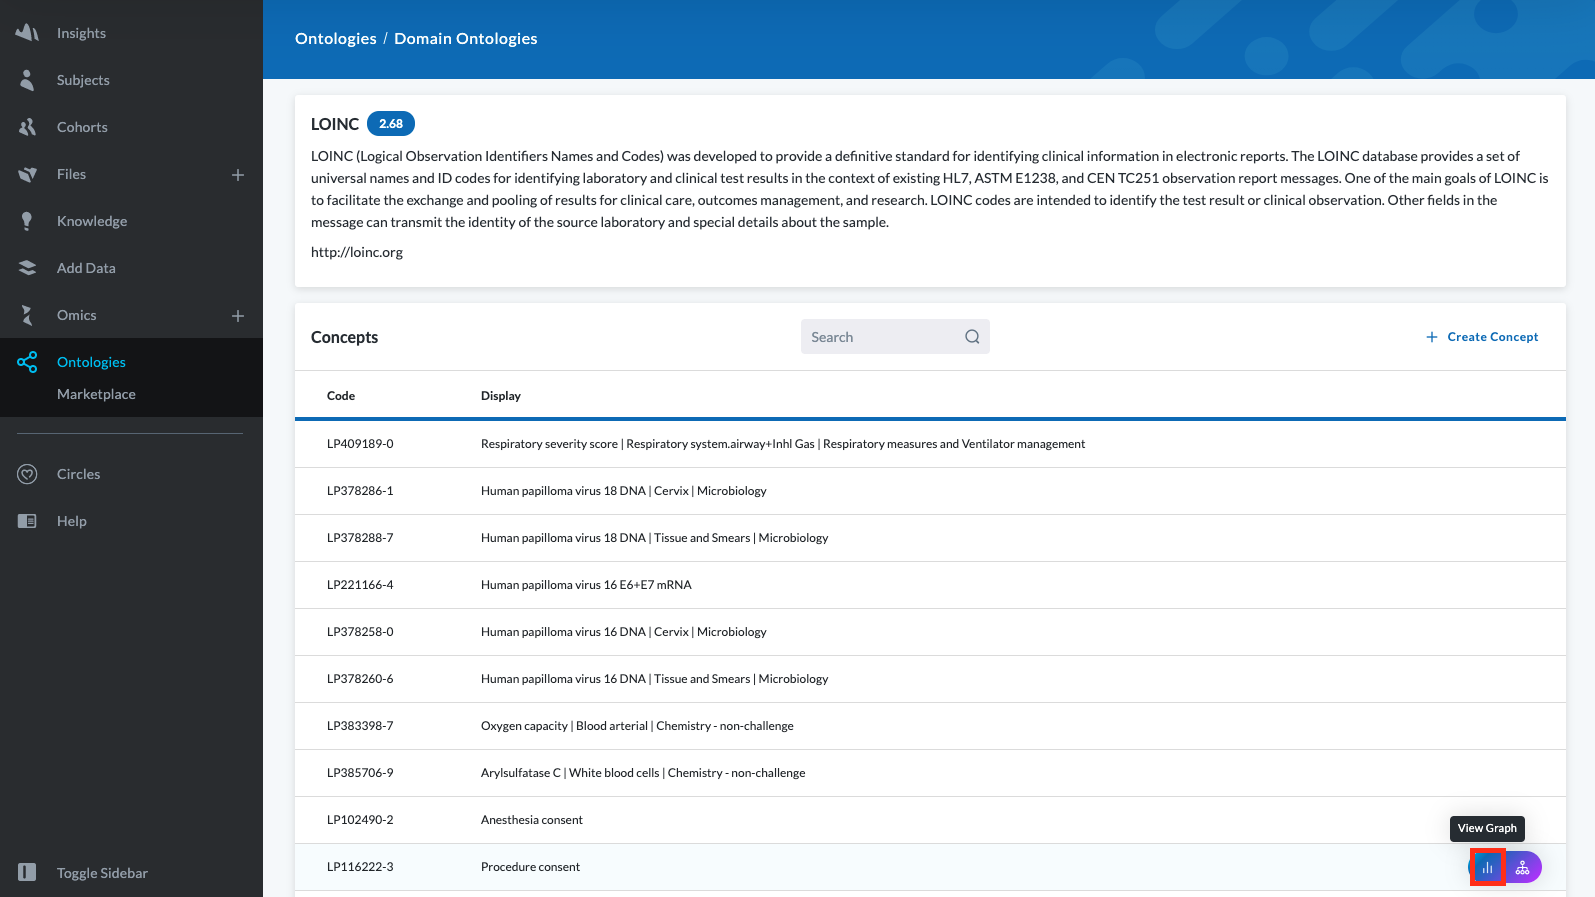
- Under the Domain Ontologies tab, click an ontology to open it and view the concepts that make up the ontology.
- Mouse over an ontology concept row to display the View Graph and View Tree icons.
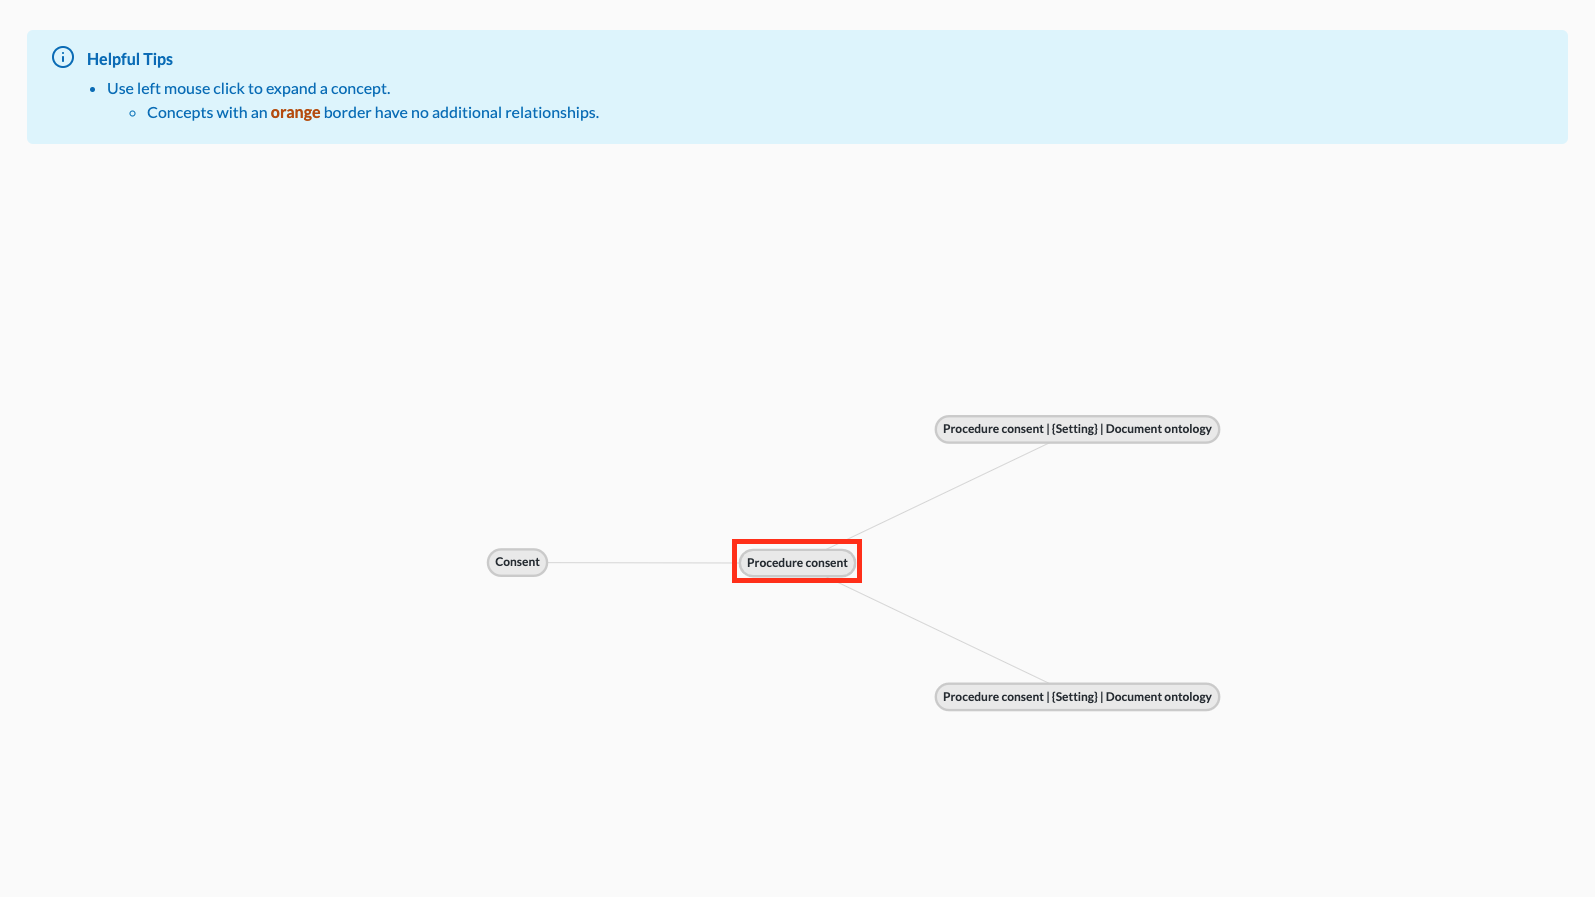
- To see a visual representation of the concept's relationships, click the View Graph icon.
- On the Concept Graph screen, click the concept to reveal the parent and children concepts. Click additional concepts to further explore the ontology.
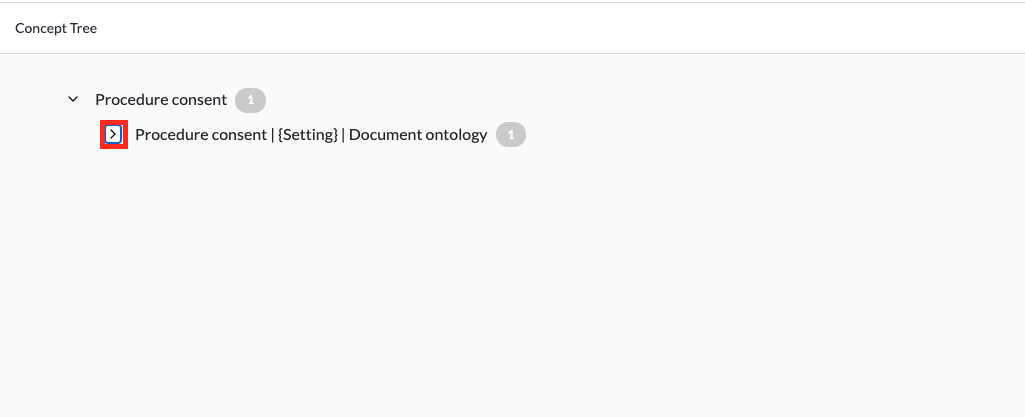
- To see an outline view of the concept's relationships, click the View Tree icon.
- Click on any toggle symbols to reveal additional information.