Cohorts Overview
A cohort is a subset of patients from a LifeOmic Platform project. The cohort is defined by a user and allows you to isolate and interact with the selected group. An example of a cohort is a group of males over 50 who smoke. The project that contains the cohort would contain patients that meet and don't meet these criteria. The cohort would only contain patients that meet these criteria.
The default LifeOmic Platform view is the project view that shows all cohorts. But when a user selects a cohort, the view and operations are restricted to that cohort. For example, if you add a subject, it is added to that cohort. The data shown in Omics and Insights is also filtered for the selected cohort. Files and OCR documents are only shown if they belong to a patient associated with the selected cohort or if you created them yourself. If someone assigns a file you created to another cohort, you would no longer be able to view it in your selected cohort.
The LifeOmic Platform features cohort memory that persists across projects. If you select a cohort and then switch projects, your cohort selection is retained for the new project. When you return to the original project your selected cohort remains your selection.
You can also create child cohorts that are sub-cohorts of top-level cohorts. The child cohorts are visible under the Cohorts or Subjects tab, when you select the top-level cohort with the cohort picker.
An access control policy can grant privileges based on cohort membership, see the Create an Access Control Policy procedure and the "Add a cohort restriction to this policy" option.
If you need to delete a subject from the LifeOmic Platform and that subject belongs to a cohort, remove the subject from the cohort before deleting the subject. This order ensures an accurate cohort count. See Remove a Subject from a Cohort for more information.
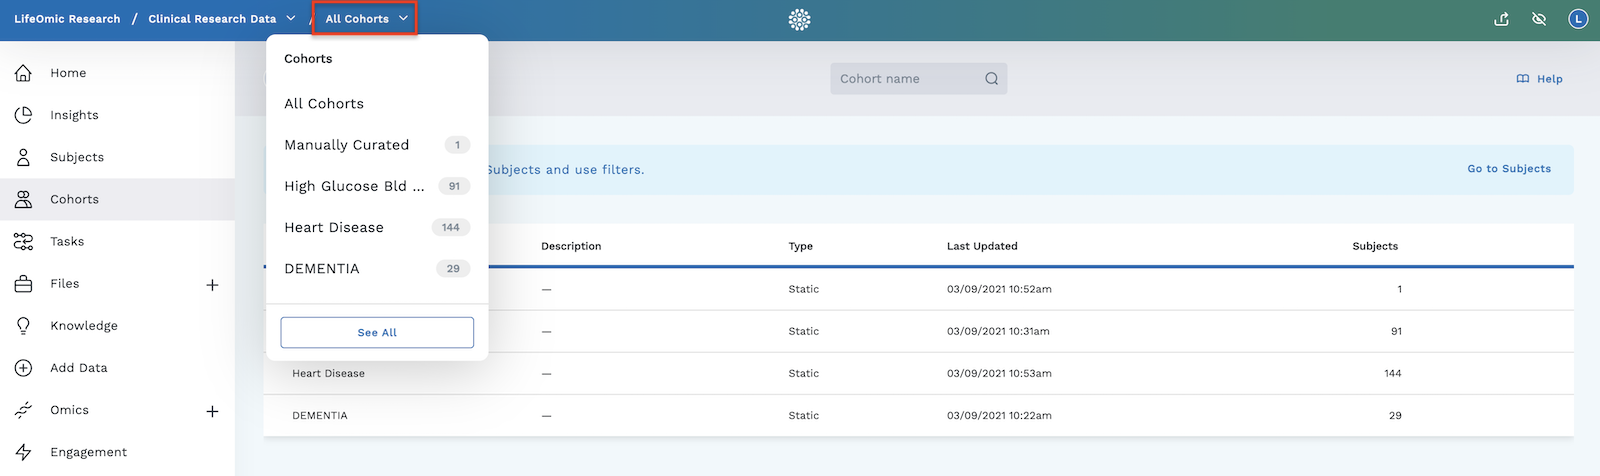
Use the Cohort Picker to Select a Cohort
On any page, click the Cohorts picker on the top-left of the screen under the project name and click the name of the desired cohort. To leave a cohort and return to the default view, click All Cohorts.
Note: When a user has Read Data and Read Masked Data permissions for an entire project, the default LifeOmic Platform view is the project view that shows all cohorts. If a user has Read Data and Read Masked Data permissions limited to a specific cohort, the cohort view is the default view and that cohort is automatically selected in the picker.
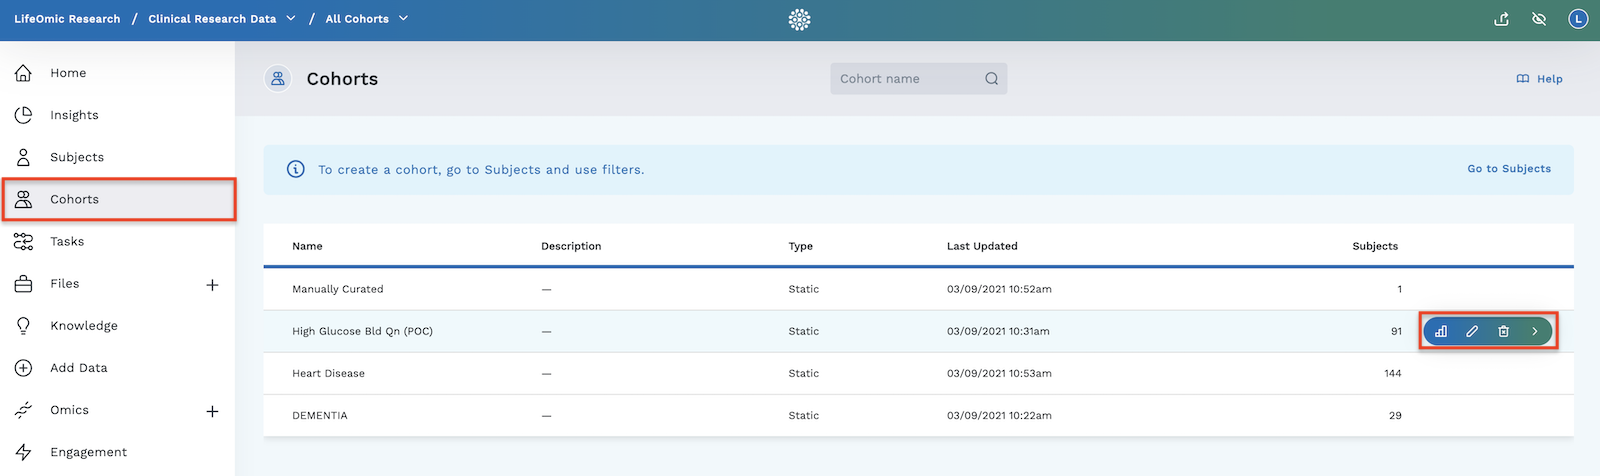
View, Edit, and Delete Cohorts
Click the Cohorts tab on left of the app screen and mouse over a cohort row to reveal the action icons.
-
Click on the Insights icon to open that cohort on the Insights screen.
-
Click on the edit icon to enter a name or description.
-
Click on the delete icon to delete that cohort.
-
Click on the view icon or double-click the cohort row to view the details for that cohort.
Create a Cohort
This procedure requires Data Access > Create Data privileges. To grant privileges, see Access Control.
-
Click the Subjects tab on the left side of the app screen.
-
Under the Standard tab, select the filter criteria for your cohort. The Subjects table on the right of the screen updates with the subjects matching the chosen criteria.
-
Select the subjects from the Subjects table that you wish to add to the cohort by either:
- Selecting each subject individually by checking the corresponding checkbox
- Selecting all subjects in the table by clicking the checkbox at the top of the Subjects table
Selecting a subject activates the action buttons located above the Subjects table.
-
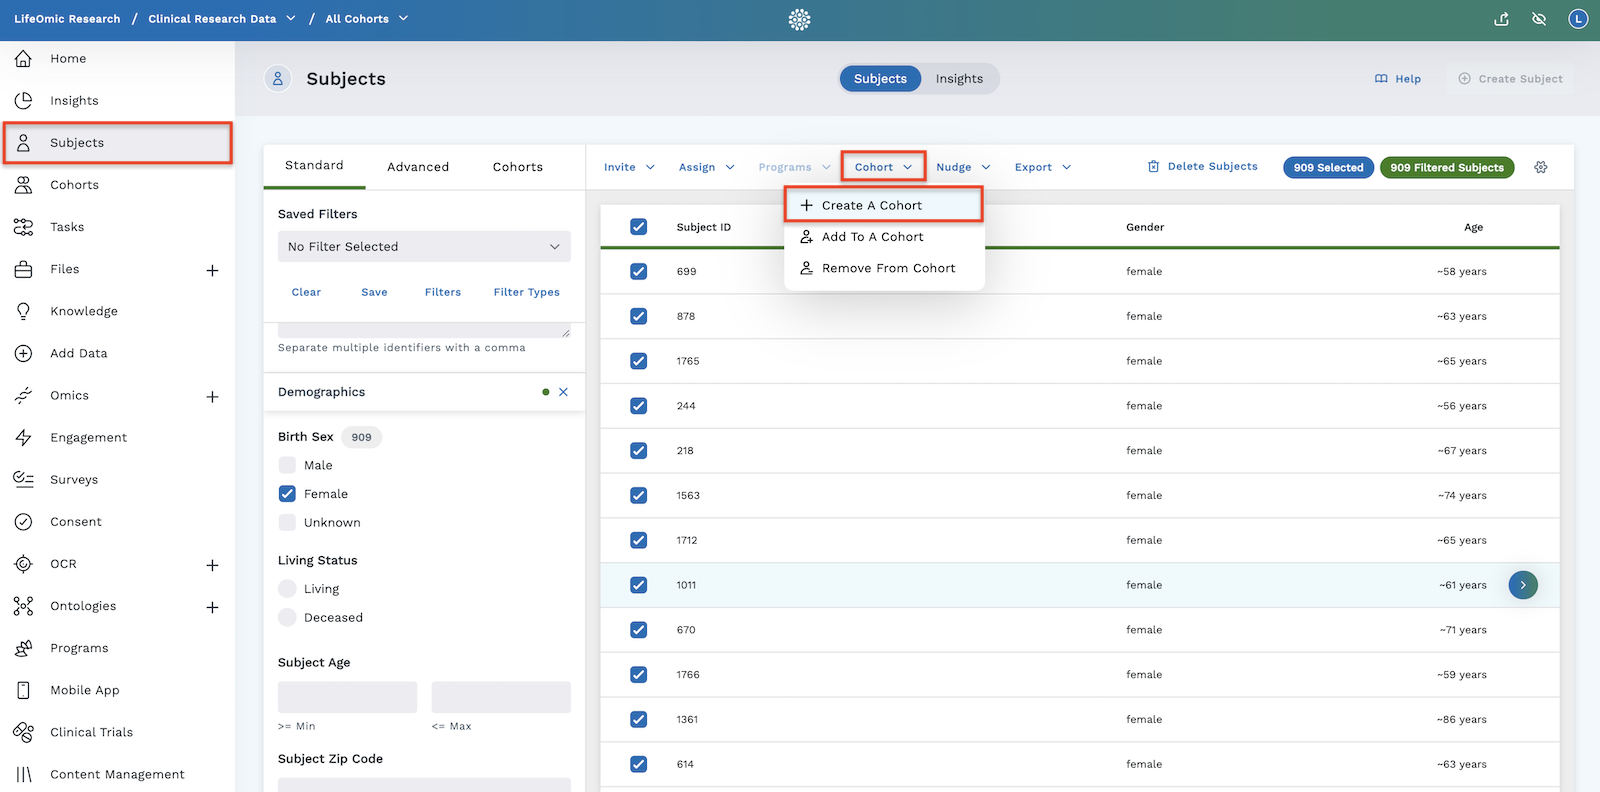
Click the Cohort action button.
-
Click Create a Cohort.
-
In the dialog that appears, enter a name and description for the new cohort.
-
Click Create.
Your new cohort can be found under the Cohorts tab of Subjects. It is also available to other users to filter in the Standard or Advanced tabs of Subjects as seen below.
Standard tab:
Advanced tab:
Create a Child Cohort
A top-level cohort is one level below a project. A child cohort is one level below a top-level cohort. You can only have one level of child cohorts.
- Select the desired top-level cohort with the cohort picker.
- Follow the Create a Cohort procedure.
Note: The child cohorts are visible under the Cohorts or Subjects tab, when you select the top-level cohort with the cohort picker.
Remove a Subject from a Cohort
This procedure requires Data Access > Update Data privileges. To grant privileges, see Access Control.
The steps taken to remove a subject from a cohort depend on which Subjects tab you are in.
Remove a Subject from a Cohort via the Subjects/Cohorts Tab
The clip below illustrates how to remove a subject from a cohort using the Cohorts tab. When you are in this tab, the only way to remove a subject from the active cohort is by using the Update Cohort action.
-
Click the Subjects tab on the left side of the app screen.
-
Click on the Cohorts tab.
-
Click the + next to the name of the cohort.
-
Click the View Subjects button in the expanded window to see the subjects in that cohort.
-
Select the checkbox for the subject(s) you WISH TO KEEP.
-
Click the Cohort action button.
-
Click Update Cohort.
-
On the dialog that appears, click Update to confirm the action.
In the clip above, four subjects were in the cohort. We selected one subject to keep and performed the update cohort action. A window opened confirming that we were adding zero subjects and removing three subjects from the cohort.
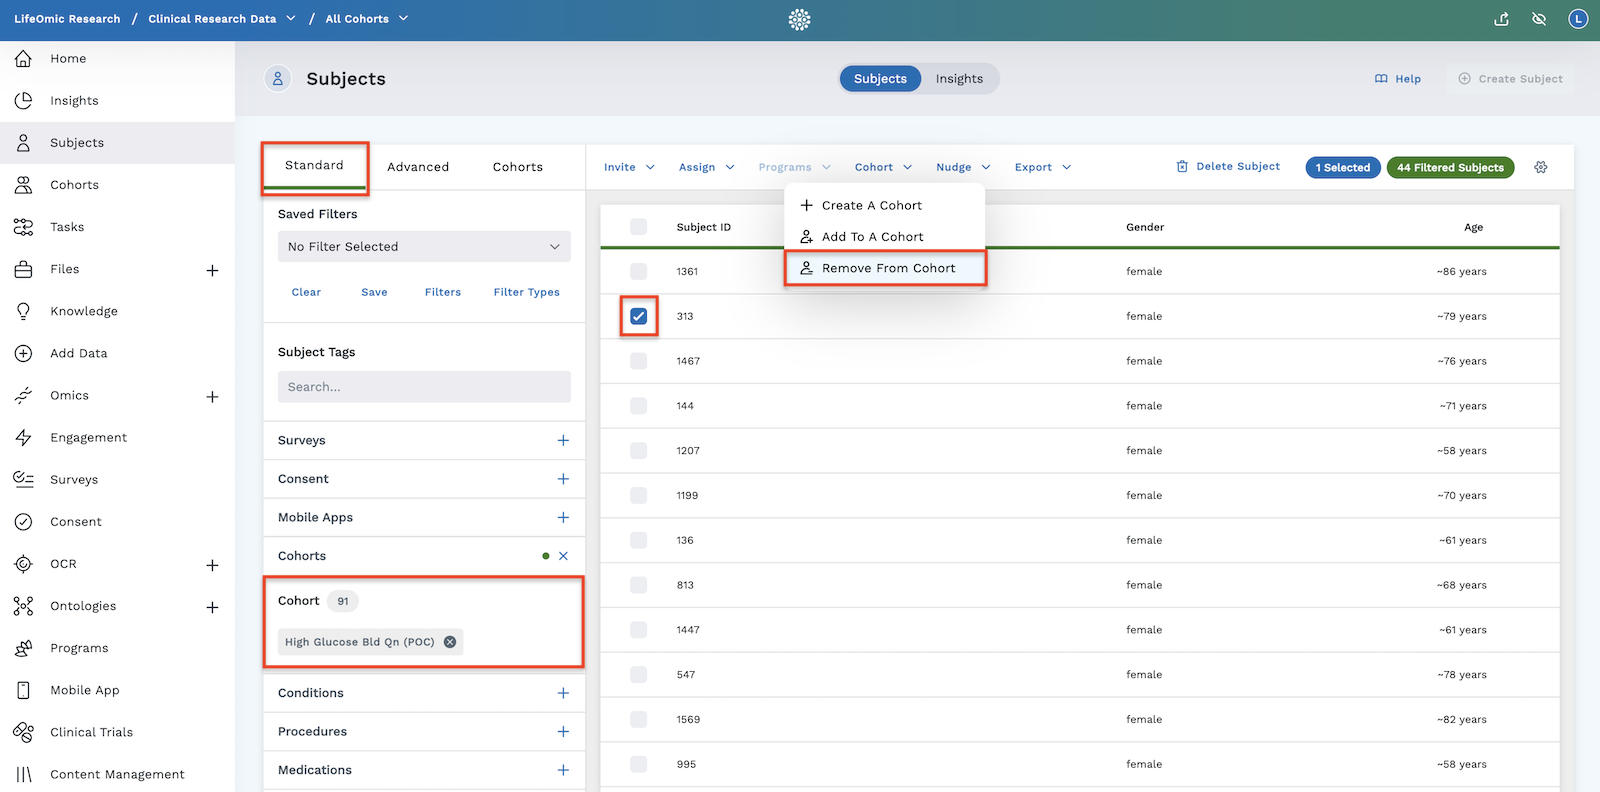
Remove a Subject from a Cohort via the Subjects/Standard Tab
-
Under the Standard tab, scroll down the list of filters and click the + beside Cohorts.
-
From the dropdown menu, select the cohort you wish to view. The Subjects table to the right updates with the subjects in the selected cohort.
-
Select the subject you wish to remove.
-
Click the Cohort action button above the Subjects table.
-
In the dropdown menu, click Remove From Cohort.
-
In the window that opens, select the cohort from which you wish to remove the subject and click Update to confirm the action.
If you want to add the subject back into the cohort, or you want to add a different subject to the cohort, follow the "Add a Subject to a Cohort" procedure below.
Add a Subject to a Cohort
This procedure requires Data Access > Update Data privileges. To grant privileges, see Access Control.
-
Click the Subjects tab on the left side of the app screen.
-
Under the Standard tab, select any filters needed to find your subjects.
-
Select the subjects from the Subjects table that you want to add to the cohort.
-
Click the Cohort action button.
-
Click Add To A Cohort.

-
In the dropdown menu that opens, select the cohort and click Update.