Clinical Trials Overview
The LifeOmic Platform provides advanced capabilities to search the ClinicalTrials.gov database. ClinicalTrials.gov is a public resource provided by the U.S. National Library of Medicine. The database contains information on hundreds of thousands of privately and publicly funded clinical studies conducted around the world.
The Clinical Trials feature lets the user configure specific search filters and enter terms in the same manner as sophisticated retail websites, such as Amazon.com. Search filters are curated fields based on ClinicalTrials.gov fields with additional fields added by LifeOmic, such as drug name and drug class.
Clinical Trials Matching
Clinical Trials also offers trial matching, which is a capability unique to the LifeOmic Platform. Trial matching automatically filters trials for a specific subject with the subject information that already exists in the LifeOmic Platform. This data can include common patient information, such as date of birth and birth sex, and more advanced information, such as genetic variants.
Clinical Trials Alerts
When you have configured a search, you can save it under Filters. You can also favorite specific trials from your search results. Saved Filters and favorited trials can generate notifications for the user. A notification trigger for a favorited trial is a change in a specific field of the study, such as the recruiting status moving from pending to recruiting. Along with recruiting status, other field changes that trigger alerts are inclusion criteria, exclusion criteria, birth sex, minimum age, and maximum age. A notification trigger for a saved filter is a new trial in the ClinicalTrials.gov database that meets the filter criteria. Users receive an alert email and also a notification in the LifeOmic Platform web app by the bell icon.

A user needs to belong to the default User group or have those permissions to complete these procedures. The default User group policy grants the Manage Clinical Trial Alerts permission. To add a user to the default user group, complete the Add a user to a group with the Users tab procedure.
Developers can access this functionality through the Trial Matching Alerts API.
Search and Filter Clinical Trials
Drug Name and Drug Class filters require the LifeOmic Platform JAX feature. Contact LifeOmic to enable this capability.
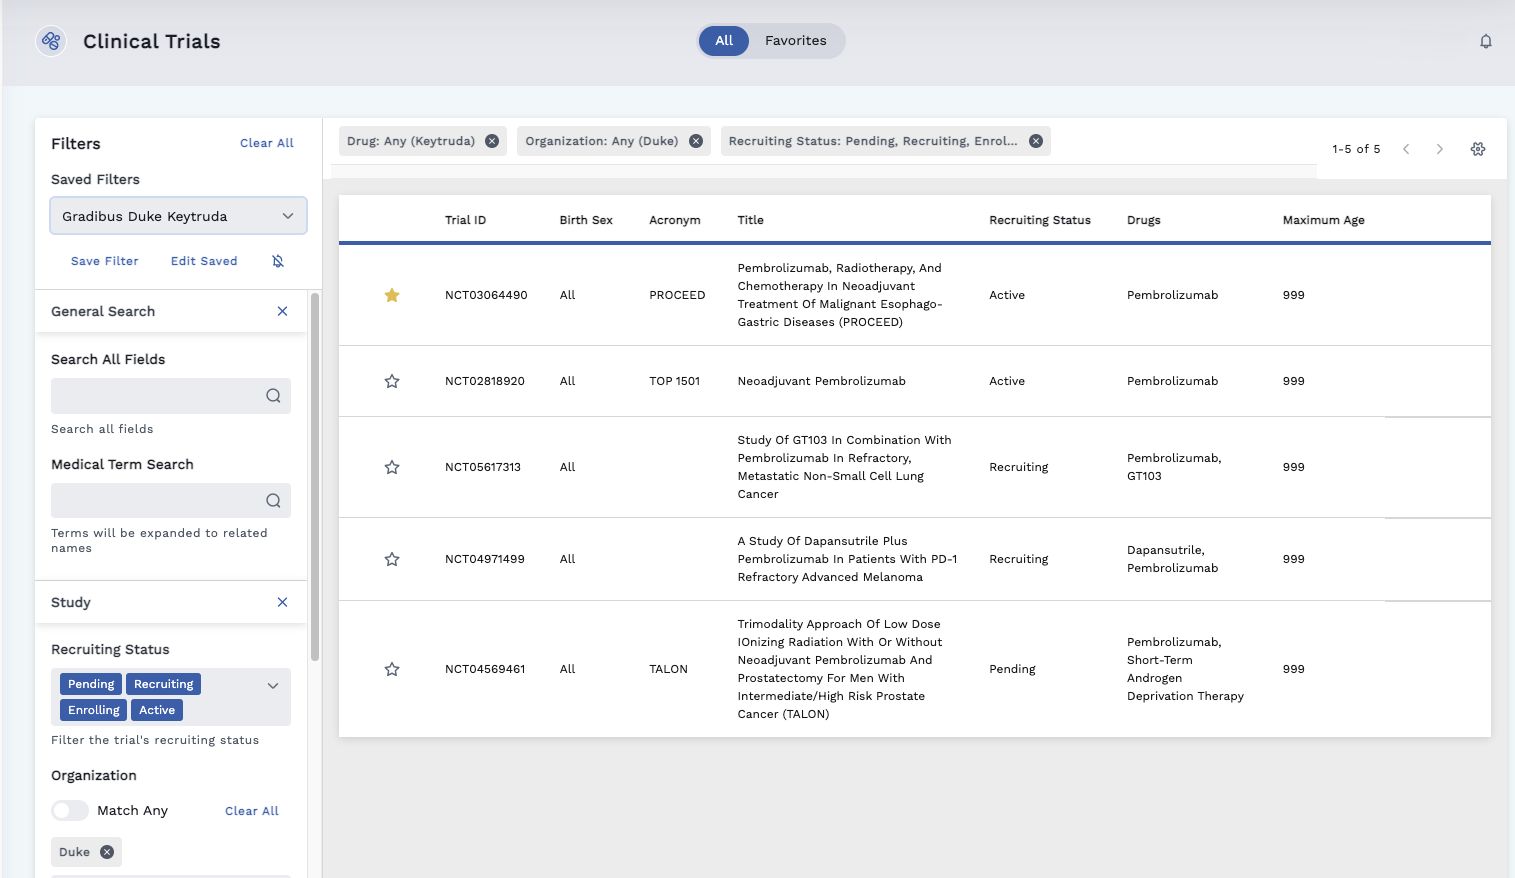
- On the left side menu, click Clinical Trials.
- Click the icon to open a filter category.
- Enter terms or select options in the exposed filter fields to narrow your trial results.
- To page through a large number of results, click the or icon next to the number of results.
- In the search results, click the star icon to designate a trial as a favorite. Changes in favorite trials trigger notifications.
- Mouse over a row and view and click the edit icon to add notes to the trial or view previously entered notes.
- Mouse over a row and view and click the View trial details icon to reveal the trial details page.
- On the top right corner of the trial details page, click the Trial ID to navigate to that trial's detail page on clinicaltrials.gov. The Trial ID is also the ClinicalTrials.gov Identifier.
Create and Save a Filter
- Enter terms or select options in any desired filter fields.
- Under Saved Filters, click Save Filter to display the Edit Filter dialog.
- In the Edit Filter dialog under Filter Name, enter an identifying name.
- Under Filter Description, enter the characteristics of the filter (optional).
- Click Save.
- To use a filter, select a filter under Saved Filters.
- To delete a filter, click Edit Saved and click the icon.
Enable and View Alerts
- Select a filter under Saved Filters.
- To enable alerts for that filter, click the icon under the name of the selected filter.
- To view all alerts, click the icon at the top right of the screen.
- To dismiss alerts, click Dismiss All or Dismiss on an individual alert.
Set Filters and Columns for the Default View
- Click the icon at the top right of the Clinical Trials screen.
- Under Active Default Filters, click the for a desired filter category and enter terms or select options.
- Under Table Fields, click the and select a new column type to add it to the default view.
- Click the to close the Trial Matching Search Configuration screen and return to the default view. The selected options and search terms appear at the top of the default view.
Export Selected Trials
- Click the star icon next to a trial to mark it as a favorite.
- Click the Favorites tab at the top of the screen.
- Click the download icon at the top of the Favorites section to download a CSV file.
Match Clinical Trials Based on Existing Subject Data
You can match clinical trials for a specific subject. A custom layout incorporating the Subject Trial Matching module needs to be configured.
The filter used for the trial matching module is based on information from the specific subject, such as Birth Sex.
-
Complete the Add a Subject Trial Matching Module.
-
On the left side menu, click Subjects.
-
Click on a subject to display the single subject view.
-
At the top of the page, confirm that Layout: is set to the name you gave your layout, such as Trial Matching.
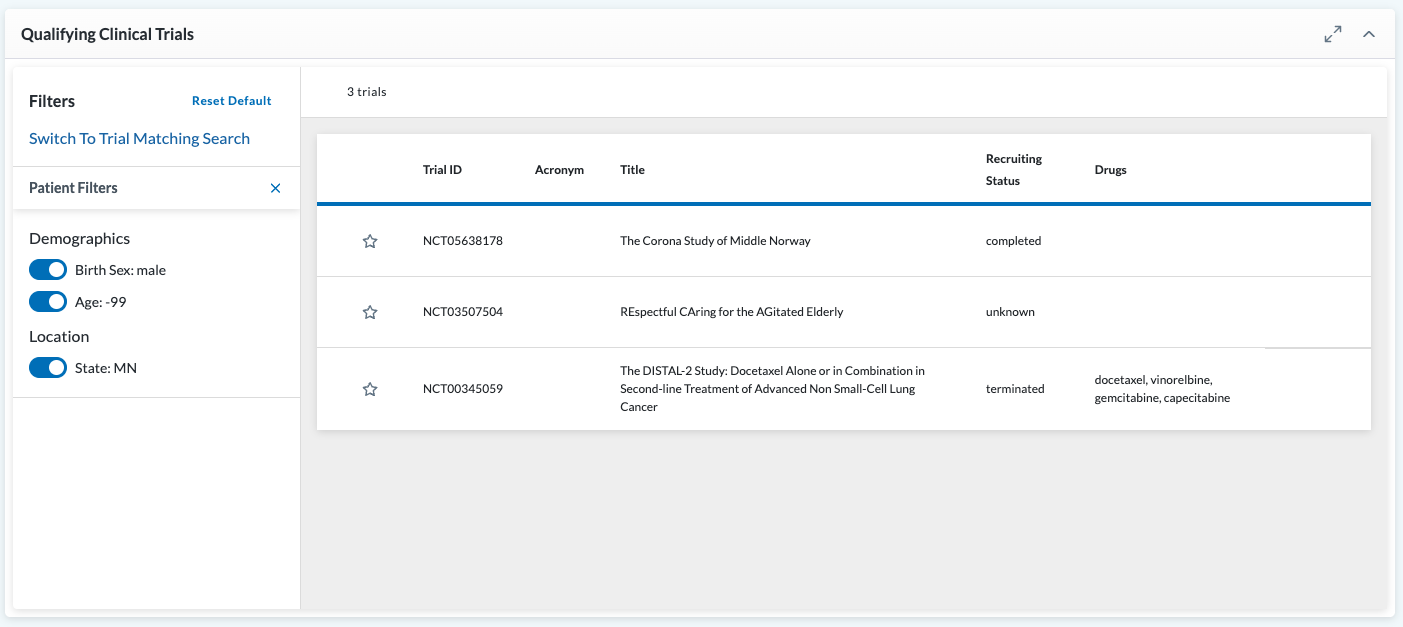
The Qualifying Clinical Trials page displays the trial results with the applied filters.
-
To change the trial results, toggle on or off the applied filters or click Switch to Trial Matching Search to access all filters.