Consent Overview
A Consent Form gives written permission to another party agreeing to the terms of an event or activity that will be performed within a project.
The LO-ME feature lets subjects give consent with their mobile devices. See LifeOmic Platform-ME App for more information.
For more information, see the Consent Service FAQ.
General Information
The terms subject or user are used to represent any individual whose data is associated with a project. The subject may or may not have access to their own data in the project, depending on how the project is structured. In many research studies or wellness programs, the administrator will invite subjects to report data into the project with the Patient Engagement mobile app or assigned surveys.
Projects not Requiring a Consent
Some projects may not require a consent or the consent will be managed outside of the LifeOmic Platform. With no consent document to sign, the invited person will move straight into any surveys or data associated with the project once they accept the invitation.
Projects with Consent
Each Project within an Account can have one informed consent document associated with it.
In projects with a consent document, the subject will accept the invitation, then agree to the published consent document to gain access to the surveys or data associated with the project.
A Project may be created within an Account to collect an informed consent from subjects and nothing else, as the LifeOmic Platform is FDA 21 CFR Part 11 compliant.
To assign a consent later or to assign a minor version of a consent to existing subjects, see the Assign Consent Action Button.
How to Manage Consent
-
Assign the consent form to subjects, either by adding them to the engagement flow or using the Assign Consent Action Button on the Subjects page.
-
View Consent Status in the Subjects tab of Consent:

-
Once a subject is invited, they’ll show up in the list as Pending with a clock icon .
-
After a subject accepts the consent, their status will change to Accepted and you’ll see a green checkmark by their name along with the date they accepted the consent.
-
If a subject Rejected the consent, you'll see an "X" by their name.
-
You may also view a list of all subjects who accepted, rejected, or are pending by clicking the related buttons under Consent Status in the Consent Subjects Tab.
-
Consent Versions
You can edit your consent form using consent versioning. Minor changes to your consent are published as a Minor Version where only new participants will see the updated consent. Important changes to a consent form are published as a Major Version and require everyone, including past participants, to agree to the new terms.
Assign Consent Action Button
The Assign Consent Action button (found above the table in the Subjects tab of the LifeOmic Platform app) allows you to select one or multiple users and assign a consent. The Assign Consent Action button is most useful in the following instances:
- A consent is later added to a project – This will assign it to everyone selected and they will have a pending consent to accept. (Creating a consent later does not automatically assign the consent to existing users.)
- A new minor consent was created and you want a subset of individuals you’ve selected to re-consent on the minor version. (Minor versions are not automatically assigned out to anyone.)
Follow these steps to Assign a Consent with the Action Button:
-
Click the Subjects tab on the left side of the app.
-
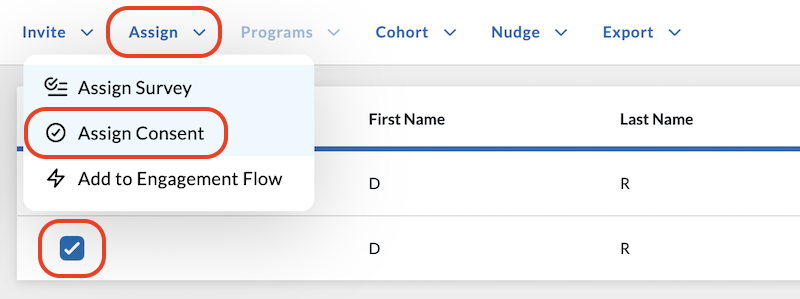
Select one or multiple users you want to assign the consent to by clicking the checkbox beside their name.
noteRemember you can toggle between masked mode and unmasked mode in the blue header to see the names of subjects.
-
Click the Assign action button above the Subjects table.
-
In the dropdown menu that opens, click Assign Consent.
-
Confirm your choice in the pop-up window that opens by clicking the Assign Consent button.
Subject/User Side of Consent Process
After you invite your participants, they'll be presented with the consent form associated with the project:
-
Subject receives an email in their inbox. Click Signup or Login. (Signing up requires a registration process verifying a valid email address.)
-
Subject accepts the invitation to the project to proceed to the informed consent document.
-
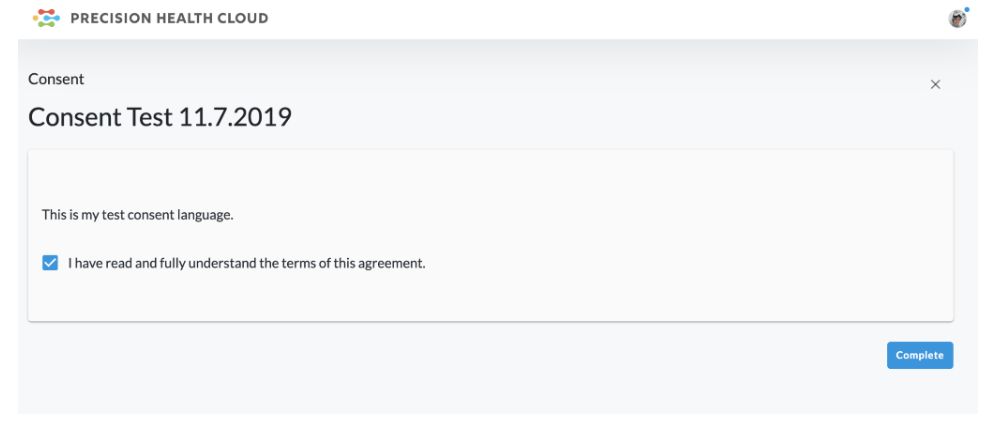
Subject reads the informed consent. They then check the box and click Complete to agree to the terms OR leave the box unchecked and click Complete to revoke consent.
Once the consent is accepted, the subject will be able to review a read-only copy of the consent language and will receive a PDF copy via email.
Revoking Consent
If at any time the subject wishes to revoke consent, he/she can do so by following these steps:
-
Log into the app.
-
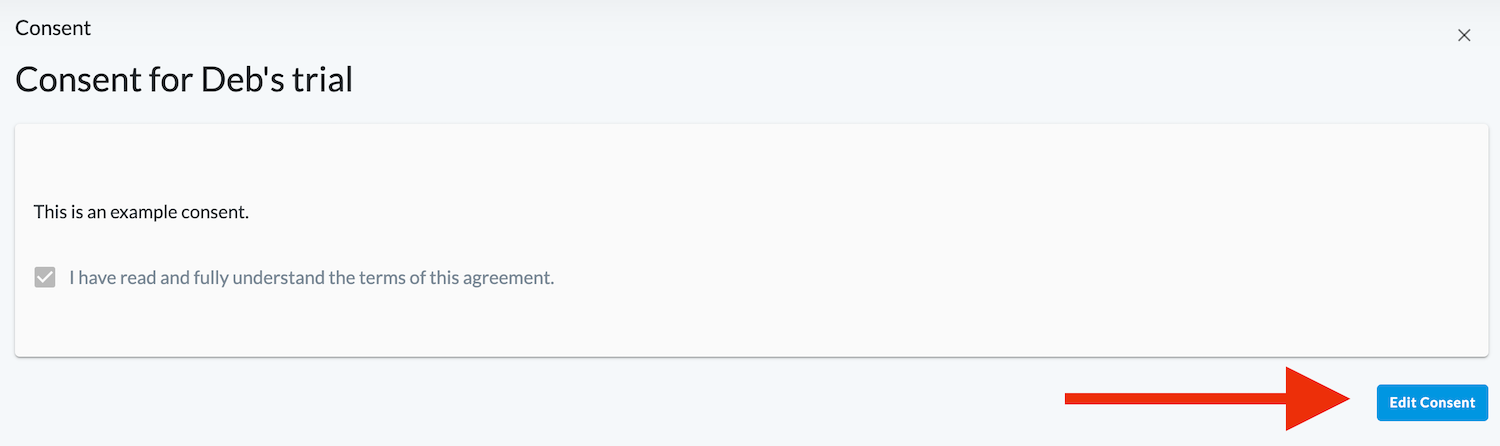
Click on Consent.
-
Click Edit Consent.
-
Uncheck the "I have read and fully understand the terms of this agreement." box.
-
Click Reject to update your consent.
-
The subject will then be presented with this warning:
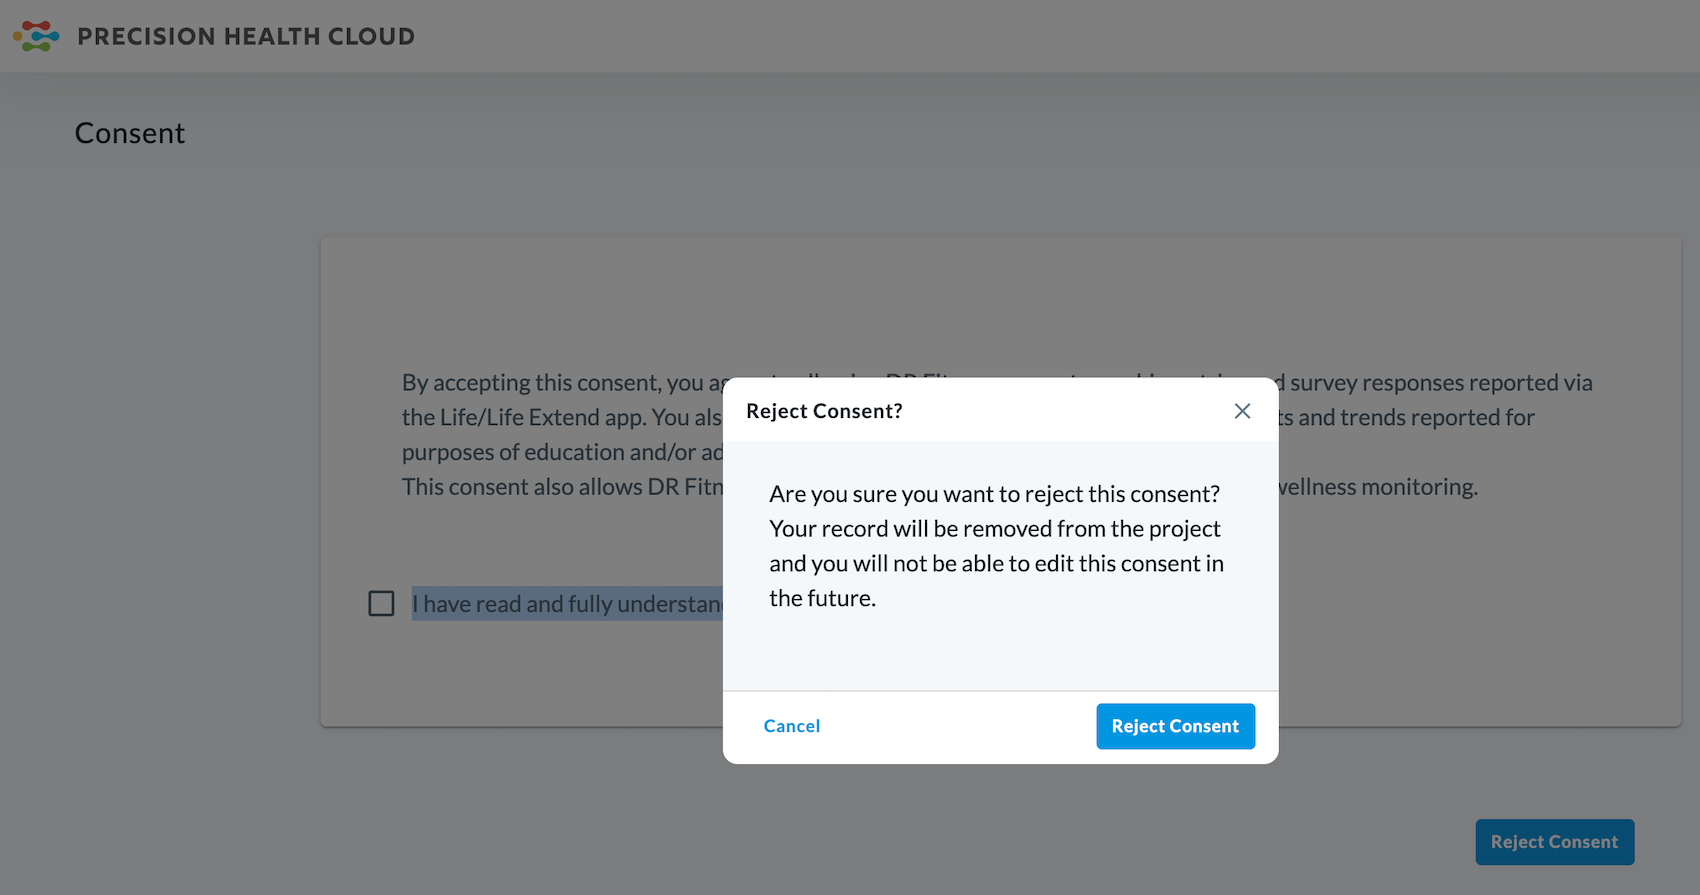 Rejecting a consent will
remove your record from the project and you will no longer be able to edit
your response to the consent.
Rejecting a consent will
remove your record from the project and you will no longer be able to edit
your response to the consent.
Consenting to an Updated Consent Form
If a consent has had a major update/version published, participants who previously agreed to the consent terms will be presented with the updated consent form upon logging into the LifeOmic Platform.