Single Subject Data Layout
A Layout is a page of various modules used to visualize subject data. From the Subjects tab of the LifeOmic Platform, users can view a single subject's data.
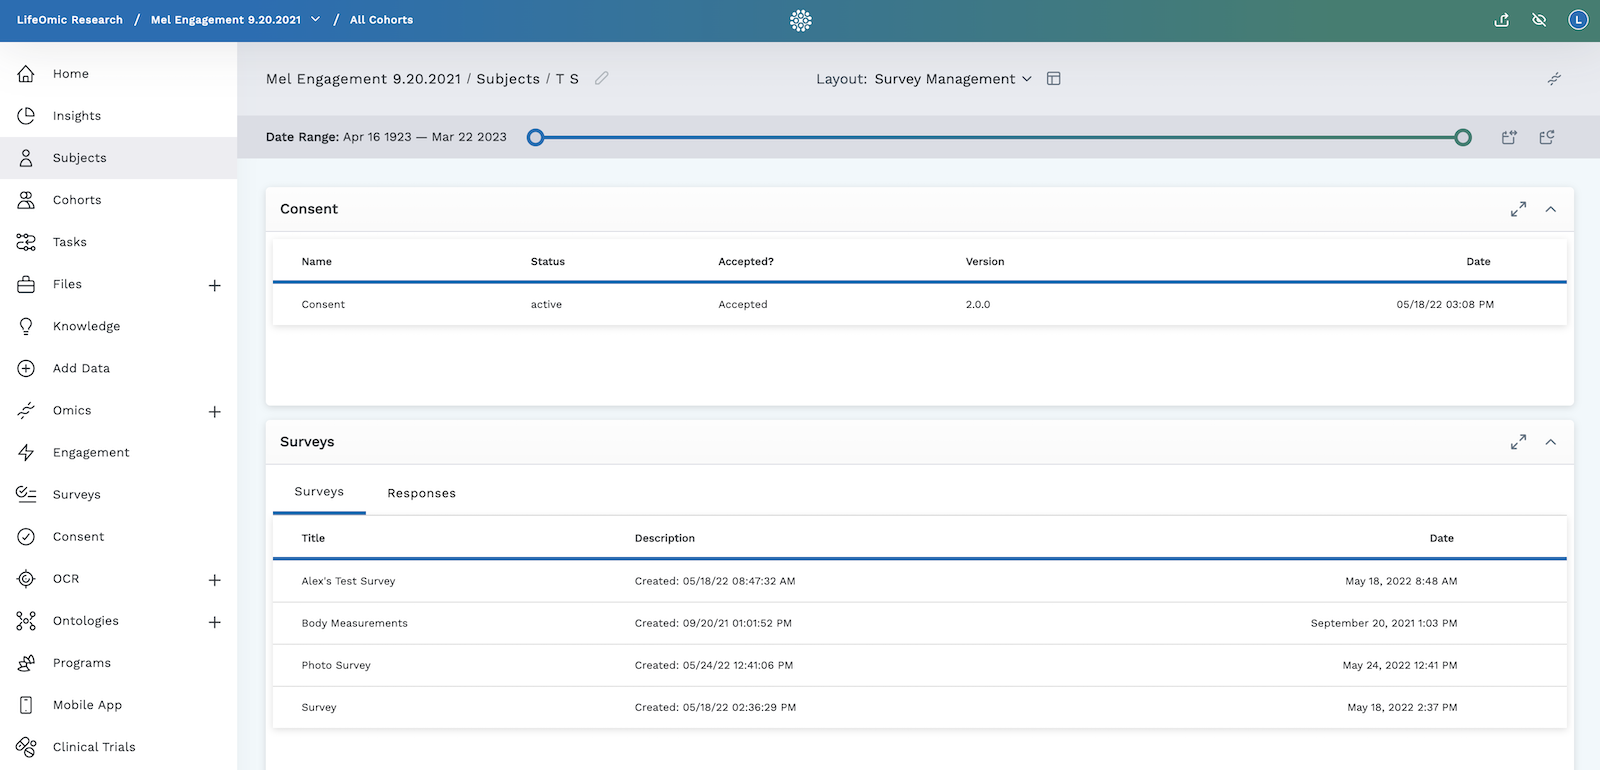
The image above is an example of the pre-configured Survey Management layout. This layout allows users to see information about a subject's consent status and various survey status information.
Users with the layoutAdmin ABAC privilege can create custom layouts by selecting modules from a library or by creating their own module. Once a layout is created, it can be saved for other users to easily access via a dropdown menu.
Note: To visualize subject data for the entire project population, please see Insights.
Creating a Single Subject Layout
Creating a Single Subject Layout is a two step process. It begins with creating and naming a new layout and ends with customizing and adding modules to the layout.
Create and Name a new Layout
-
Click on Subjects in the sidebar of the LifeOmic Platform app.
-
From the Subjects Table, click on the subject whose data you wish to view graphically - this opens the Subject Viewer page.
-
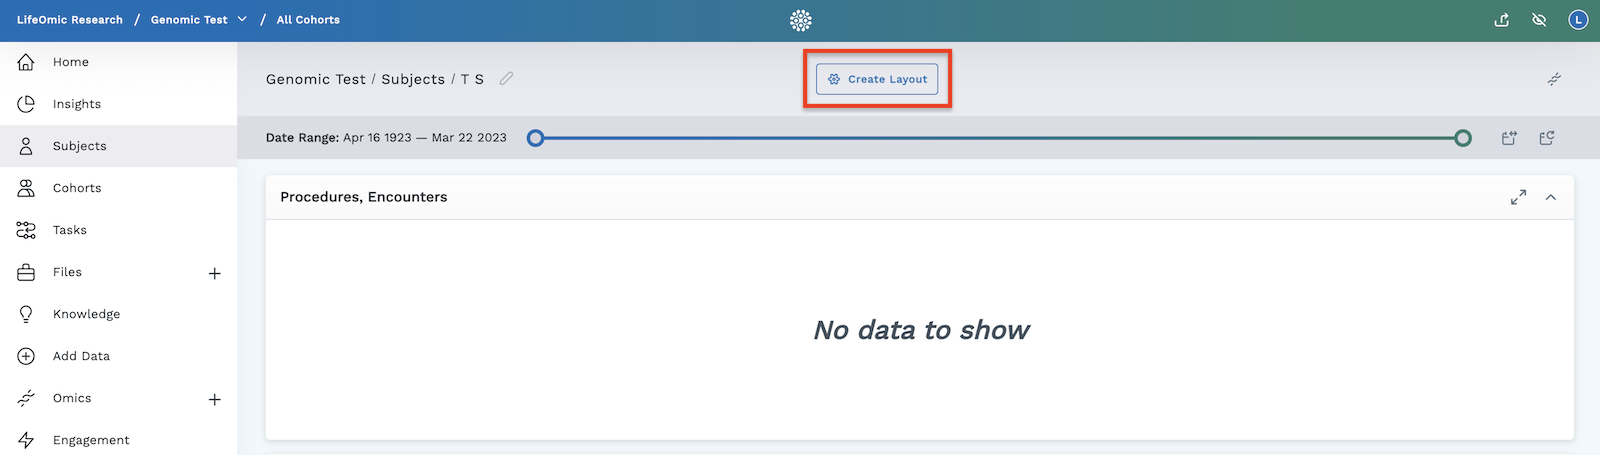
In the top banner, click the Create Layout button.
-
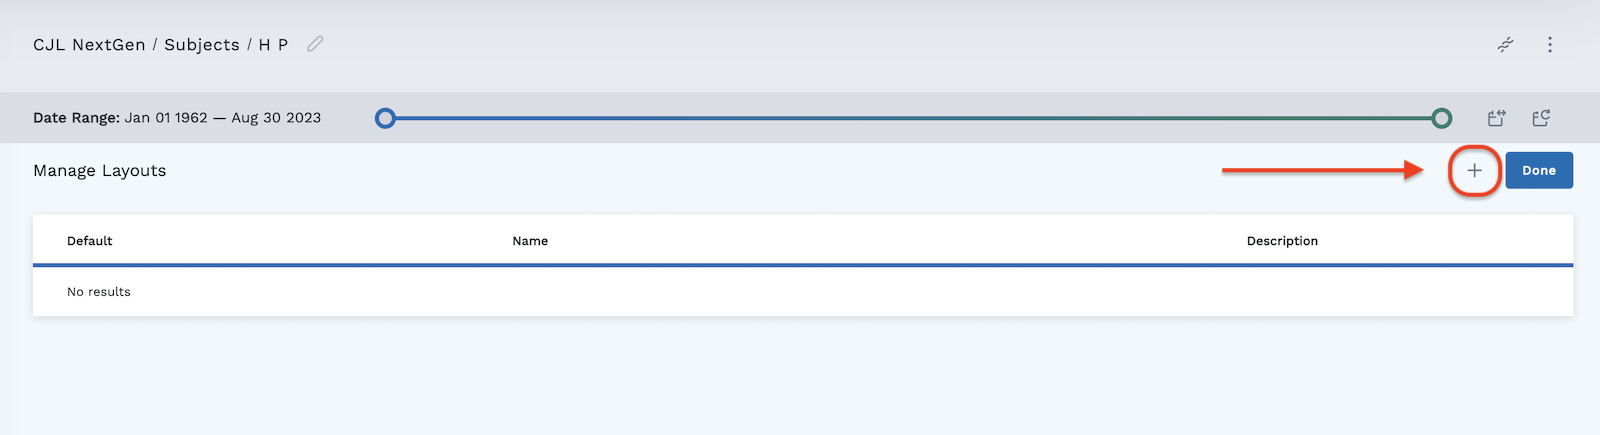
In the page that opens, click on the "+" to add a new layout.
-
The next page that opens is the Add a Layout page.
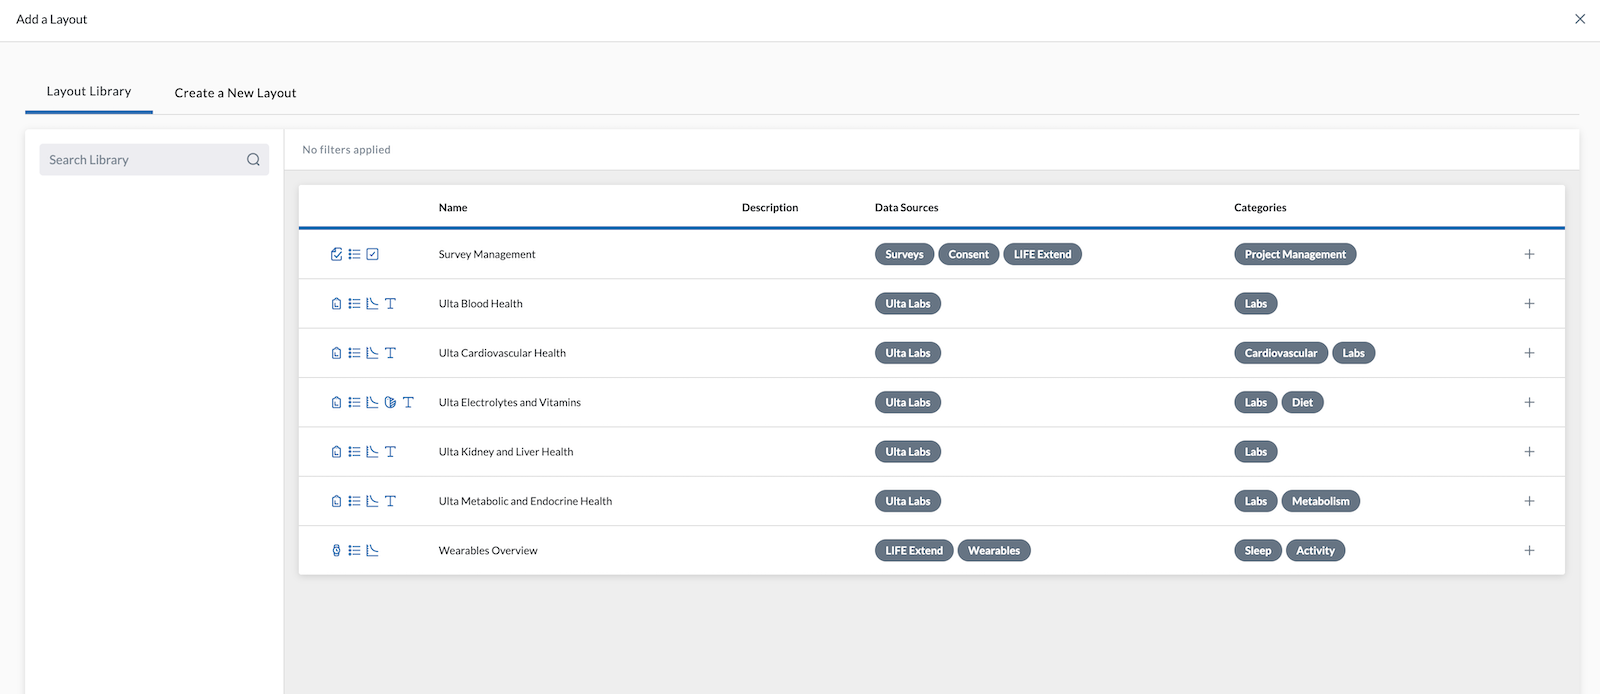
Here you can choose from:
-
Layout Library search box - Type in keywords to find a pre-configured layout (these keywords can include categories, data sources, title, and so on).
-
Layout Library tab - Users can scroll through a table of pre-configured layouts. After finding the layout you wish, you can add it by clicking the "+" at the end of its row. Each row includes:
- Symbols - Each symbol represents a module found on the layout
- Layout Name
- Layout Description
- Data Source - This is where the data for the layout comes from
- Categories
-
Create a New Layout tab - This tab allows you to create and name a new layout.
-
-
Click on the Create a New Layout tab - a window will open where you can name your new layout and give a description (optional).
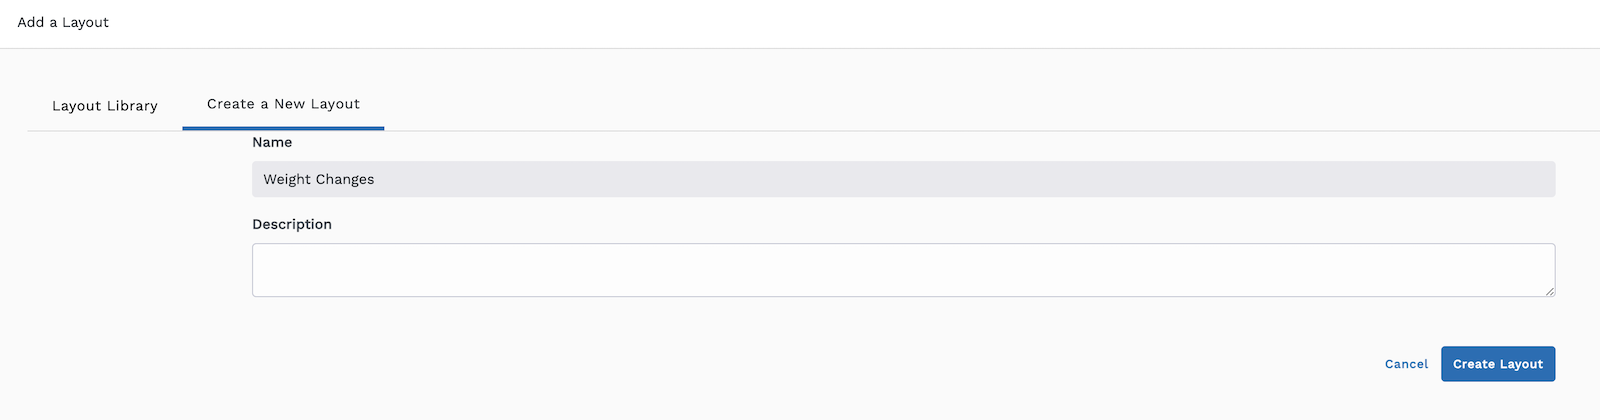
-
Click the Create Layout button at the bottom right of the window. You will now be directed to the Manage Layouts page where you will see your newly created layout.
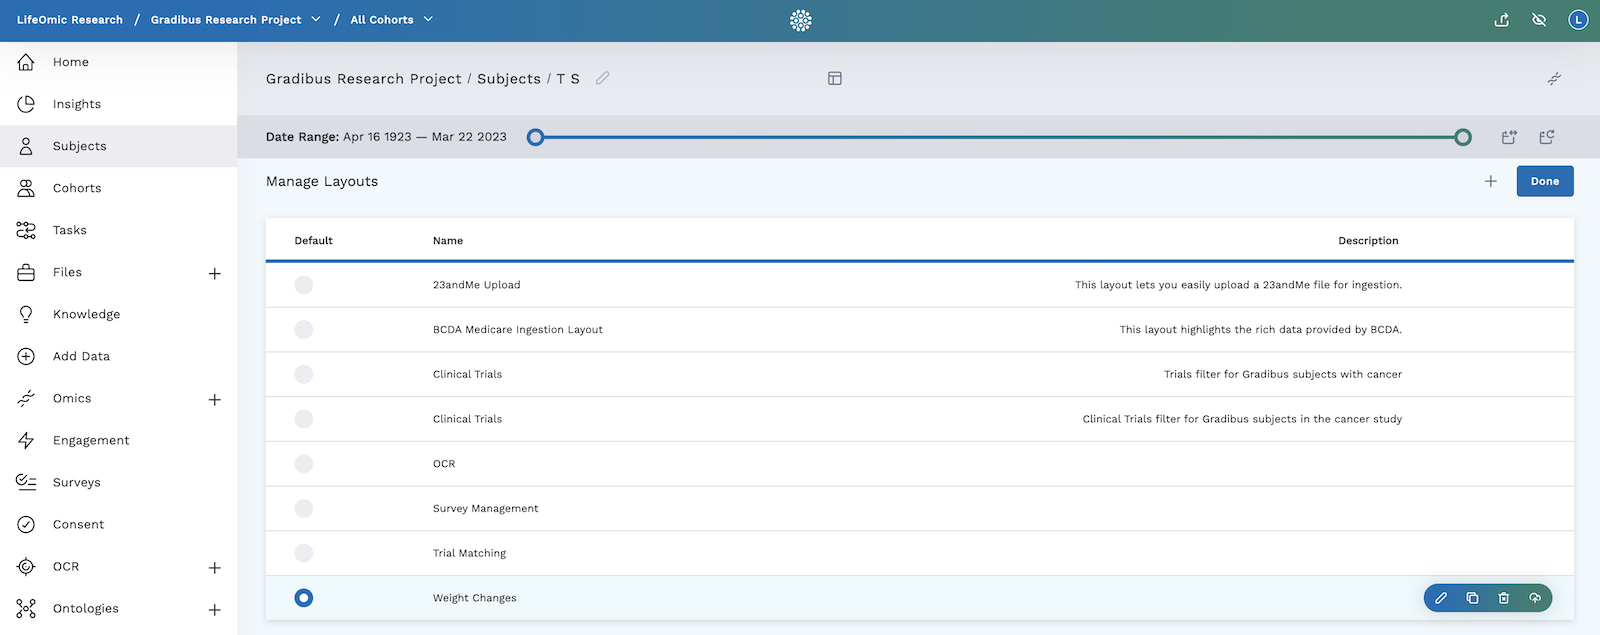
On the Manage Layouts Page you can:
-
Set a layout as the default layout by clicking the button beside the layout name.
-
Continue to add more layouts by repeating steps 4-7 above.
-
Have quick access to Edit, Copy, Delete, or Publish. These hover buttons appear when you place your cursor in the layout row.
-
Edit the title and description of a layout.
-
Copy a layout.
-
Delete a layout.
-
Publish a layout to the Marketplace. After clicking Publish, a dialog box appears asking "Are you sure you want to publish the (layout name) layout to the marketplace? This will make the layout available to all other accounts." Click Publish again to finalize publication to the Marketplace, or click Cancel. To learn more about working with layouts in the Marketplace, visit the Marketplace Overview.
-
-
-
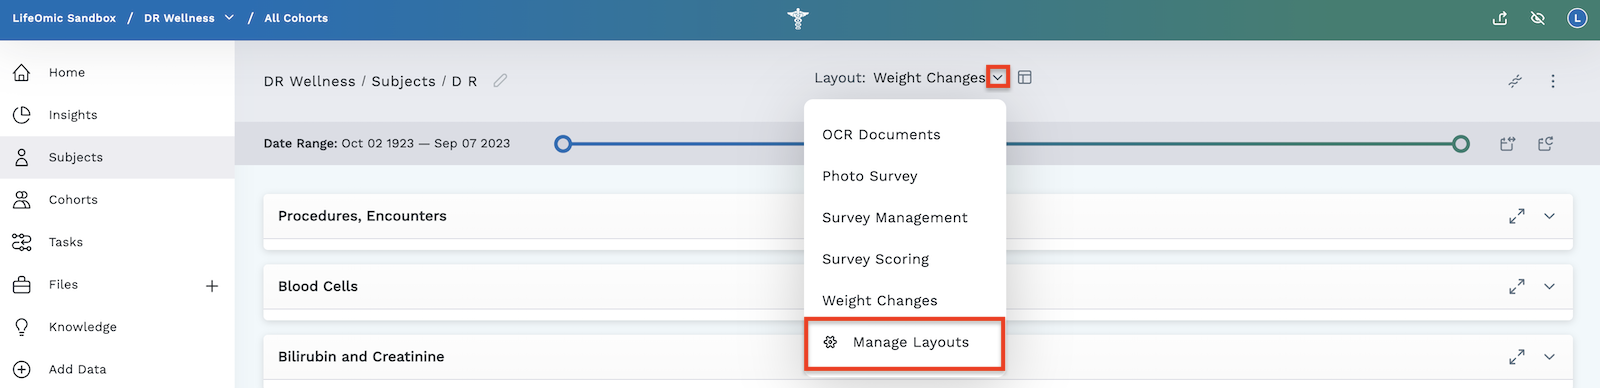
Click the Done button. If this is your only layout, the window that opens will show your new empty layout. If you have other layouts and a different one opens, you can navigate to your new menu by clicking the expand icon in the header and selecting the new layout name.
You can open the Manage Layouts page at any time by clicking the in the header and selecting the Manage Layouts option at the end of the list of added layouts.
Customizing and Adding Modules to the New Layout
-
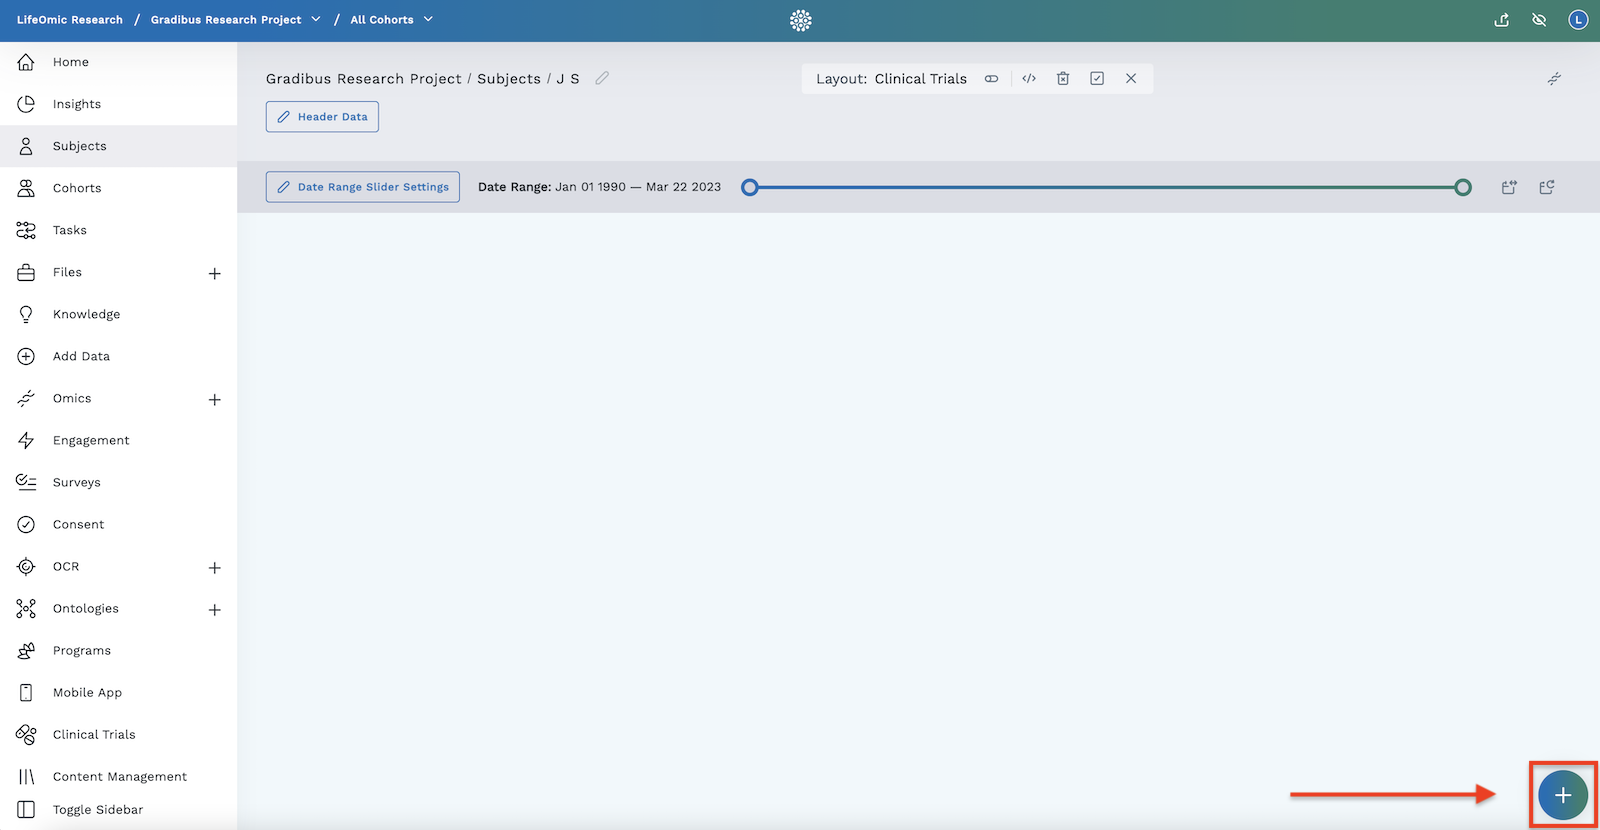
Click the Edit Layout icon in the page header. This will:
- Allow you access to the round Add Module button found at the bottom right of the screen.
- Open a toolbar with other options to edit your current layout.
-
Add modules and customize your layout by clicking the Add Module button in the bottom right and choosing from the two tabs at the top left of the Add a Module page:
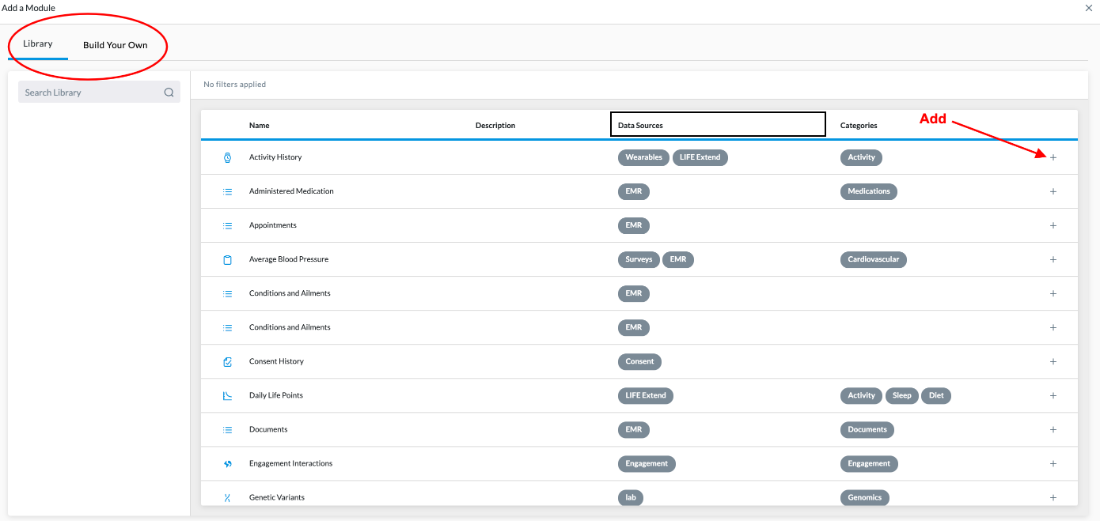
- Library - Scroll through a library of pre-built modules and add the module you wish by clicking the "+" at the right side of the module row. A message stating it's been successfully added will flash across the top of the screen. You can continue adding modules or close this page and return to your layout by clicking the "x" in the top right corner of the page.
- Build Your Own - Allows you to create your own module using our module building tools. To learn more about all the types of available modules, visit the detailed section on Build Your Own Module Types.