Add Subject Data Overview
The Add Data tab on the left side of the LifeOmic Platform lets you use a CSV file to import names and demographic information. The imported individuals become the subjects and members of the project that the admin is logged into.
If you want to add the subject to an additional project, complete the Add a user to a group with the Users tab procedure.
For adding files with SFTP, Amazon S3, and the LifeOmic Platform app, see Files.
The imported data is Patient resource data (STU 3 of the FHIR Specification).
-
Click the Add Data tab on the left of the screen.

-
Click the Download CSV Template button in the box labeled "1".
-
The template opens in the designated application on your computer such as Excel.

-
Complete the spreadsheet with the information for your subjects and follow these guidelines:
- Caution: Do not type over the first row of the spreadsheet that contains the formatted cells. Add new rows below this existing row.
- Match the format of your input to the template to avoid errors. If you get the formatting wrong, you will get an error message when importing the data.
- The phone number and DOB/DOD formats are shown in parentheses on the template. Take care to match the format AND include the parentheses. Not doing so will result in an incorrect formatting and an error importing the file.
- If you are missing information, you can add it later.
- An email address is required to send the individual an invitation.
- #ID - This is the subject ID in the LifeOmic Platform and is a UUID like
bb8dbda4-90b0-4aa9-8146-38e916d0802a. This ID matches the ending of the URL of the subject's subject viewer page. If you do not provide an ID#, the application assigns one.
-
Save the CSV file to your computer.
-
Return to the Add Data page and click the Upload CSV button in the box labeled "2".
-
Select the file you saved in Step 5 and click Open.
-
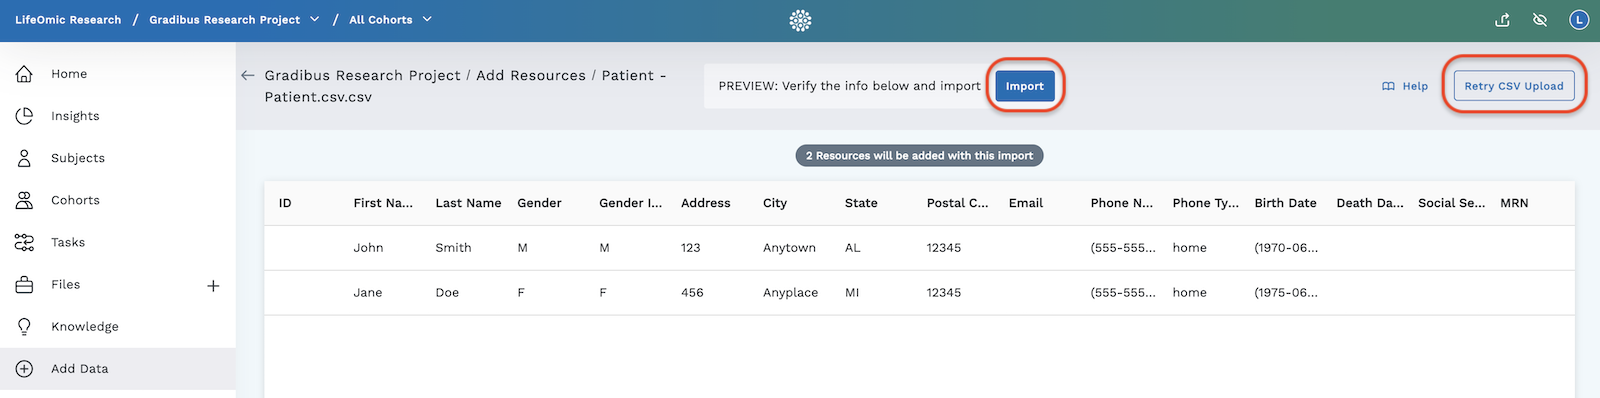
The LifeOmic Platform previews the import data. If you've forgotten some data, have more subjects to add, or need to change the format of the information, return to the CSV file, make those edits, and save them. Then return to the Add Data page you were previously on and click Retry CSV Upload. The table should update with the changes.
-
When everything looks correct, click the Import button in the blue header.
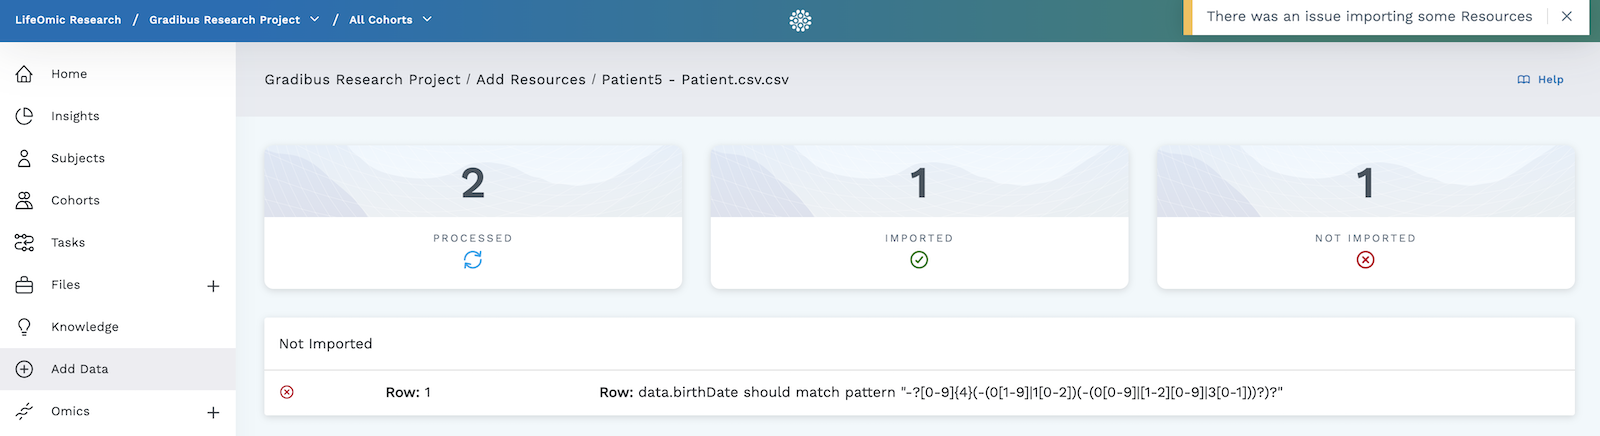
Note: If you've formatted something incorrectly, you will get an error message similar to the image below. Click Done then repeat step 7 until this no longer persists.
-
If you have everything successfully formatted, you will get a success message.

-
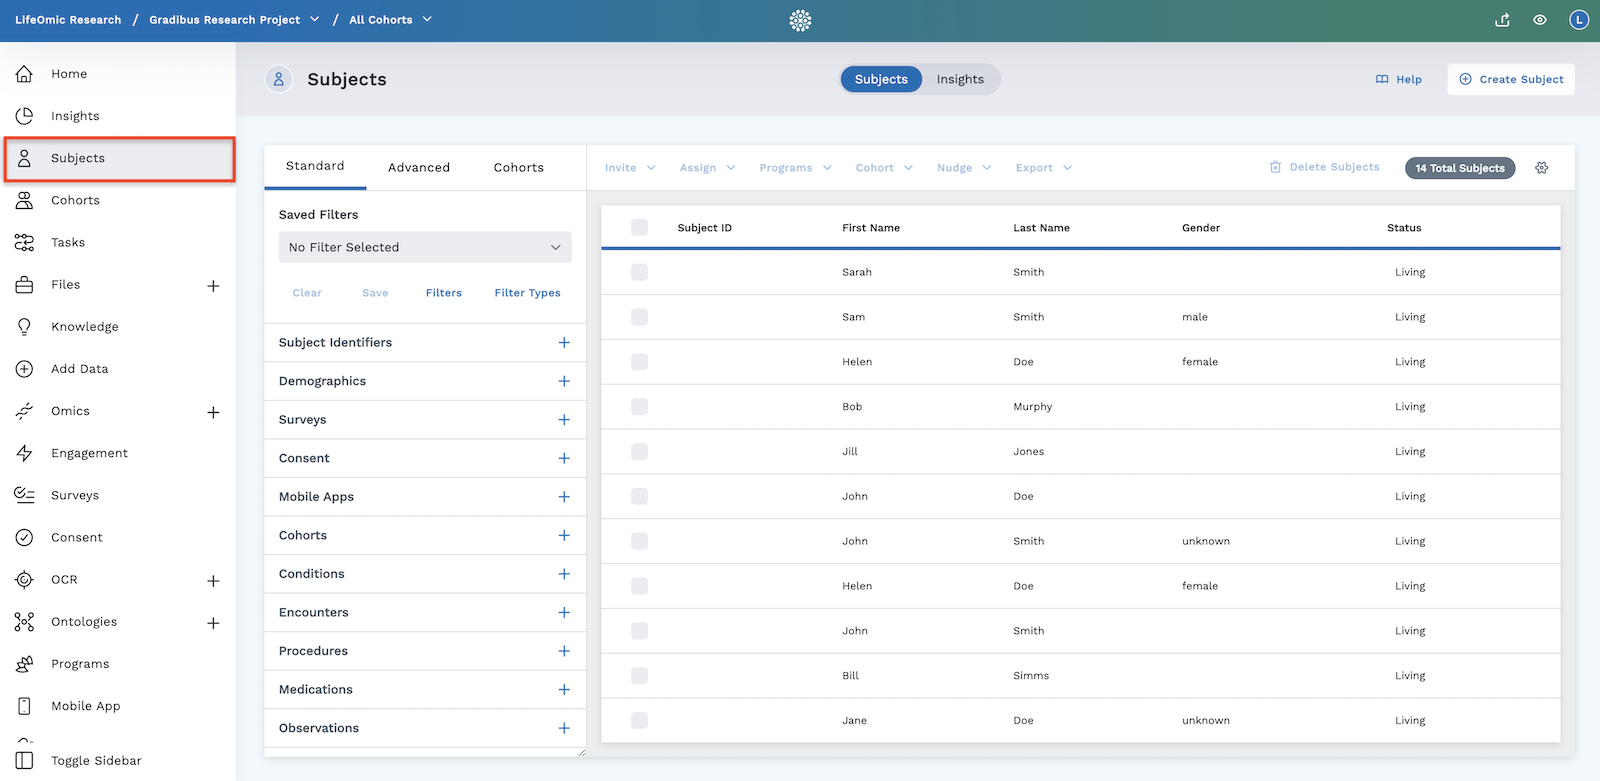
Verify the addition of the subjects to your project by clicking on the Subjects tab on the left side of the application. You should see your new subjects in the table.