Survey How-to Guide
Add a Survey to your Project
Create a new survey for your project.
-
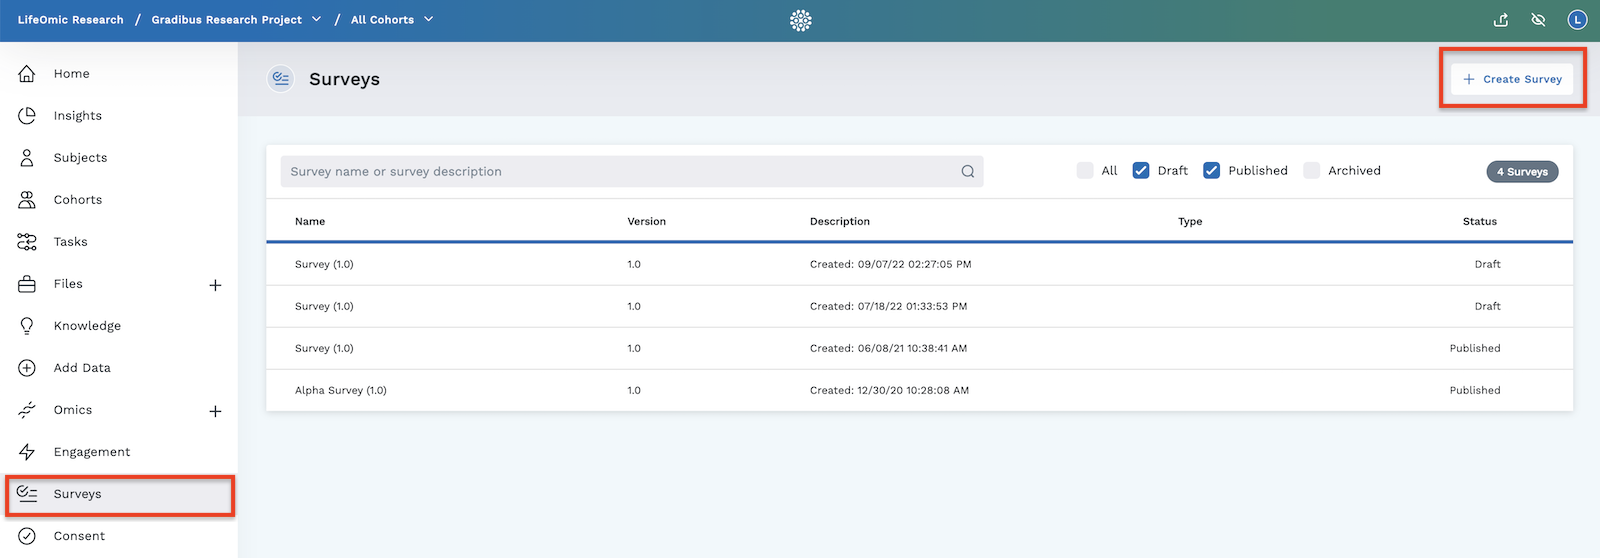
From the top left corner of the LifeOmic Platform, select your project.
-
On the left side of the screen, click the Surveys tab.
-
Click the Create Survey button in the top right corner of the survey screen.
-
To hide this survey from subjects, click the Internal Survey check box. Leave it unchecked if you wish the subject to view and answer the survey questions. An internal survey example is a list of questions a nurse asks the subject.
noteA LifeOmic Platform admin can still respond to a survey on behalf of a subject even if it is not marked as an internal survey.
-
In the Details box, click the Edit icon and enter a name and description. Click Save.
-
Click the Edit icon beside Page 1 to rename this page of your survey from the default Page 1 (optional). Click Save.
-
Add Custom Messaging (optional) to your Survey
You can choose to display custom text upon survey completion rather than the default message. See Custom Messaging for more details.
-
Add your Questions
Read more about Choosing your Questions in the detailed section below.
Custom Messaging
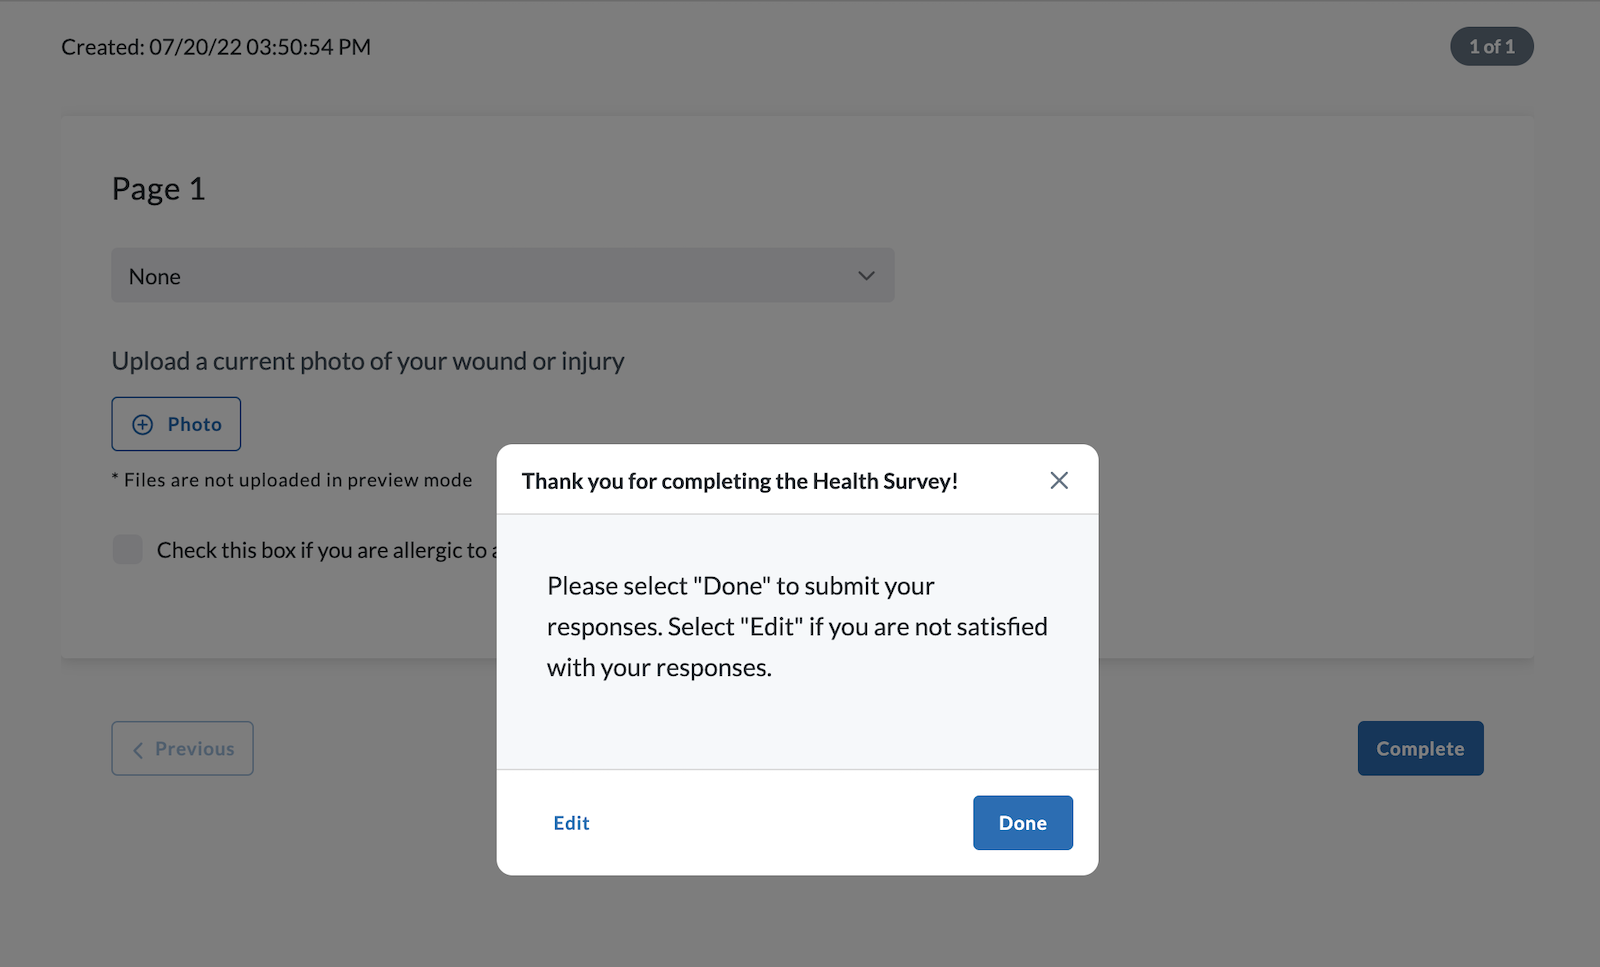
The default text box that displays when a subject finishes a survey in the LifeOmic Platform displays the message shown below.
To customize the submission message, click on the Custom Messaging section in the bottom left of the Survey Builder. You can only access this feature when your survey is in draft form. Once it has been finalized, you cannot change the submission message.
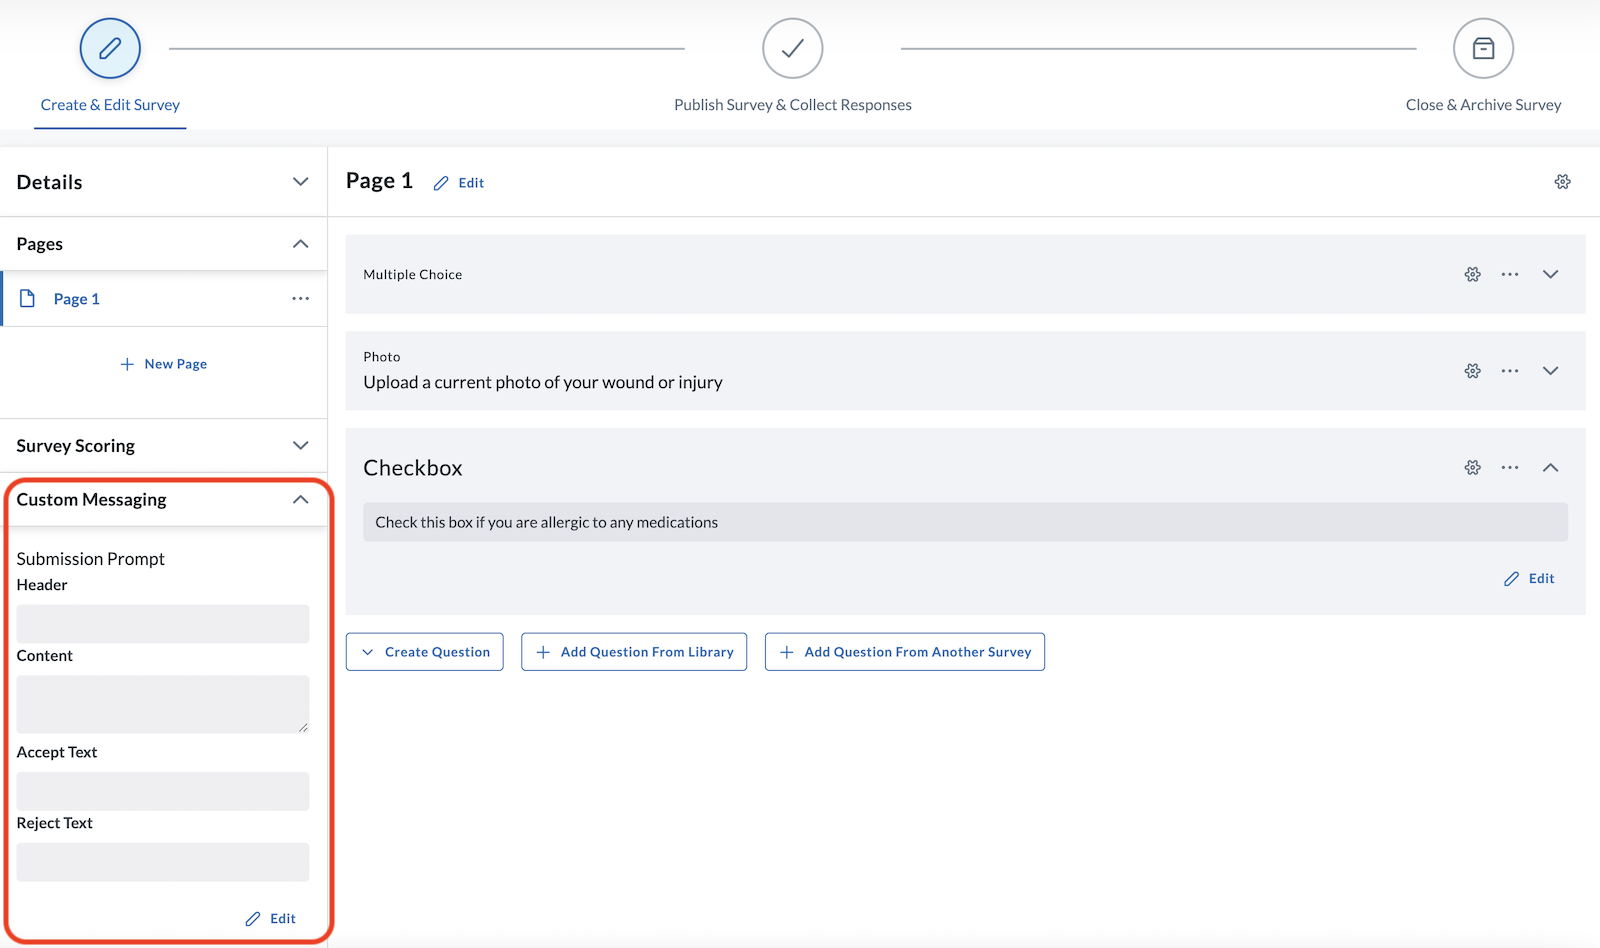
- Click the Edit button in the Custom Messaging section.
- Enter your custom Header, Content, Accept Text, and Reject Text. Accept Text replaces the wording on the "Yes, Submit" button, and Reject Text replaces the "Back to Survey" wording.
- Click Save.
- Follow the instructions to Preview your Survey if you'd like to view how your custom submission message will look before sending it out to recipients. See an example of a custom message below.
Choosing your Questions
When considering your question type, keep in mind your audience and the feedback you hope to collect. Response types can vary from open-ended text comments to Matrix/rating scales.
Not all response types are graphable. The easiest responses to graph are Matrix, Single Textbox with numeric answer option, and Multiple Choice.
-
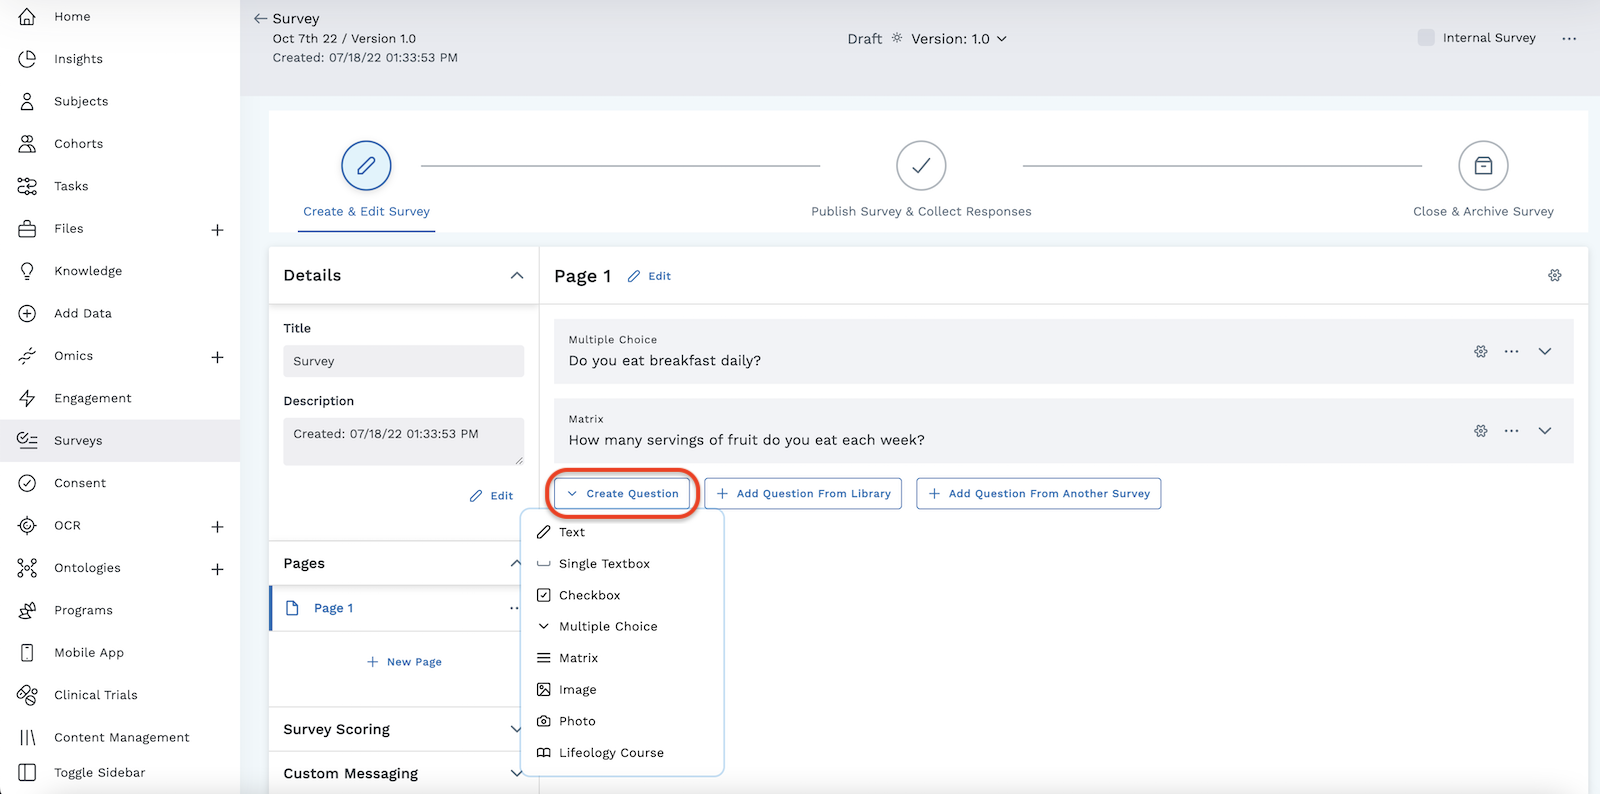
Click Create Question.
-
Select one of the following question types from the dropdown menu:
-
Text (formattable informational text only, no response)
-
Single Textbox (short text response)
-
Checkbox (single statement requiring a yes/no response such as "Click this box if you were a patient of Acme Medical in 2019.")
-
Image (informational image with optional caption, no response)
-
Multiple Choice (preset list of options for responses)
-
Matrix (rating scale response)
-
Photo (allows subject to upload a photo as a response)
-
Lifeology (allows you to add a Lifeology course to your survey)
-
It is good practice to use a single searchable term before your questions to later aid in the analysis of the data.
- Continue adding pages and questions to your survey, remembering to name your pages.
Publish the Survey
-
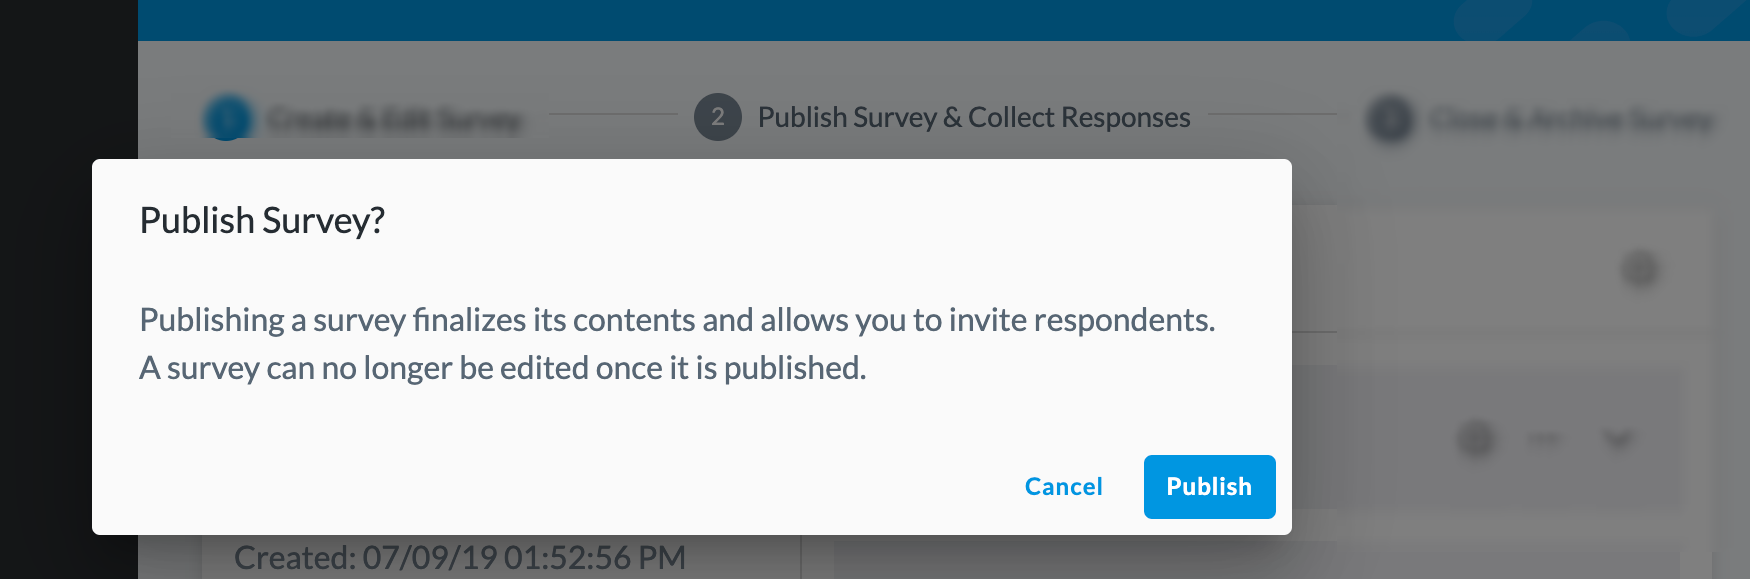
When you are finished adding your questions, Click the Publish Survey & Collect Responses tab.

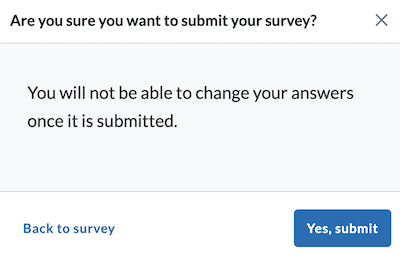
It will open a dialog box asking if you wish to Publish the survey. Once you click Publish, you will NOT be able to go back and edit the survey.
-
To learn more about sharing surveys with your participants, visit the detailed section on Assigning Surveys.
Once a survey is published, you can click on the Edit Survey button and access three additional survey tools:
- Alerts - Click to learn more about setting up custom alerts for your survey responses
- Schedule - Click to learn more about automated resending of your survey
- Notifications – Click the expand icon and select how your users will be notified of an assigned survey. Select from:
-
Email
-
Push notifications (mobile app)
If both are toggled on, your users will get both email AND push notifications.
-

Alerts, Schedule, and Notifications are only visible for setup if the survey has been published. If the survey is still in draft form, these options will not be visible.
To archive your survey, click the Close and Archive Survey tab.
 A dialog box appears with the message: Archiving a survey finalizes its contents. Archived surveys can return to a published status at any time.
Preview Surveys
You can preview your survey before sending it out to your participants.
- Select the draft or final survey you want to preview.
- Click the Edit Survey button at the top right of page to open the Survey Builder.
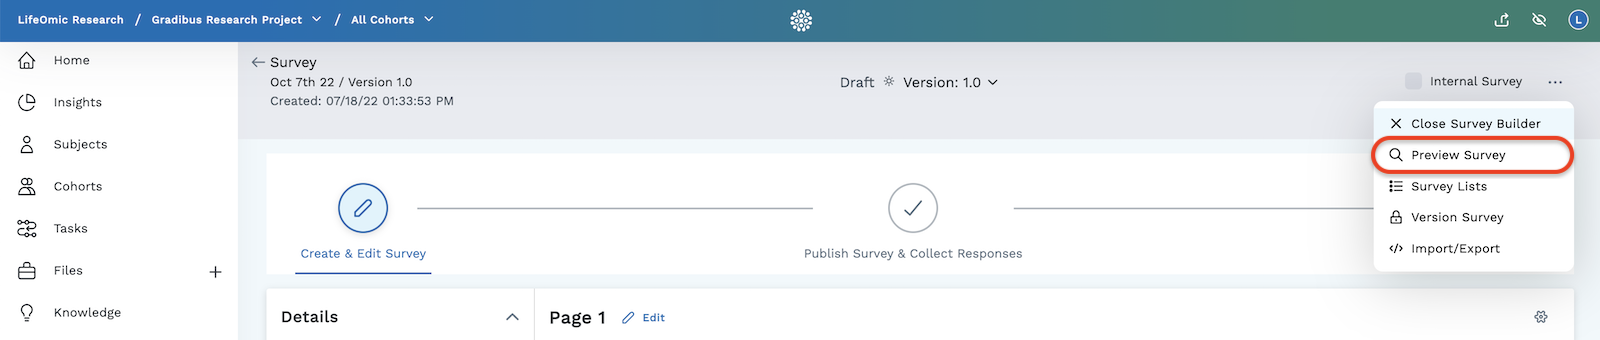
- Click on the three dots in the far right corner to open additional options.
- Select Preview Survey from the dropdown menu.
- You can move through the survey questions to see how the survey will appear to your participants.
To learn more about analyzing survey responses, see Managing Surveys.
Participant Side of the Survey
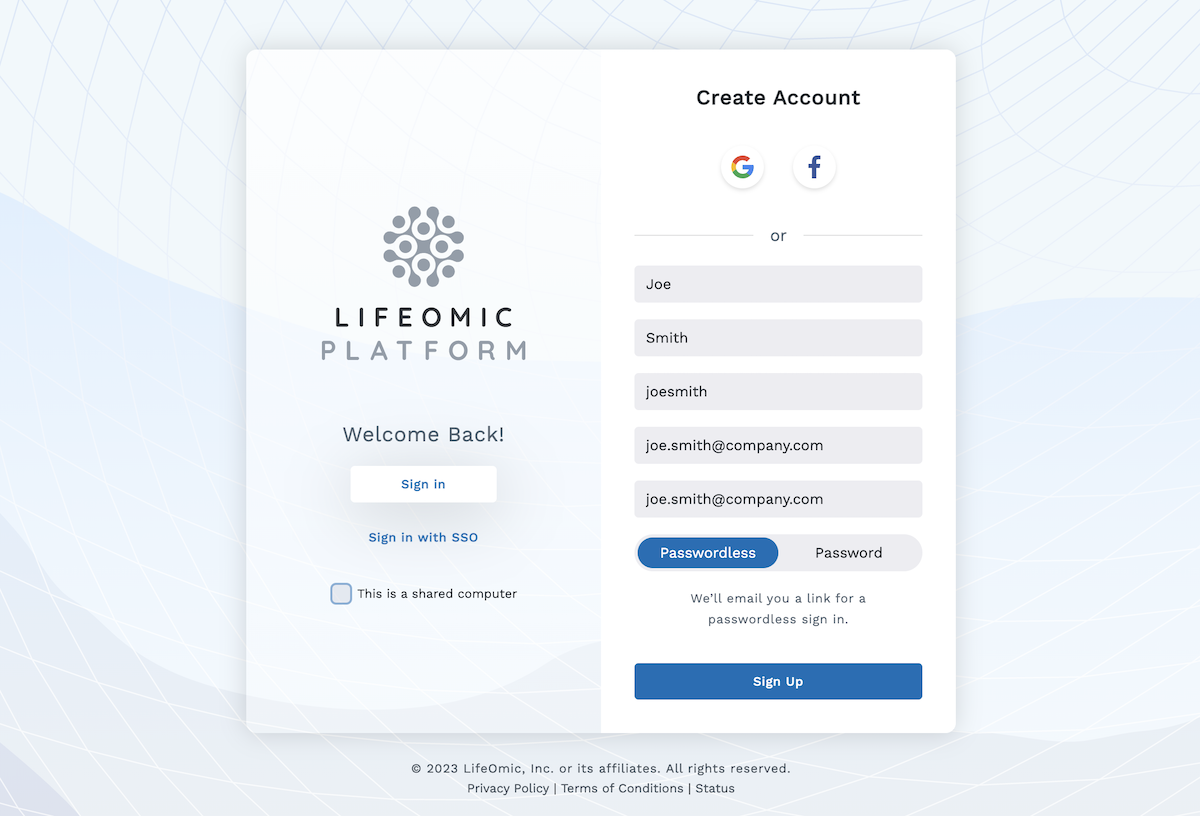
- Participants invited to your survey will receive an email inviting them to take the survey. After clicking the Signup or Login button within the email, participants will be taken to the login/signup page to log into the account they have created.
Survey participants accessing the survey from a shared link will be taken directly to the LifeOmic Platform login/sign up page.
-
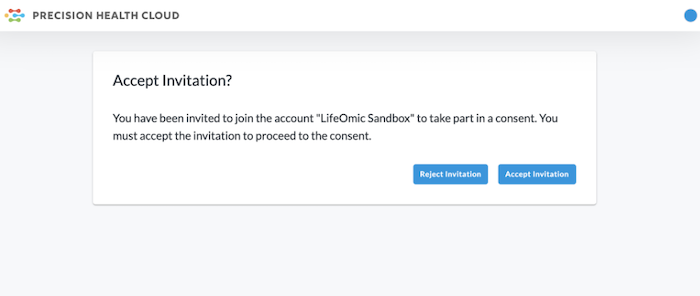
A dialog asks participants to either accept or reject the survey invitation. Clicking Accept Invitation takes them to the next step in the survey process.
-
If a Consent form is linked to the project, participants will be asked to reject or accept the terms of the consent. Clicking Accept Consent takes them to the next step in the survey process.
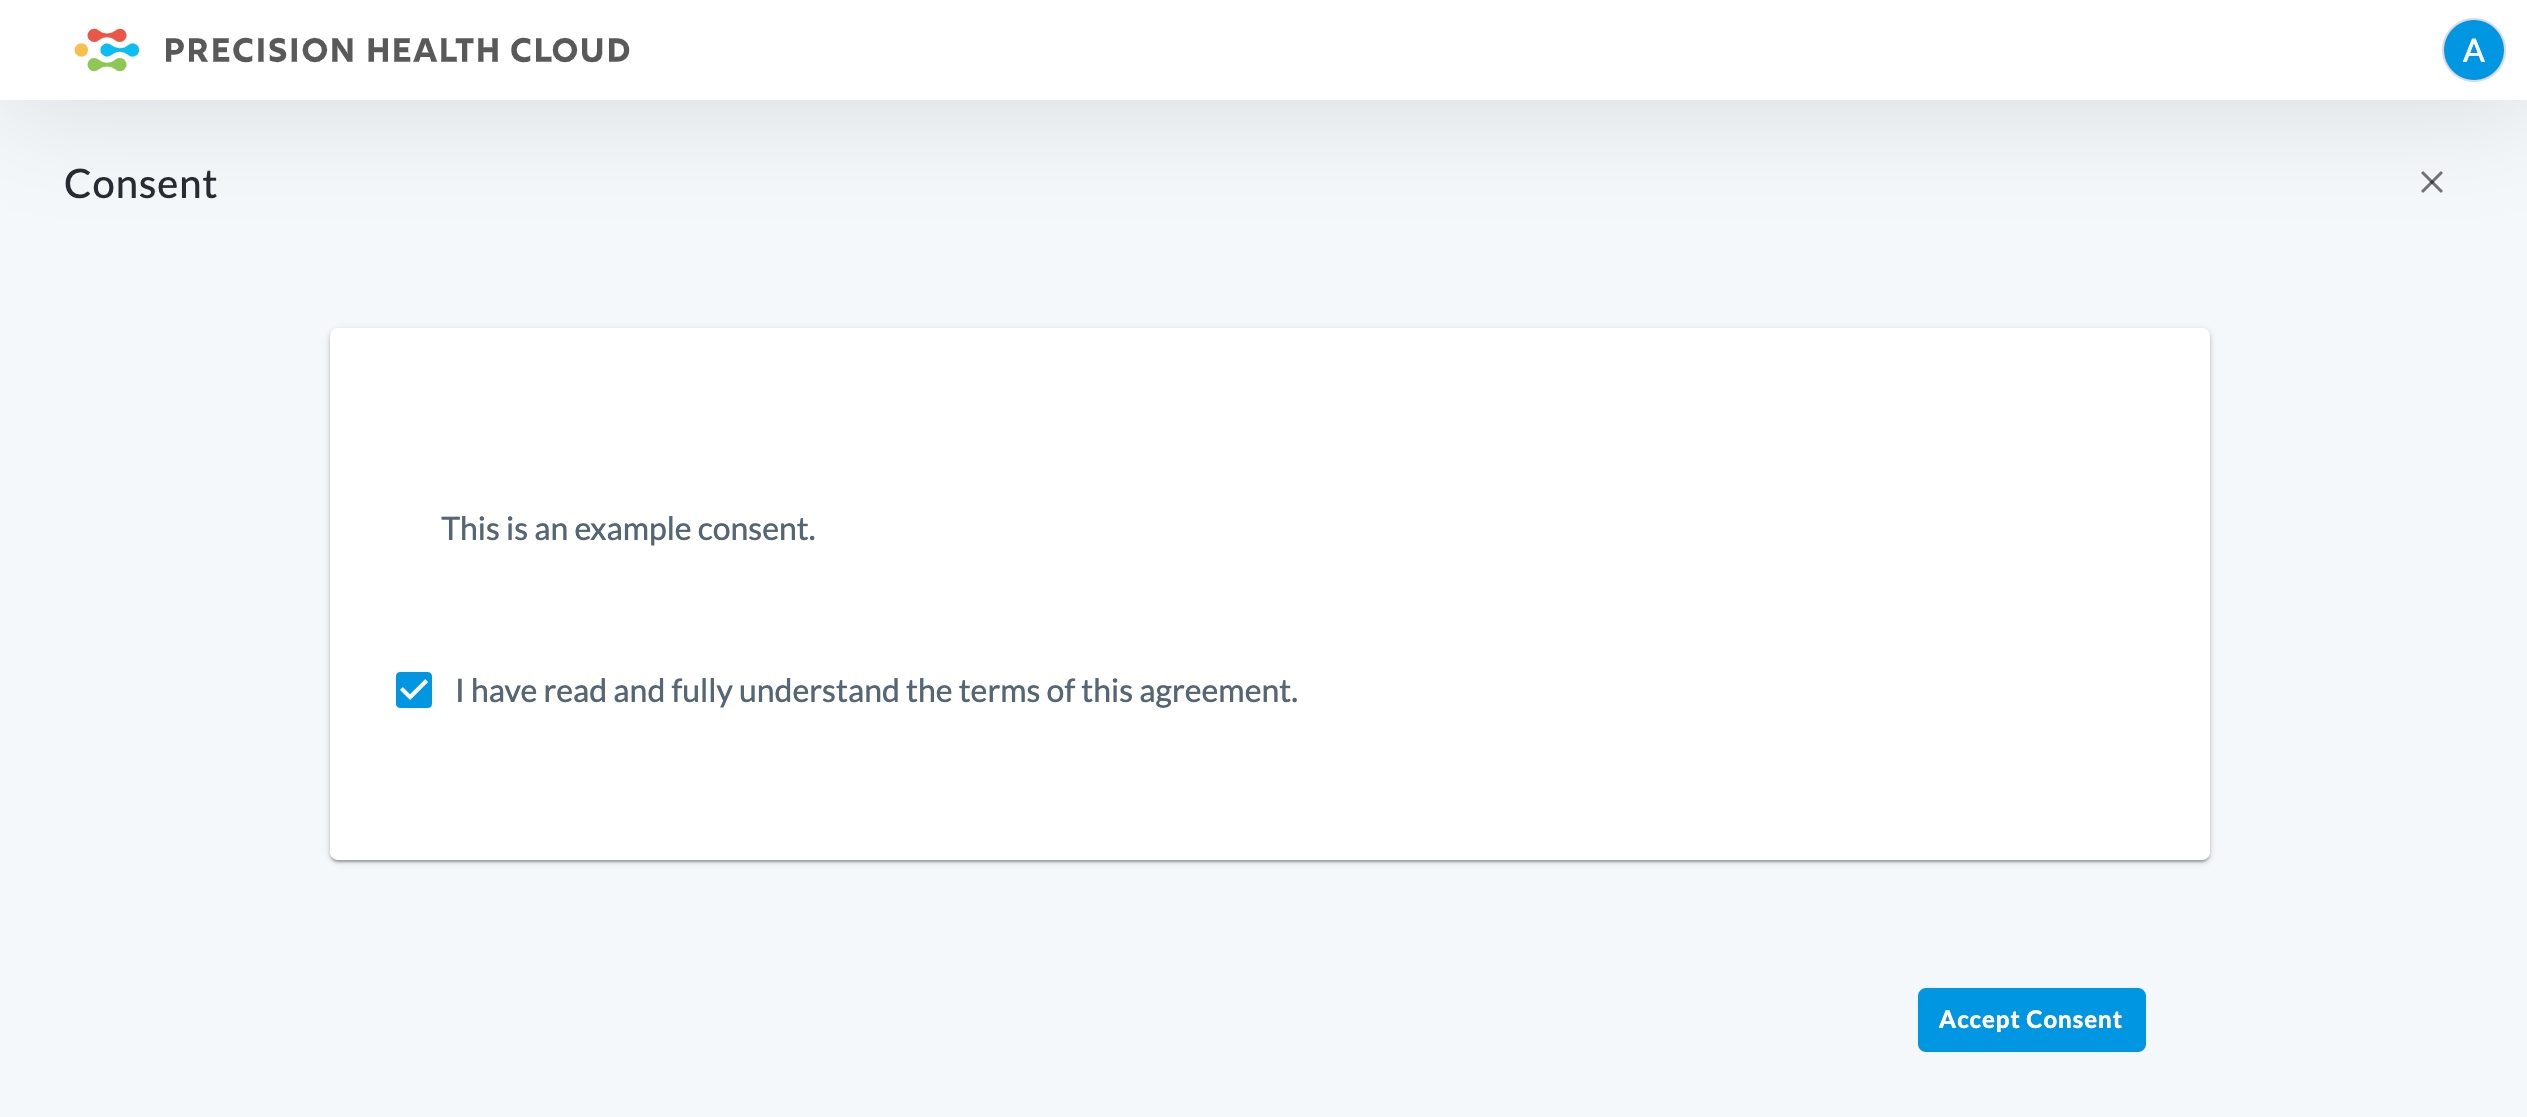
Note - If the project does not have a consent, they automatically start the survey.
-
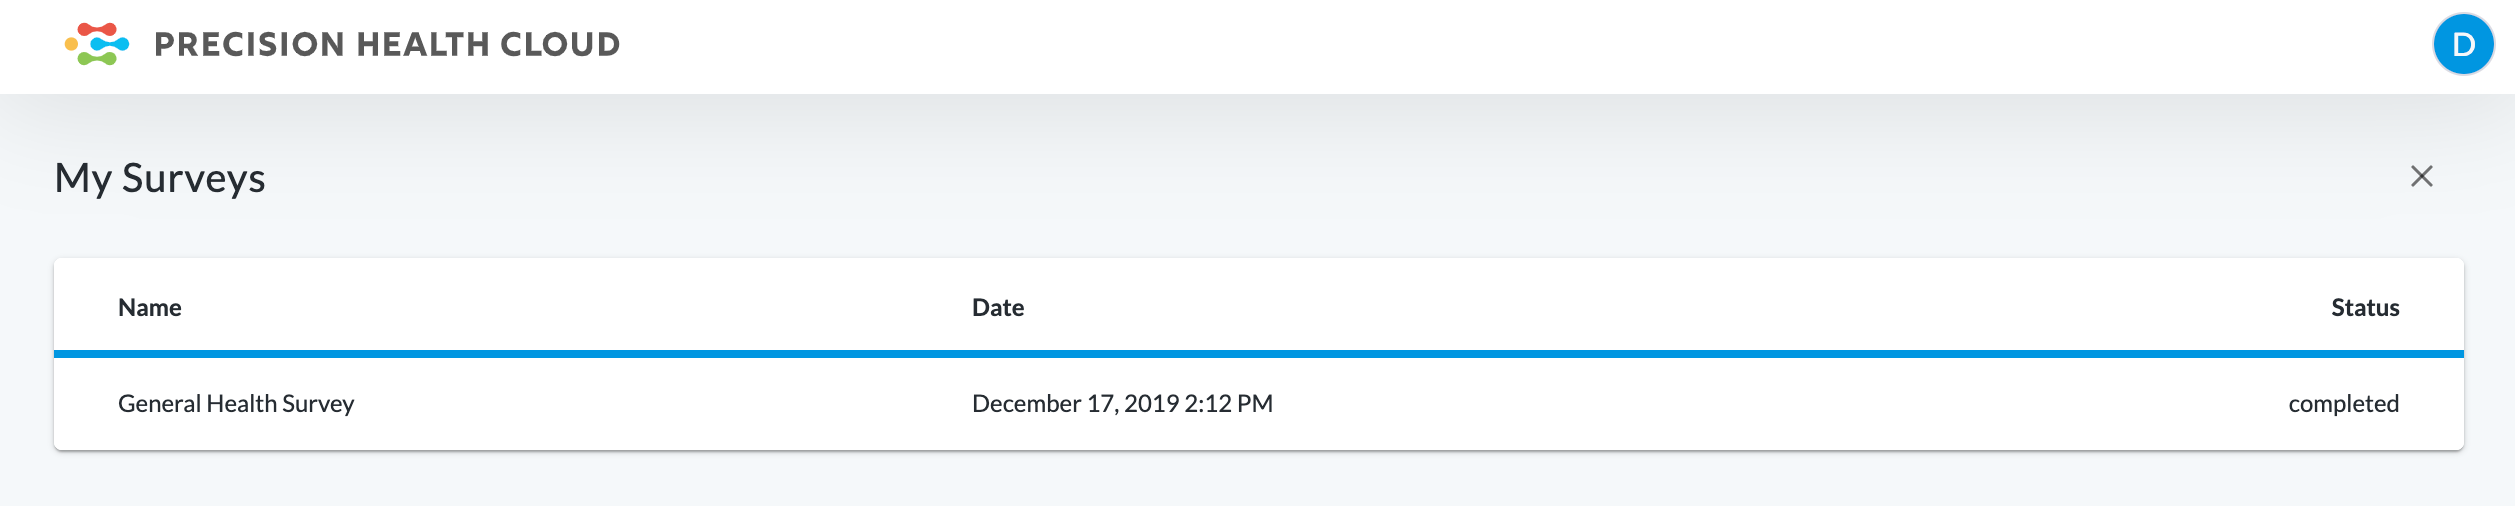
Participants complete the survey.
-
Once they have completed the survey and have clicked Submit, they will see the status has changed to completed.