Survey Alerts
Survey Alerts can be set up on published surveys to alert a user via email about a survey response.
The Alerts feature is only available for published surveys. This option is not available for surveys in the draft state.
How to set a Survey Alert
-
Click anywhere on the desired survey row to open the Manage Survey page.
-
Click on the Edit Survey button in the top right.

-
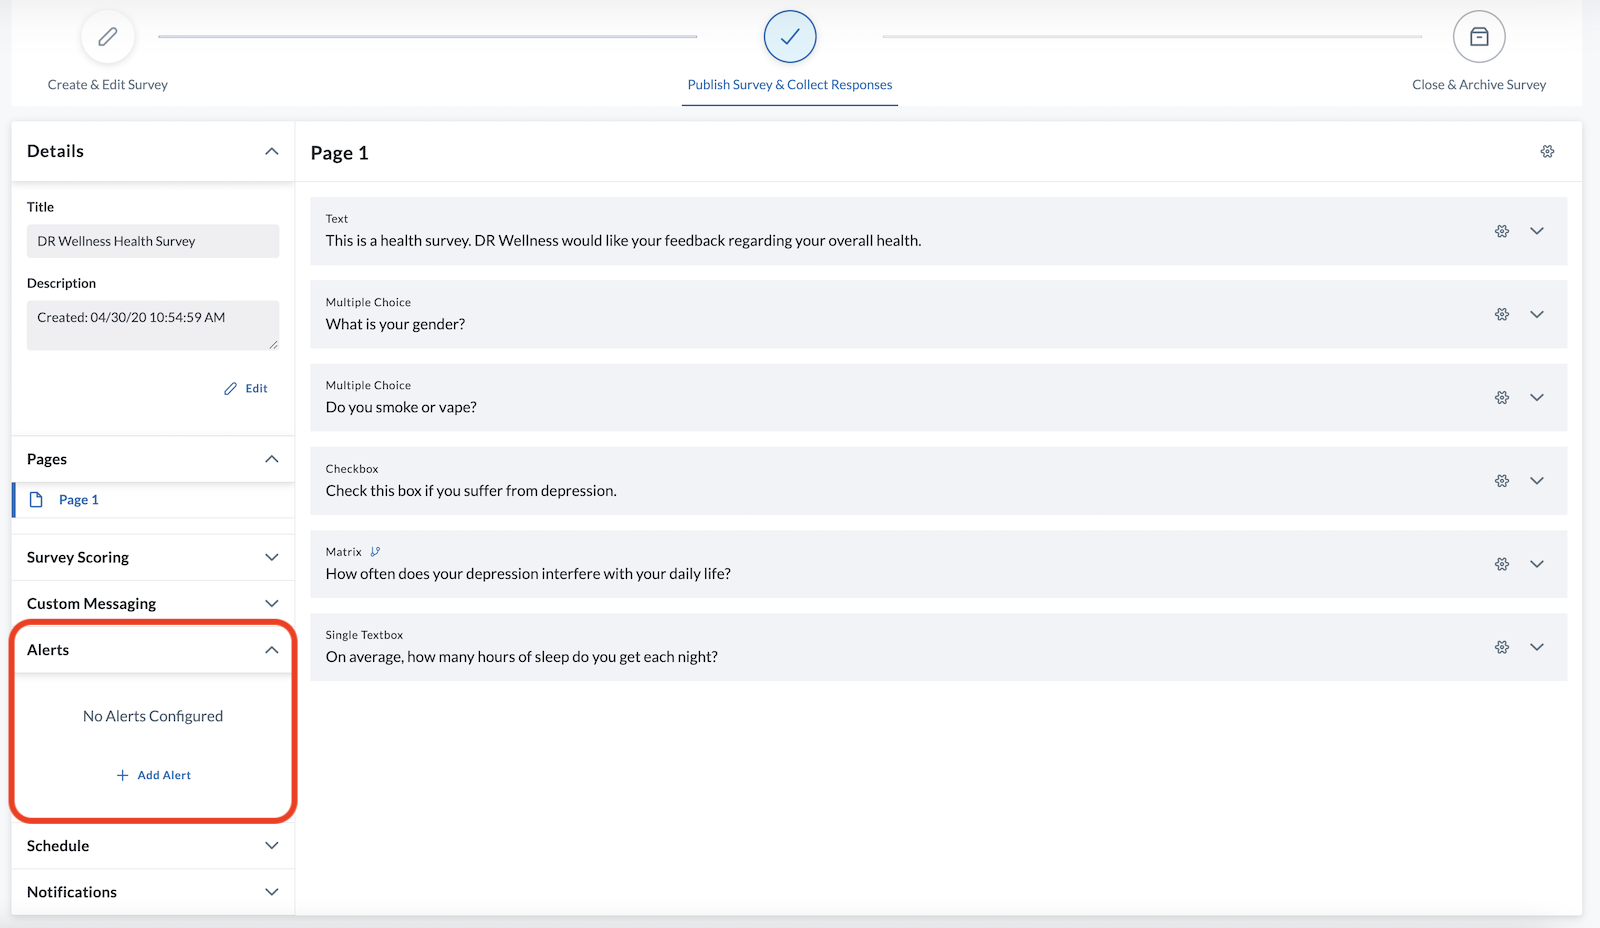
In the menu to the left of your survey questions, click the expand icon beside "Alert." This will open additional options.
-
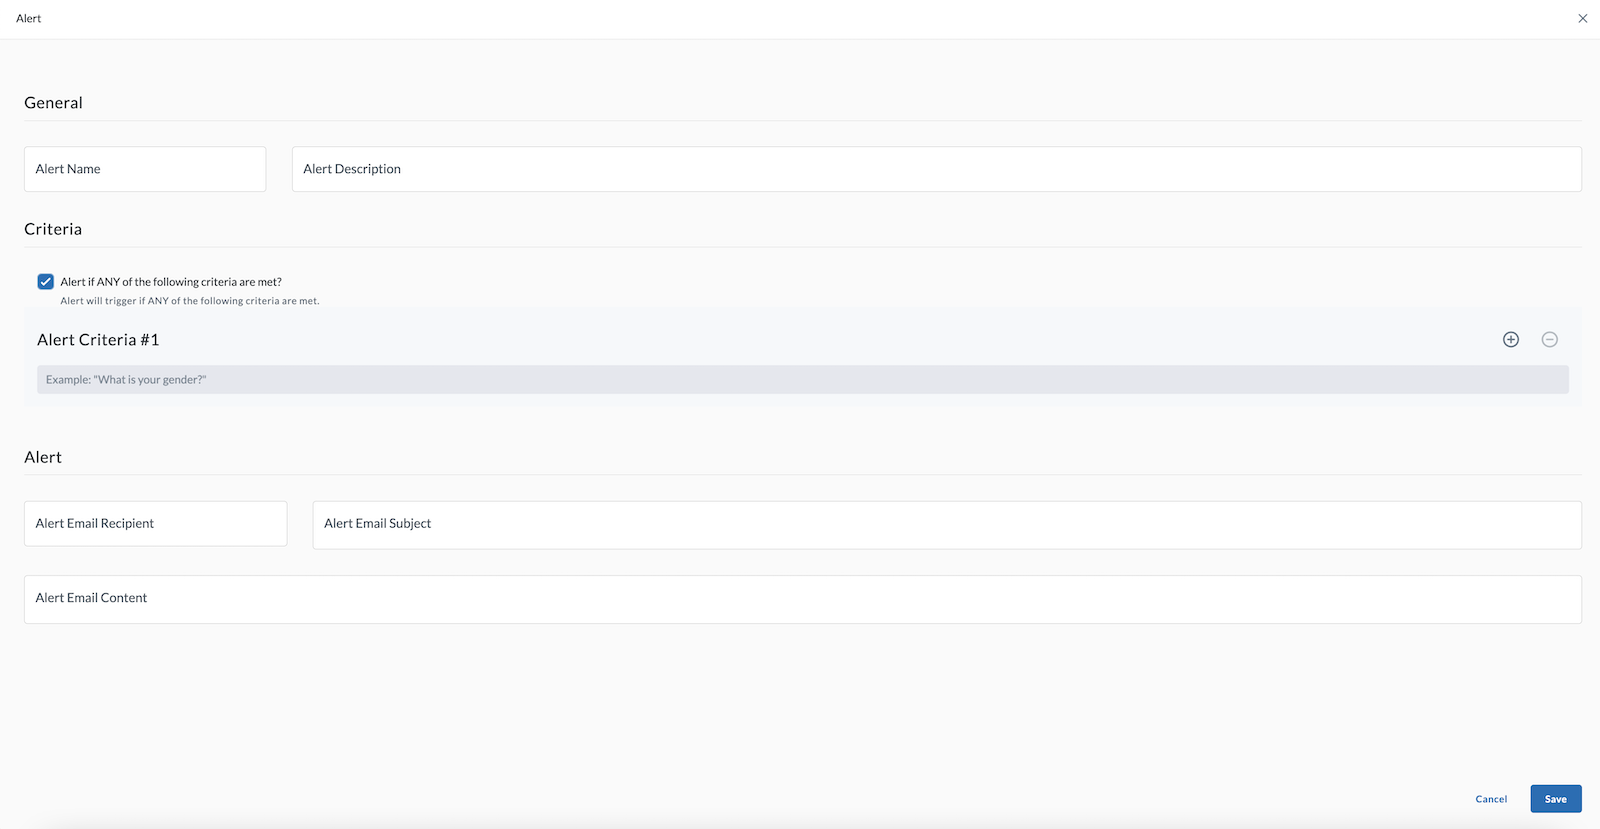
Click the + Add Alert button. This opens the Alert page.
-
Under General, give the following information:
- Alert Name - Name your alert (such as: "Wound selfie uploaded")
- Alert Description - Describe what is being alerted
-
Under Criteria, complete the following:
-
Check the box next to Alert if ANY of the following criteria are met? or leave it unchecked to have it Alert if ALL selected criteria are met.
-
Alert Criteria #1 – Click in this box and select a survey question you want to base your criteria on.
- Set your Value Comparison (options available depend on the question being asked).
- Equals
- Does not equal
- Less than
- Less than or equal to
- Greater than
- Greater than or equal to
- Set your Comparison Value (options available depend on the survey question, for instance, yes/no, no pain/slight pain/severe pain, and so on).
- Set your Value Comparison (options available depend on the question being asked).
-
-
To add more Alert Criteria, click the button. To delete an Alert Criteria, click the button.
-
Under Alert, fill out the following:
-
Alert Email Recipient – Type the email address of the person you wish to alert.
-
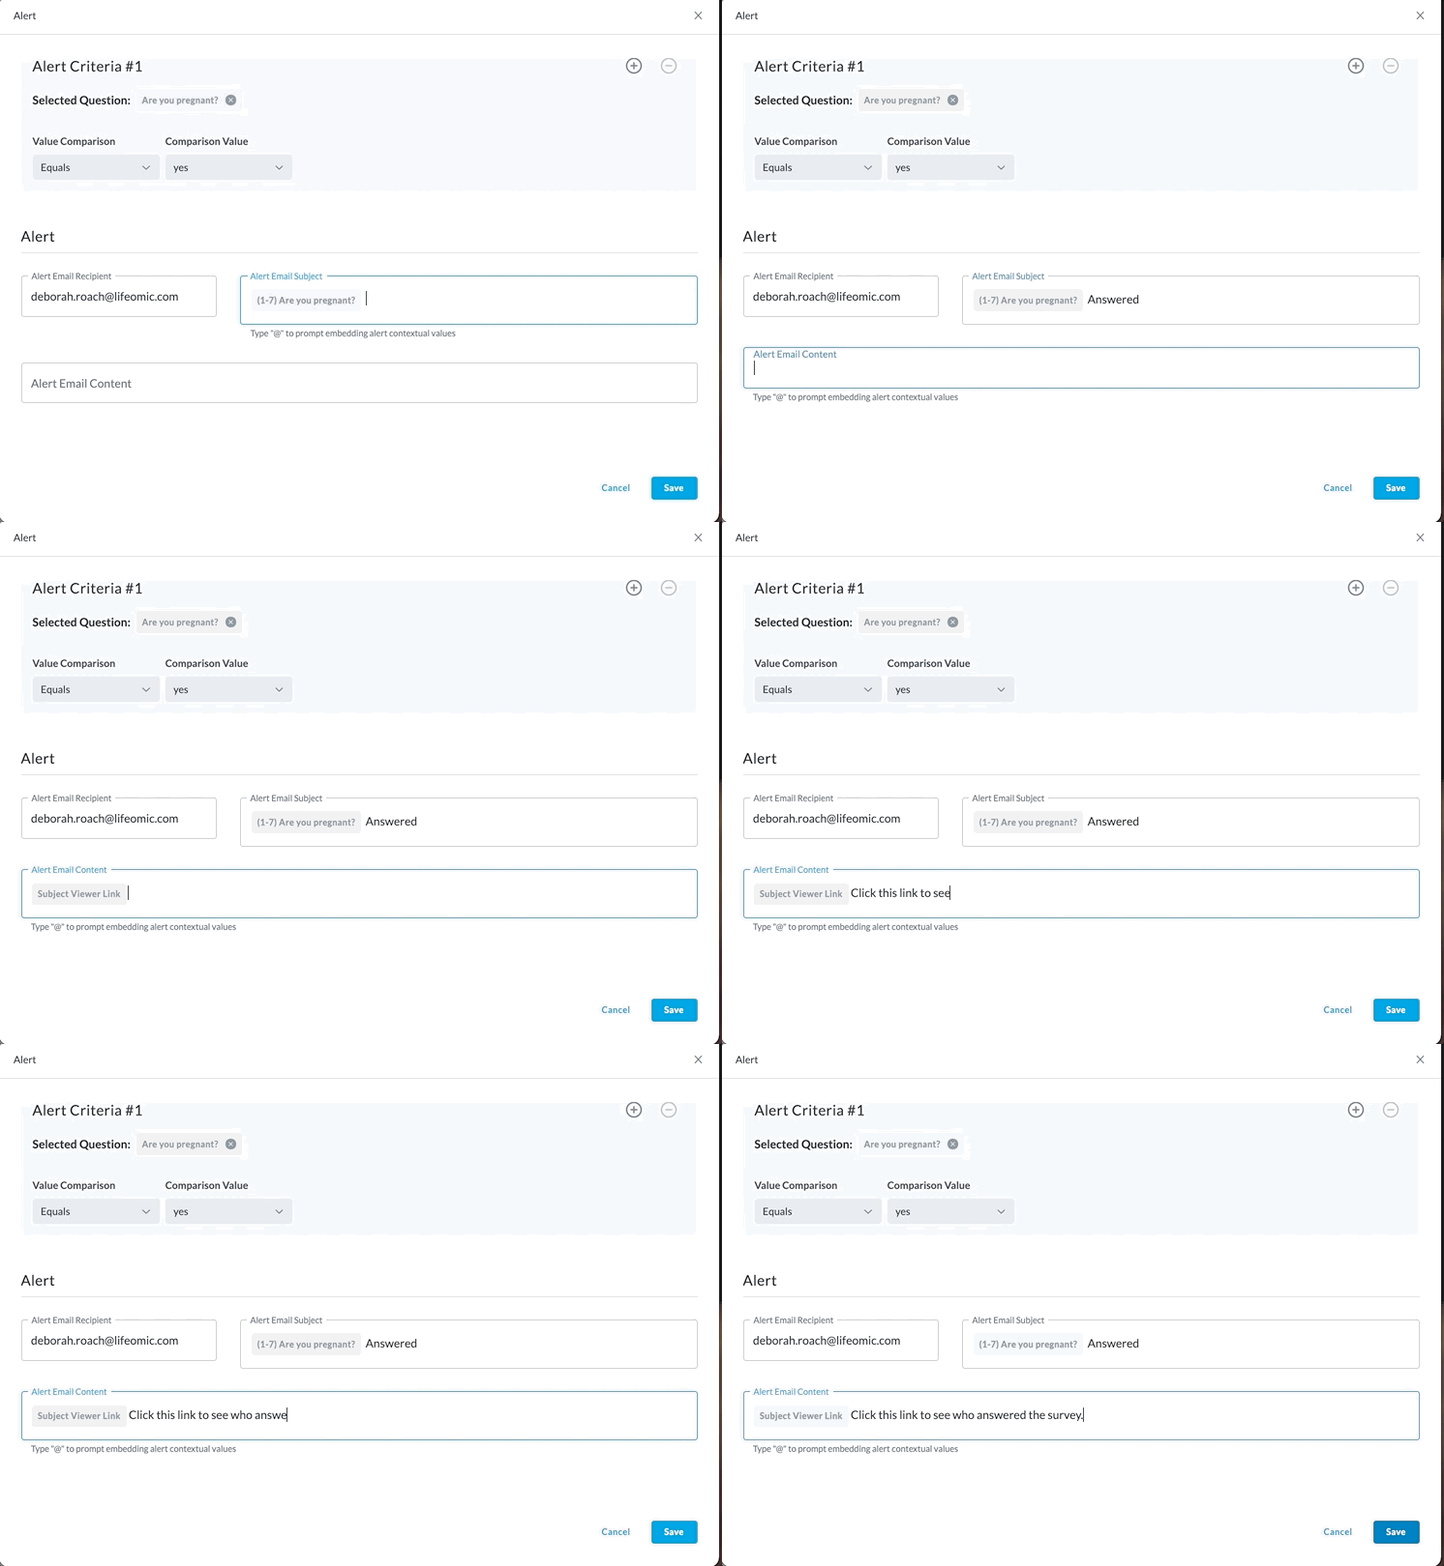
Alert Email Subject – Set the Subject line for the email (such as: "A patient has completed the post-surgical survey.") When you click in this box, the following tip appears: “Type ‘@’ to prompt embedding alert contextual values.” This allows you to select from the following preset links to include in the email:
- Subject Identifier (the survey respondent’s unique identifier within the LifeOmic Platform system)
- Survey ID (the name of the completed survey)
- Subject Viewer Link (a link to the respondent’s subject viewer dashboard)
In other words, using the “@” and one of the above selections provides a clickable link to that information within the LifeOmic Platform. It does not display the user's personal health information in the email.
- Alert Email Content – Type the text of the alert email. When you click in this box, you'll get the “Type ‘@’ to prompt embedding alert contextual values." This allows you to choose from the options provided.
-
-
-
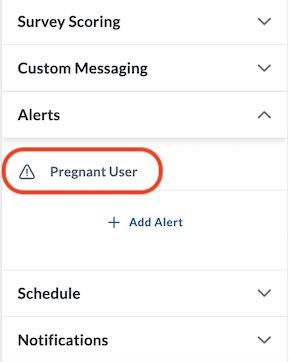
Click Save. The survey page now shows the alert you created.
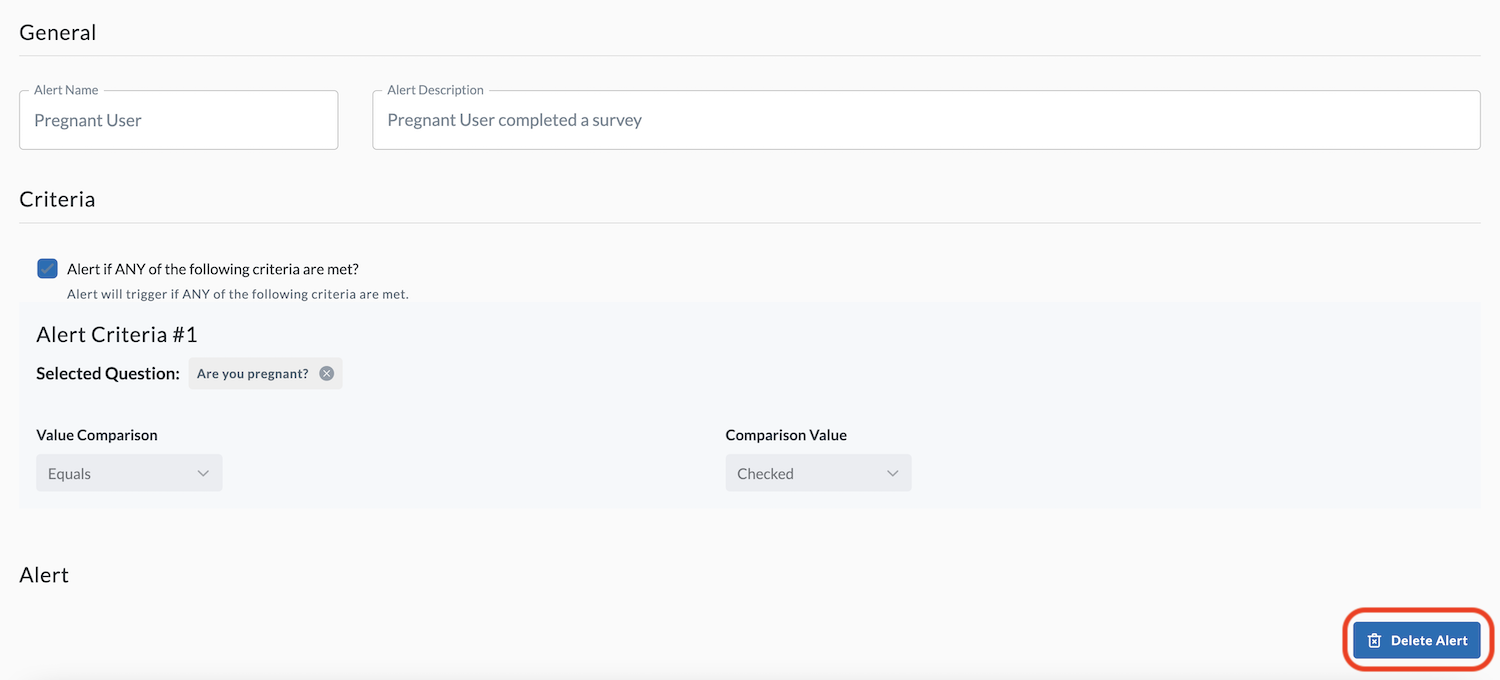
Delete Survey Alert
- On the survey page, find the alert you wish to delete in the left column and click it.
- The alert page opens. Click the Delete Alert button at the bottom right of the page.
