Organize your Document
These operations are found under OCR > Settings > Organization.
Enable Document Organization
A faxed patient record can contain multiple document types in a single file. Classifying these sections creates a linked table of contents for the document. You can also configure OCR to attempt to classify the document on import.
-
Under the OCR tab on the left side menu, click Settings.
-
Click the Organization tab.
-
Under Organization, click Classification on, or Advanced Organization.
-
Click Update Settings.
-
Import a document or open an existing document.
-
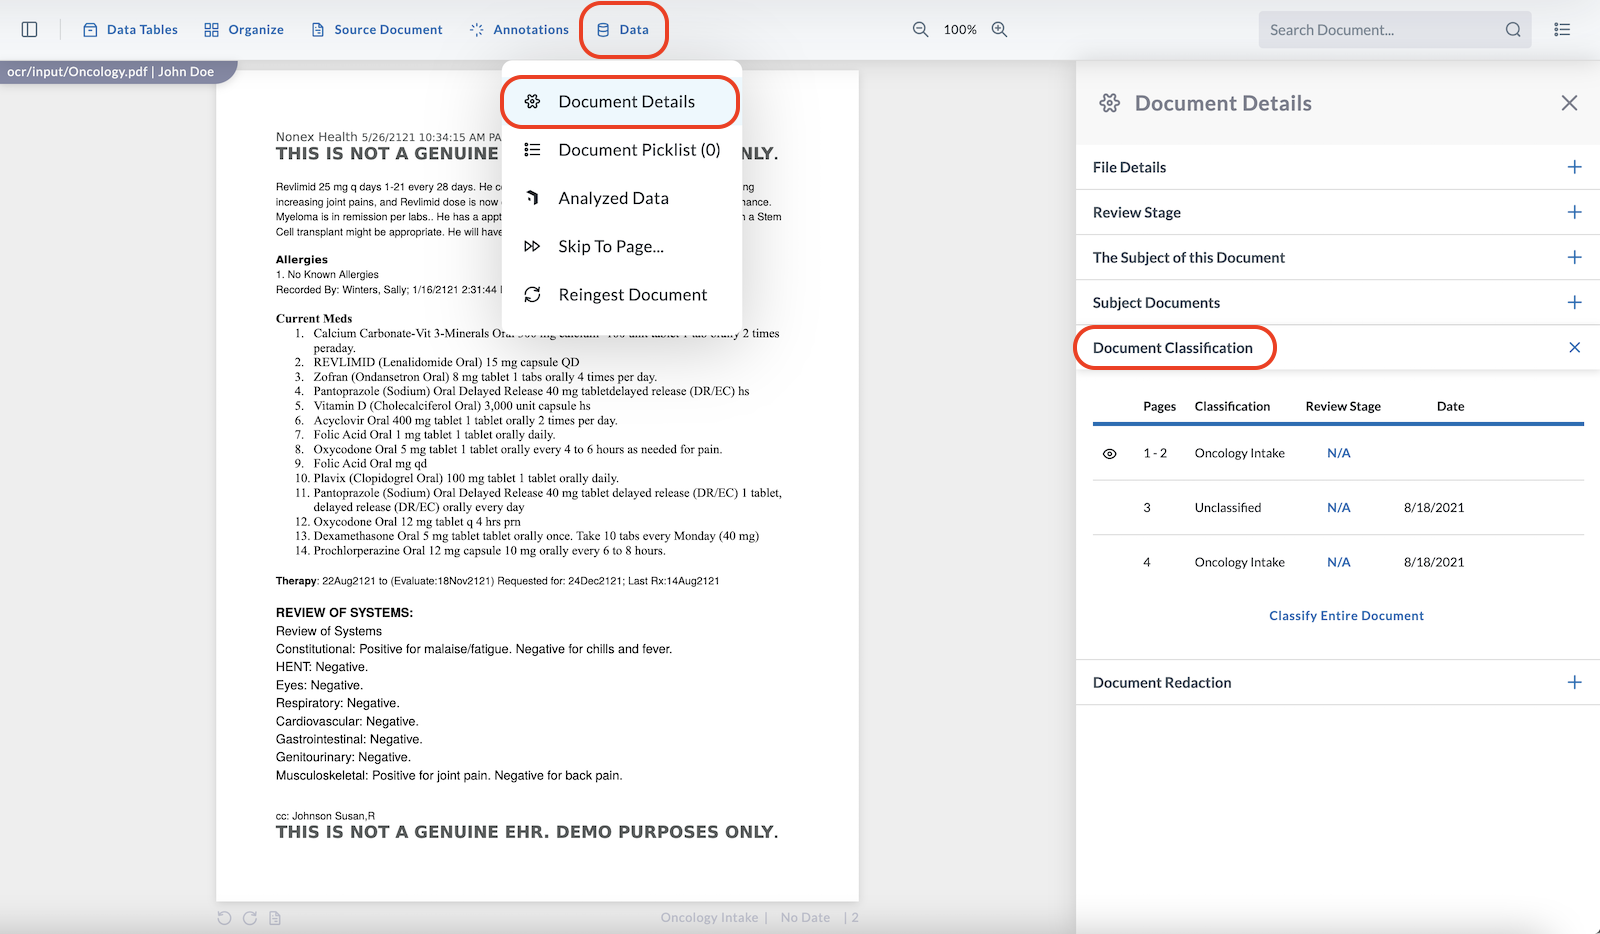
To verify classification and display the created table of contents, at the top of the screen, click the Data icon , click Document Details , and click Document Classification.
-
Under Document Classification, click any Classification section to navigate to that page.
Add a Classification Field for Document Details
Classification fields allow you to add additional data to organized document sections. You can customize the field and enter any value for the field. The classification information is contained in a manifest.pdf file that is included in the downloaded zip file, when you Download a Split File. In the LifeOmic Platform app, you can view the information under the Organize tab in the open document.
- Under the OCR tab on the left side menu, click Settings and the Organization tab.
- Under Classification Fields, click the plus symbol next to the classification where you want to add a field.
- In the Add Field... field that displays, enter a name.
- Click Add.
- Click Update Settings.
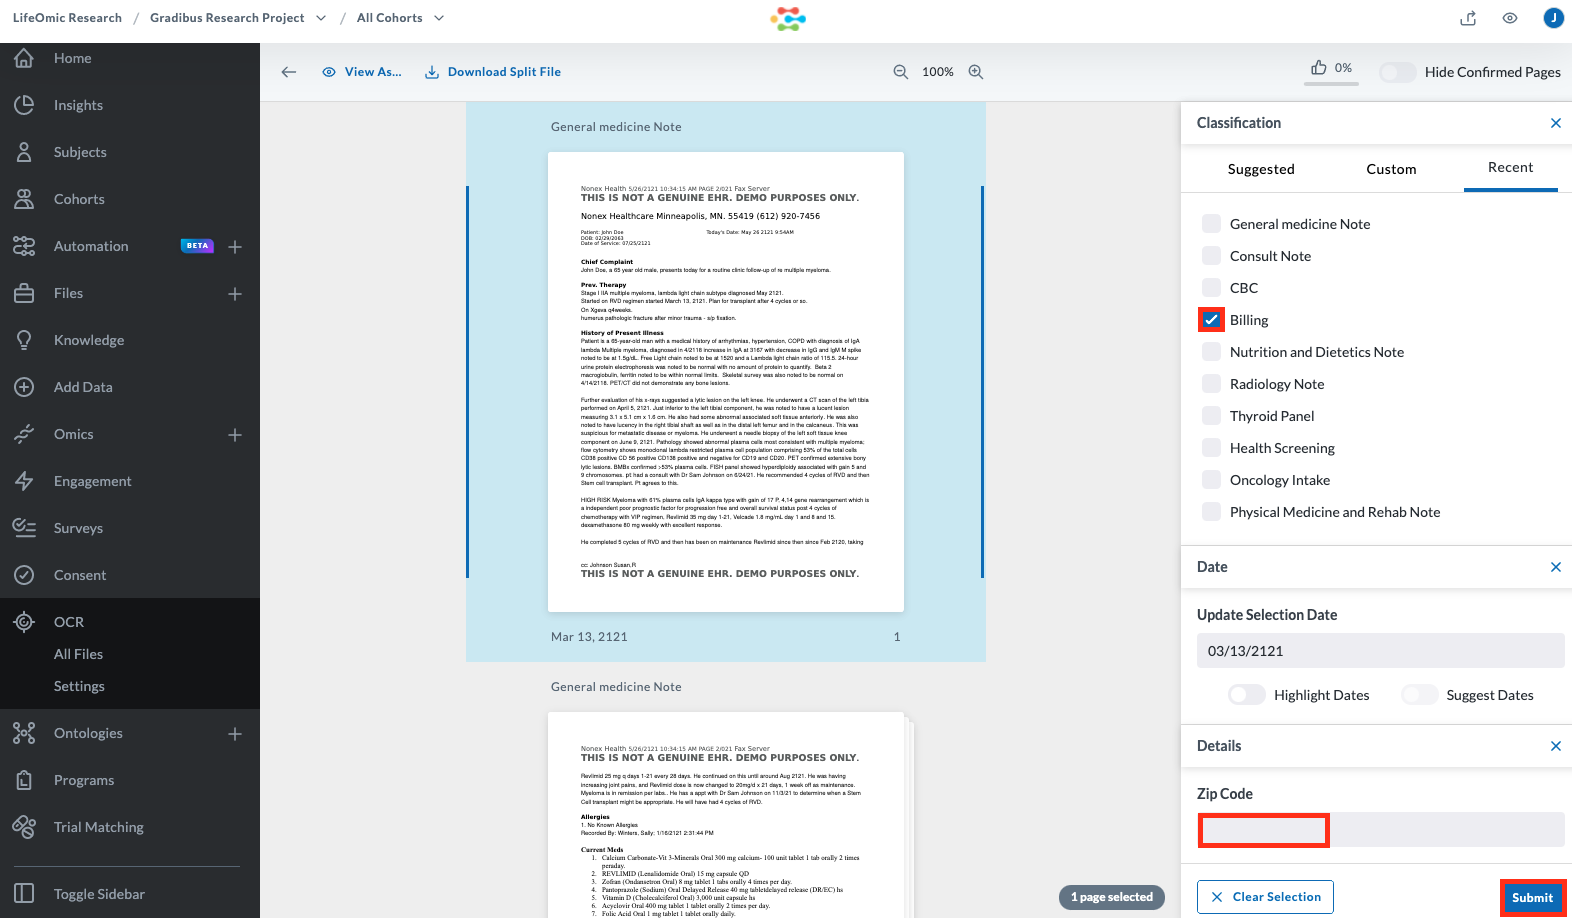
- To use the new field, open a document and click the Organize tab at the top of the screen.
- Select a page and click the classification with the added field.
- Under the Details section, enter the expected data.
- Click Submit.
Configure Review Stages
Review stages help you keep track of where OCR documents are in your workflow by allowing you to assign a label to the document. The label allows anyone who views the document to identify what operations are completed or pending. You can set the number and names of stages based on how your organization operates.
-
Under the OCR tab on the left side menu, click Settings and the Organization tab.
-
Under Review Stages, click Configure Review Stages.
-
Enter a list of stages in a list separated by commas, for example, not started, in progress, completed.
-
Click the check icon .
-
Click Update Settings.
-
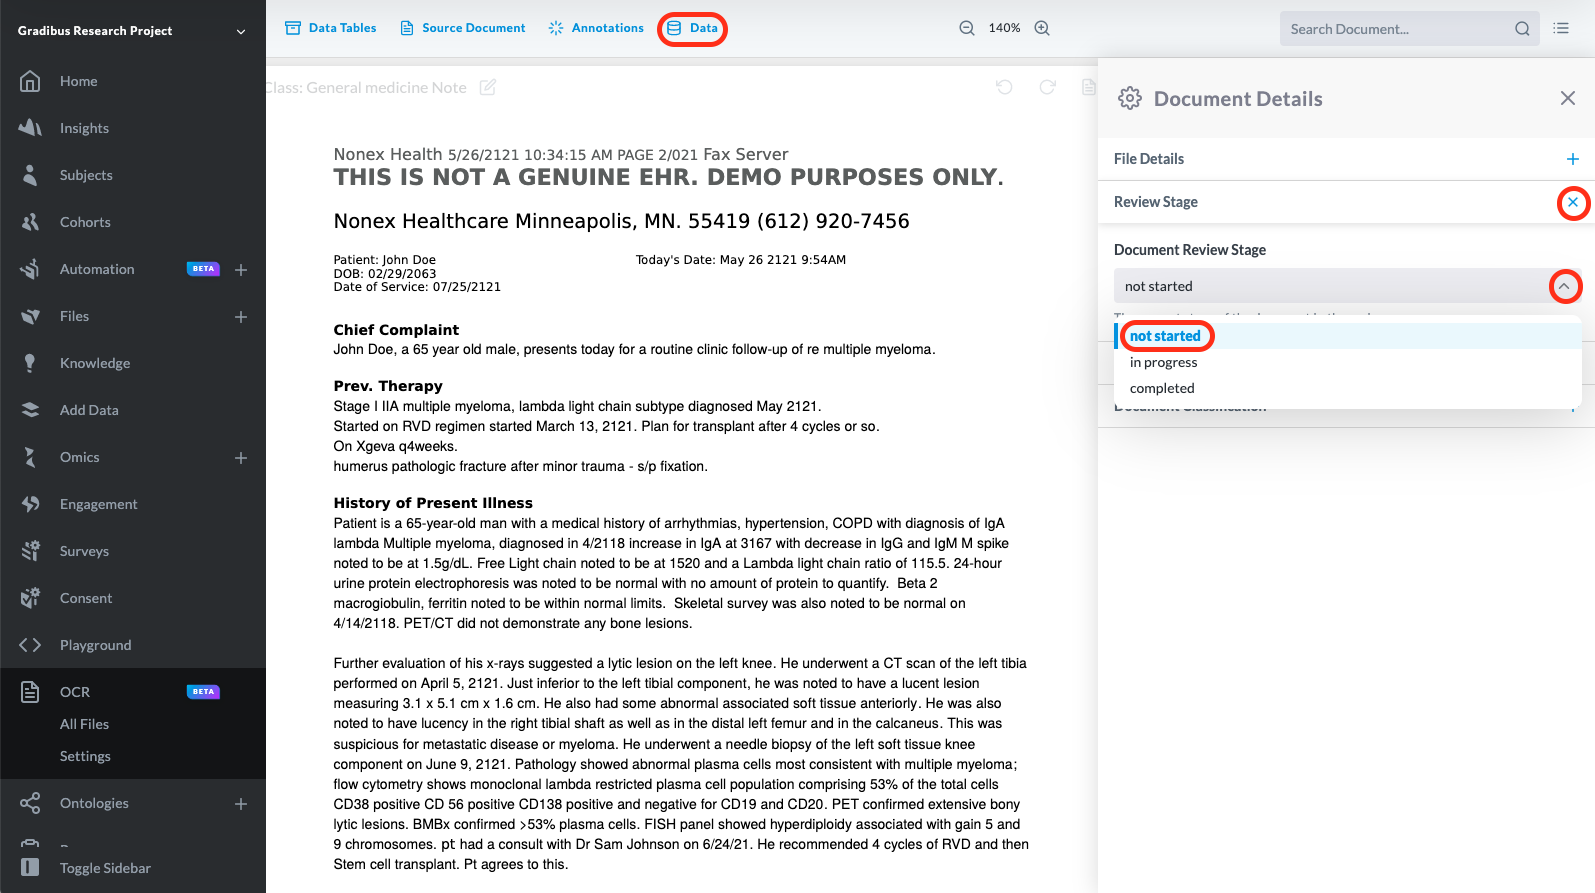
To set a review stage for a document, view a document and click the Data icon and the Document Details icon .
-
Under Document Details, expand the Review Stage menu and under Document Review Stage expand the menu and click the desired stage.
-
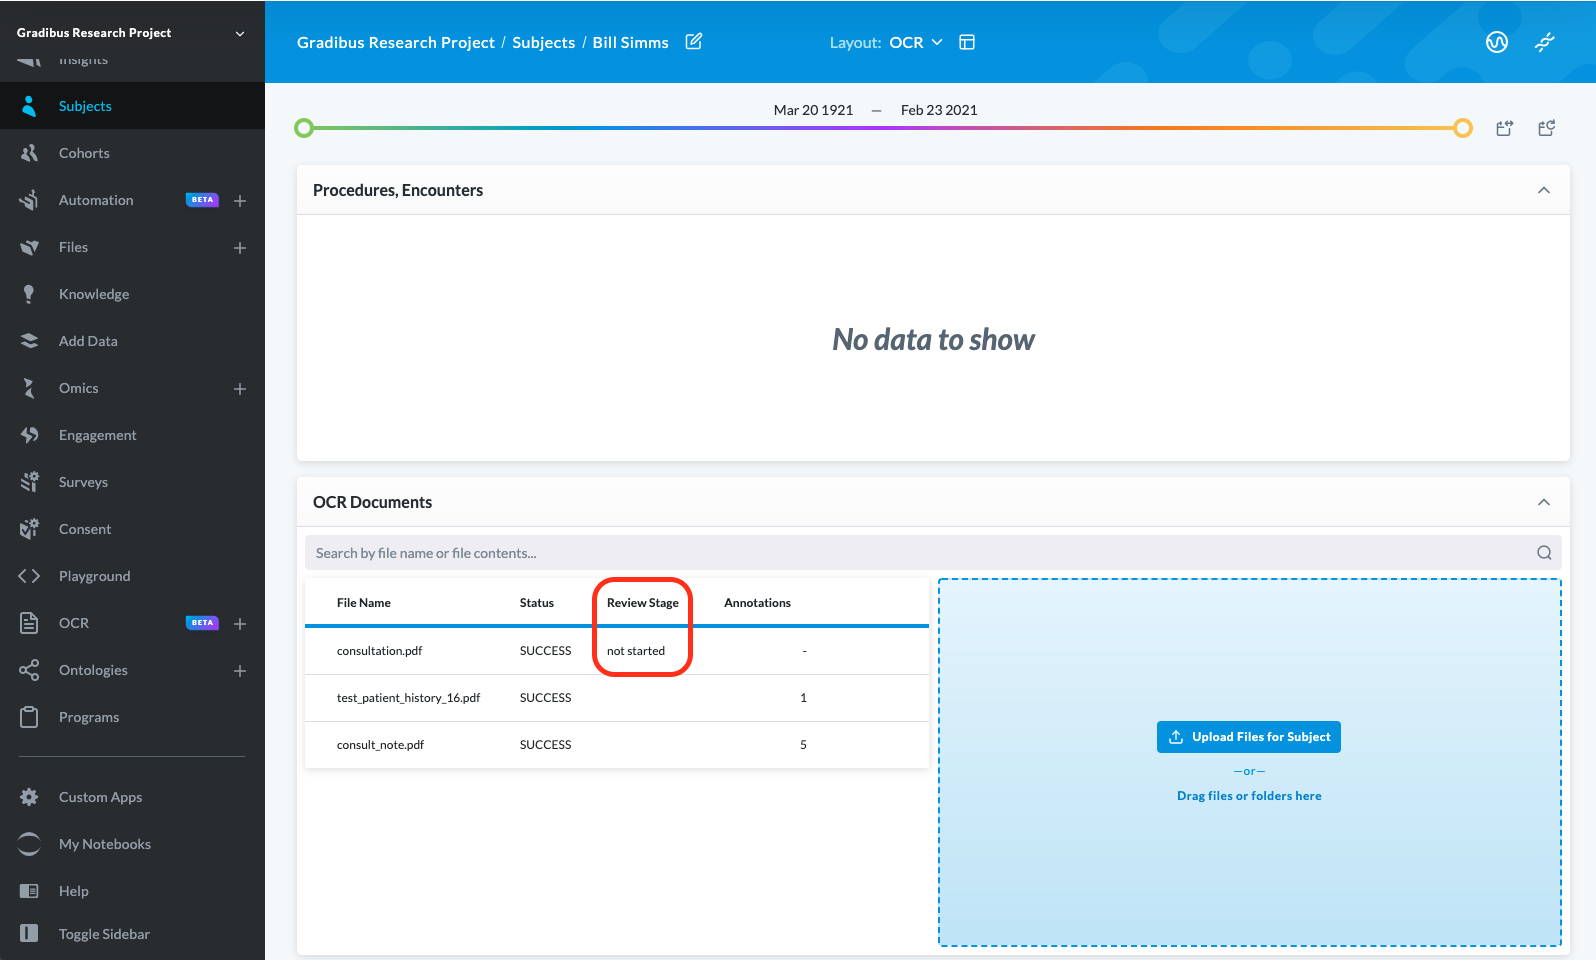
To view the review stage of a document, look under the Document Details section and Review Stage of an open document or in the OCR Documents section of the Subjects viewer.
Suggest or Automate Subject Assignments to Documents
You can configure the LifeOmic Platform to make subject suggestions that you pick from or to automatically assign the subject to the document.
-
Under the OCR tab on the left side menu, click Settings and the Organization tab.
-
Scroll down to the Subject Assignment section and click the pulldown menu.
-
Click Suggest Subject Assignments if you want to pick a subject from the subject suggestions.
-
Click Update Settings.
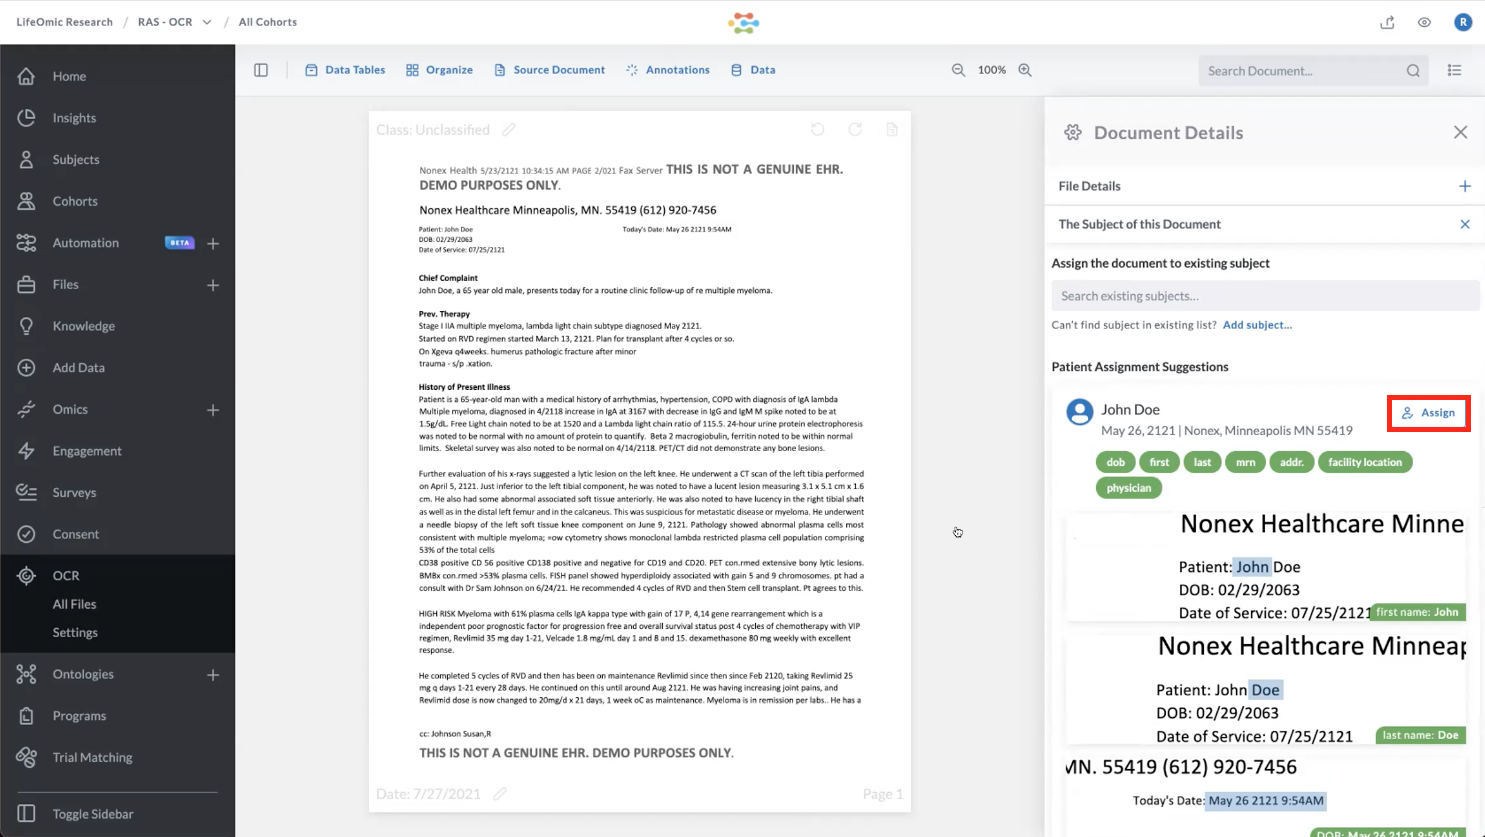
- On an open document, at the top of the screen, click the Data icon and click Document Details .
- On the Document Details pane, under The Subject of this Document, examine the Patient Assignment Suggestions. The matched criteria are highlighted in green. The location in the document for the match is also shown.
- Find the correct subject and click Assign.
-
Under the Organization tab, click Automatically Perform Subject Assignment if you want the LifeOmic Platform to automatically assign a subject from the subject suggestions.
For a subject to automatically be assigned to a document, it must match at least one of the following assignment criteria groups. A subject matches an assignment group when all criteria in a group are found in the document and their values match those of the subject.
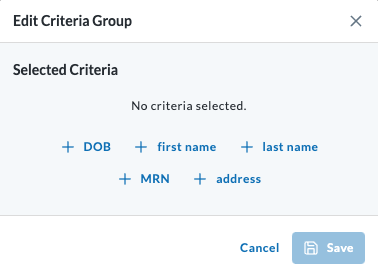
- Click Add Group.
- Click your chosen criteria, such as DOB. A best practice is to use multiple criteria.
- Click Save.
- To add additional criteria groups, click Add Group again and repeat the process. Each criteria group functions independently.
-
To edit a Criteria Group:
- Mouse over the group and click the icon.
- Click Save.
-
Click Update Settings.
To confirm automatic assignment, upload a document and after it processes, click the Data icon , click Document Details and click The Subject of this Document. Confirm a name is assigned.