Get Started and Upload your Document
This section details how to set up OCR and upload documents.
Initial OCR Setup
OCR requires you to accept an invitation and create a LifeOmic Platform project before you upload a document. It is also recommended to configure an OCR layout for the subject view before you import documents.
Accept Invite and Create Project
- In the You've been invited to a LifeOmic Platform group! email you receive, click
Signup or login to launch the LifeOmic Platform app in your browser.
Note: If you did not receive an invitation email, contact your LifeOmic admin. - Log in or create a new account if needed.
- You need to connect OCR to a project, which is a dataset of subjects.
-
To create a new project, complete the How to create a new Project procedure.
-
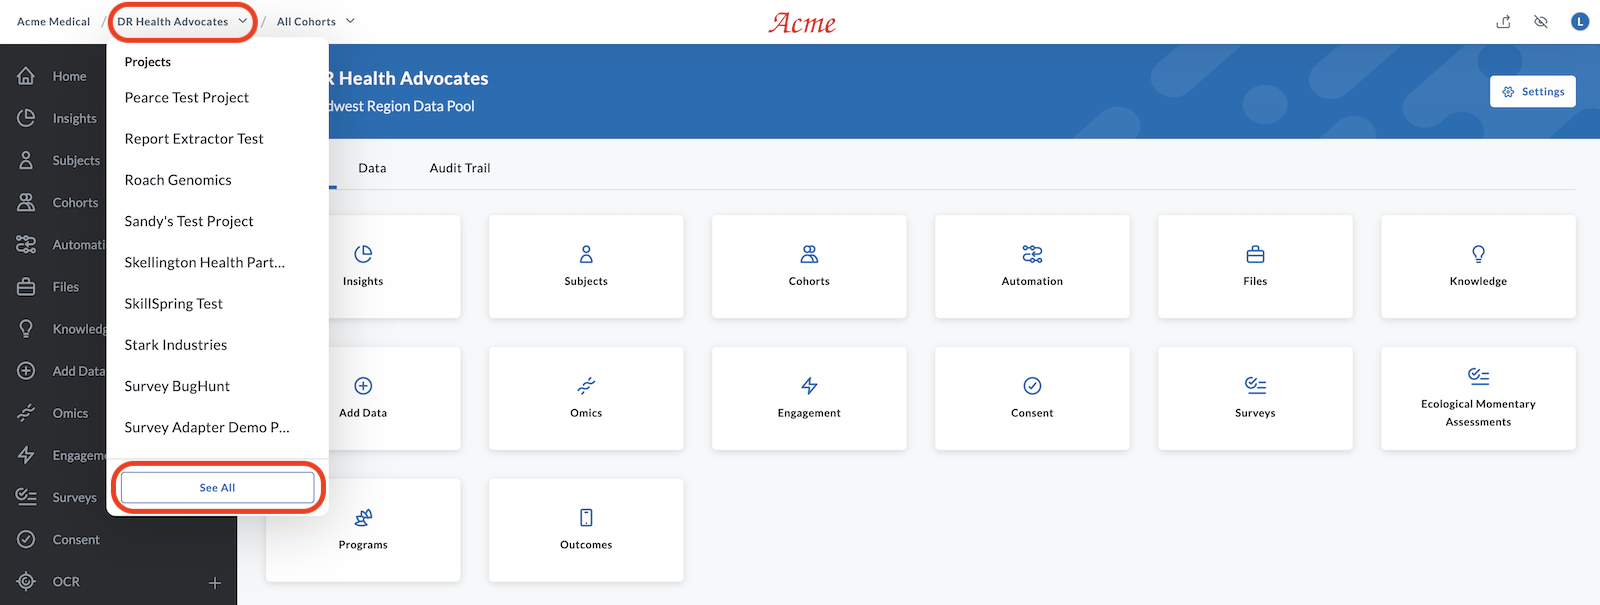
To connect to an existing project, click the drop-down menu on the upper left of the screen, click See All, and click the project name.
-
Create an OCR Layout for a Subject
To view the OCR documents by subject, you need to create an OCR layout and assign it to a subject. Setting this up also allows you to upload documents directly to a subject. If you want to set this up at a later time, you can go directly to Upload Your Files to LifeOmic Platform.
-
On the left side of the menu, click Subjects.
-
Click a subject name or click Create Subject and enter and save a first and last name if you do not have an existing subject.

-
On the Subject page, click the Create Layout button.
-
On the Manage Layouts page, click the plus icon .
-
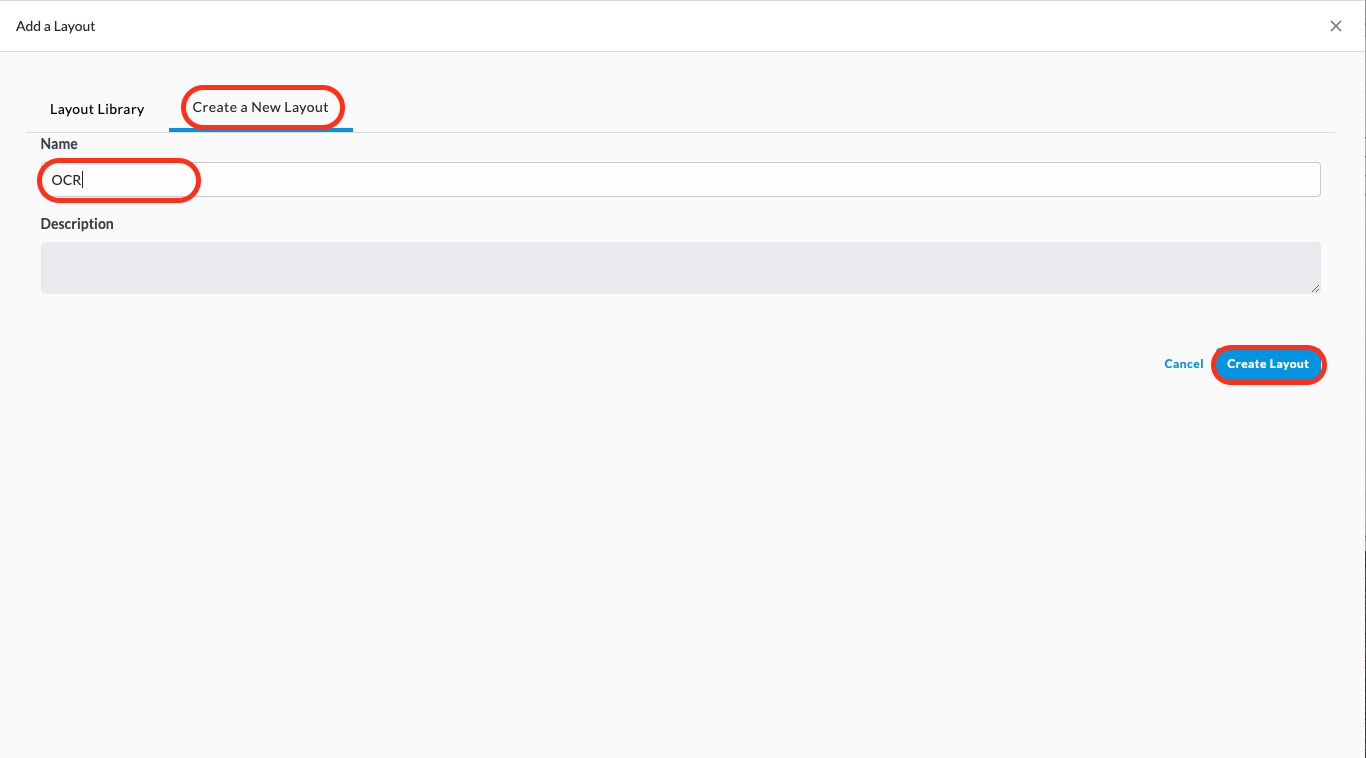
On the Add a Layout page, click the Create a New Layout tab, enter a name, and click the Create Layout button.
-
On the Manage Layouts page, click the Done button.
-
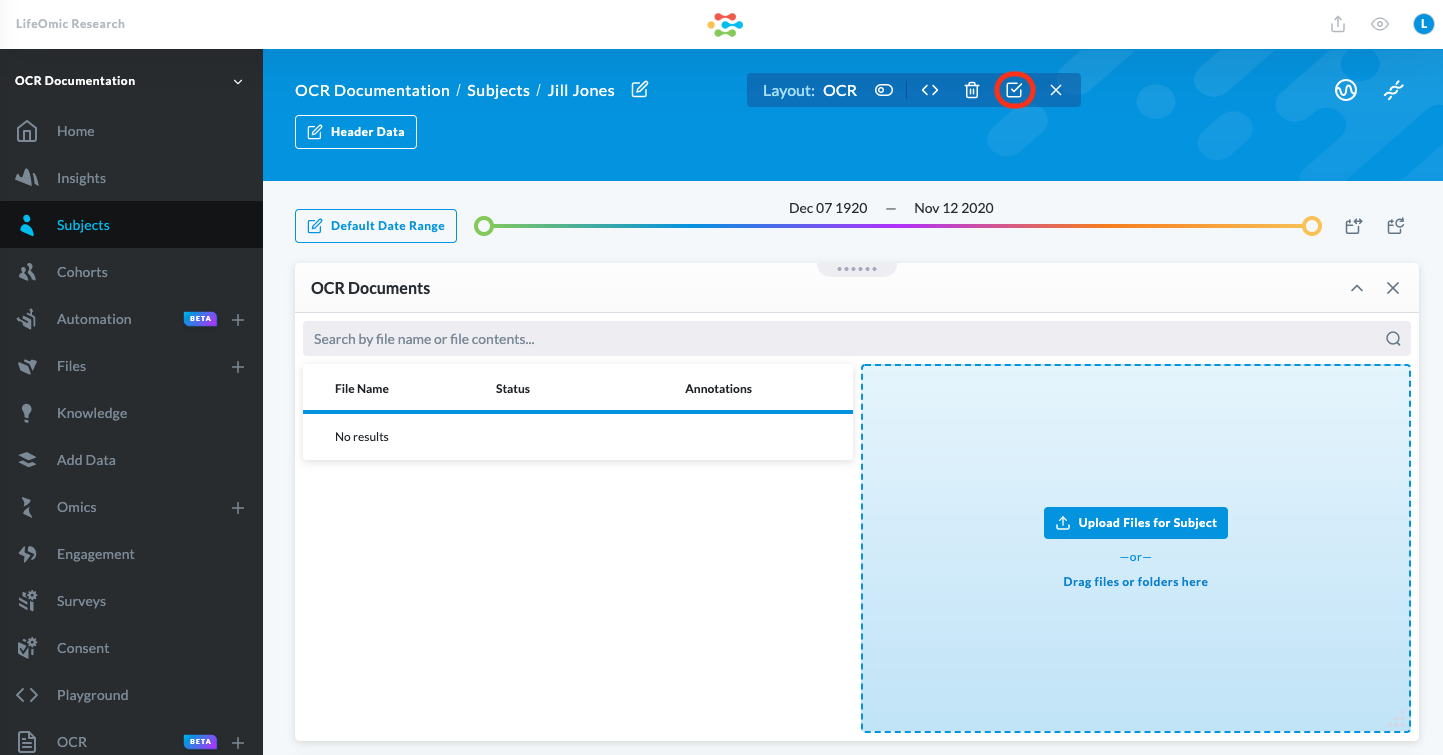
On the page for the subject, click the Edit Layout icon .
-
On the lower right of the Layout Edit screen, click the plus icon .
-
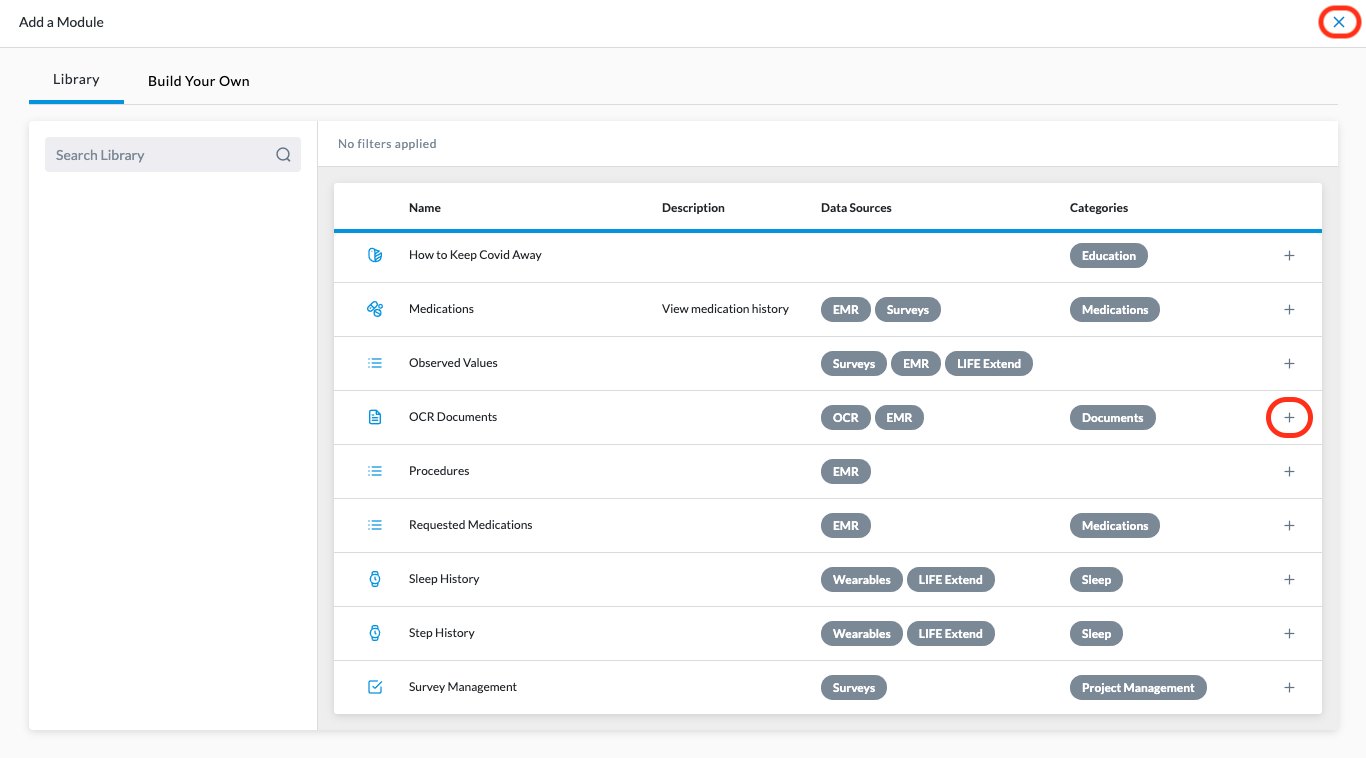
On the Add a Module screen, click the plus icon by the OCR Documents module and click the X icon to close the screen and return to the subject screen.
-
On the subject screen that now displays the OCR Documents module, click the Save Changes icon .
Upload Your Documents
OCR allows you to upload medical documents in PDF, PNG, or JPG file format. A patient's medical history and other medical records are usually stored as PDFs on a fax server, in an EMR, or in online storage. With a paper record, you need to scan the documents to create the files.
The PDF, JPG, or file from a fax or scanned record is an image file and is not usable data. It is similar to the file you create when you take a picture of a letter with your phone. After you upload the file, OCR denoises the source document and extracts the text with proprietary optical character recognition technology. The information in the document is transformed into searchable data that is usable by the LifeOmic Platform. OCR also automatically rotates documents that were scanned upside down or sideways.
In addition to the LifeOmic Platform app covered in these procedures, advanced users can also use the command line interface (CLI) or API to upload OCR documents. For more information on the using OCR with the CLI, see the OCR CLI. For more information on the API, see the OCR API.
The maximum size for a single file is 1,000 pages or 500 MB. Files cannot be password protected.
Upload Your Files to a Specific Subject in the LifeOmic Platform App (Recommended)
-
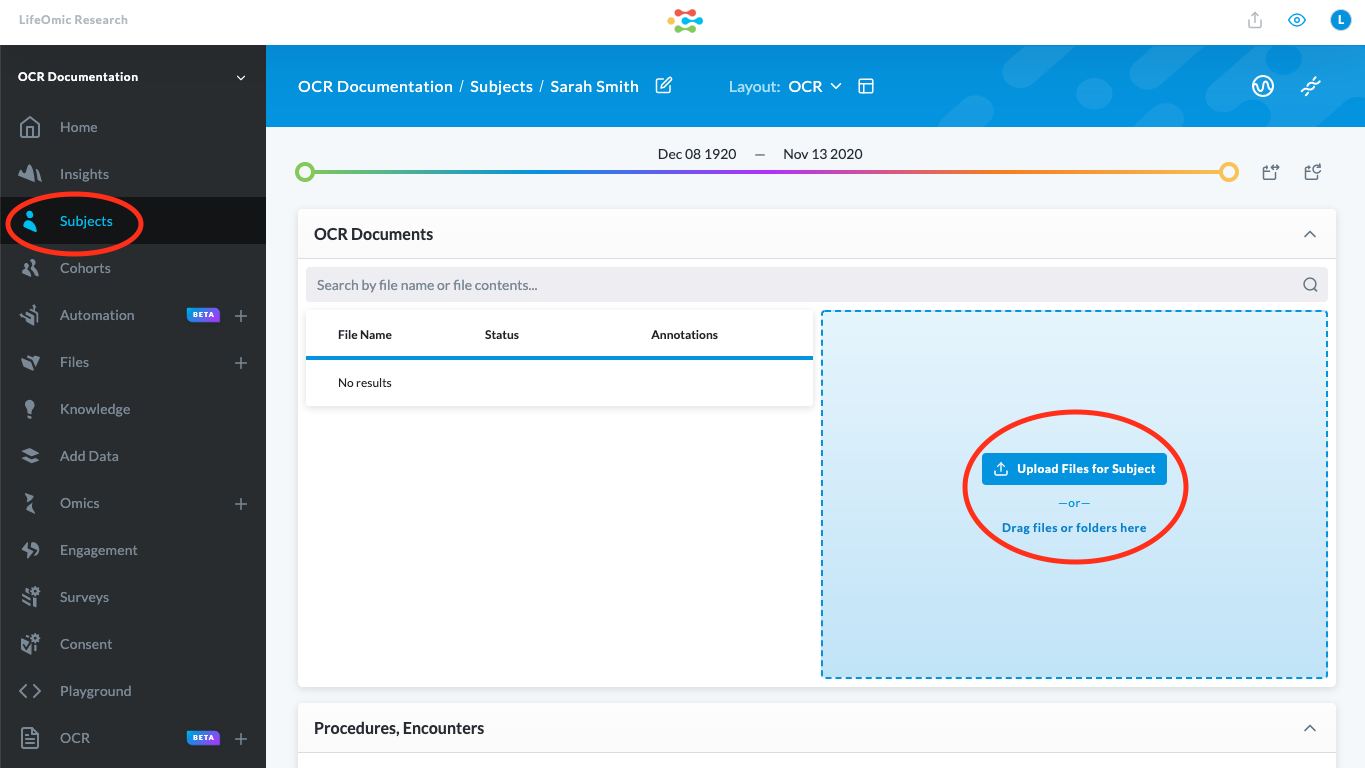
Click the Subject tab.
-
Click on a specific subject.
-
Ensure that your subject has a layout set up with the OCR module. You must use the OCR module to upload files. Follow the procedure to add an OCR module to a layout if your subject needs this module.
-
Click Upload Files for Subject and navigate to your files either on your PC or a networked file location.
-
Select the file or files and click Open.
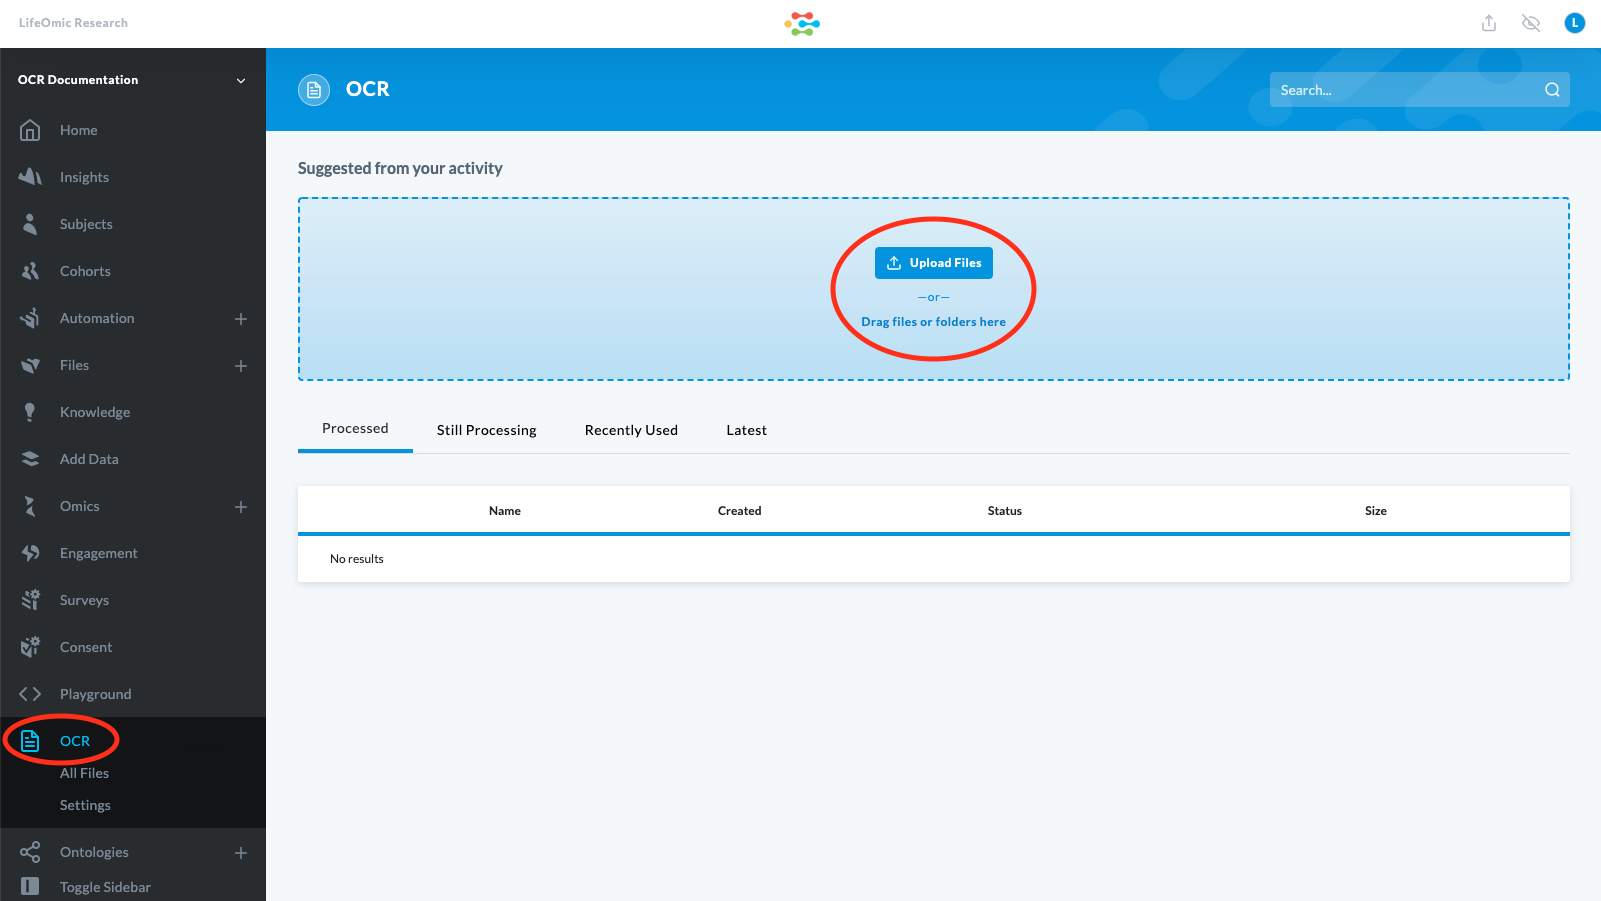
Upload Your Files to the LifeOmic Platform
-
Click the OCR tab.
-
Click Upload Files and navigate to your files either on your PC or a networked file location.
-
Select the file or files and click Open.