Use the CLI for OCR
In addition to the app, you can use the LifeOmic Platform command line interface (CLI) to operate OCR. The CLI gives you the option of using a terminal environment and commands to perform OCR API functions. This option is especially useful for the bulk ingestion of files, scripting operations, and loading JSON files that contain an OCR configuration. OCR configuration files allow you to compose complex search lists and distribute standard OCR settings to multiple projects.
To use the CLI for OCR, you must first install and authenticate the CLI with your LifeOmic Platform account. Follow the Getting Started instructions to set up the CLI. If you want to use an API key for authentication, follow the Setting Up API Keys instructions.
Note: The OCR API rate-limiter allows a maximum of 10 create-doc operations per minute.
Note: Use the CLI command lo ocr help to reveal the CLI OCR commands.
Configure Project Settings and Create Search Lists
-
Enter
lo projects listto obtain a list of projects and projects IDs and copy the project ID. -
Enter
lo ocr get-config <projectId>.The command returns OCR configuration details for the project. These details include the OCR settings.
-
Enter
lo ocr create-config <projectId> <setting> '[ON | OFF]'to change an OCR setting.lo ocr create-config --helplists the available settings.Example:
lo ocr create-config ee64951b-b593-4ba4-a97d-f6a2c0d8cc25 --spell-check-switch 'ON' -
Enter
lo ocr create-config <projectId> --config-file 'path/to/config.json'to load a JSON configuration file containing search lists and OCR settings.Example:
lo ocr create-config ee64951b-b593-4ba4-a97d-f6a2c0d8cc25 --config-file '/Users/jeffbeard/desktop/config.json'Use the following JSON template to create the config.json file.
{
    "denoiserSwitch": "ON | OFF | SMART",
    "pathPrefix": "ocr",
    "documentClassifier": "document-classifier-name",
    "classifierSwitch": "OFF | SEARCH | ML",
    "analyzeSwitch": "OFF | ON",
    "spellCheckerSwitch": "OFF | ON",
    "searchLists": {
        "lists": [
            {
                "title": "title-for-list-1",
                "searchTerms": [
                    {
                        "term": "search-text-1",
                        "coding": {
                            "code": "1",
                            "display": "display",
                            "system": "lifeomic.com"
                        },
                        "resourceType": ["MedicationAdministration"]
                    },
                    {
                        "term": "search-text-2"
                    }
                ]
            },
            {
                "title": "title-for-list-22",
                "searchTerms": [
                    {
                        "term": "search-text-3"
                    },
                    {
                        "term": "search-text-4"
                    }
                ]
            }
        ]
    }
}
Upload Files and Create an OCR Document
-
Enter
lo files upload {<file>|<directory>} <projectId>to upload a file or a folder of files.Example:
lo files upload consult_note.pdf ee64951b-b593-4ba4-a97d-f6a2c0d8cc25A successful upload displays the generated fileId string after ID:
consult_note.pdf [==============================] 100% | ETA: 0s |
138829/138829Upload complete: consult_note.pdf to consult_note.pdf,
ID: 7119a2ee-f3fb-4e15-b864-3dafae812373 -
Copy the fileId string after ID:
-
Enter
lo ocr create-document <projectId> <fileId>and use the copied data string for thefileId.The command initiates the OCR operations on the file and displays the documentReferenceId.
documentReferenceId: 0d130601-d26f-4050-b9c0-406b32040016 -
Copy the string after documentReferenceId:.
-
Enter
lo fhir get DocumentReference <documentReferenceId>and use the copied data string for thedocumentReferenceIdto confirm OCR operations.The command displays information on the document including
PrecisionOCR ServiceandSUCCESS.resourceType: DocumentReference
meta:
tag:
-
system: http://lifeomic.com/fhir/dataset
code: ee64951b-b593-4ba4-a97d-f6a2c0d8cc25
-
system: http://lifeomic.com/fhir/source
code: PrecisionOCR Service
-
system: http://lifeomic.com/ocr/document/status
code: SUCCESS
............... -
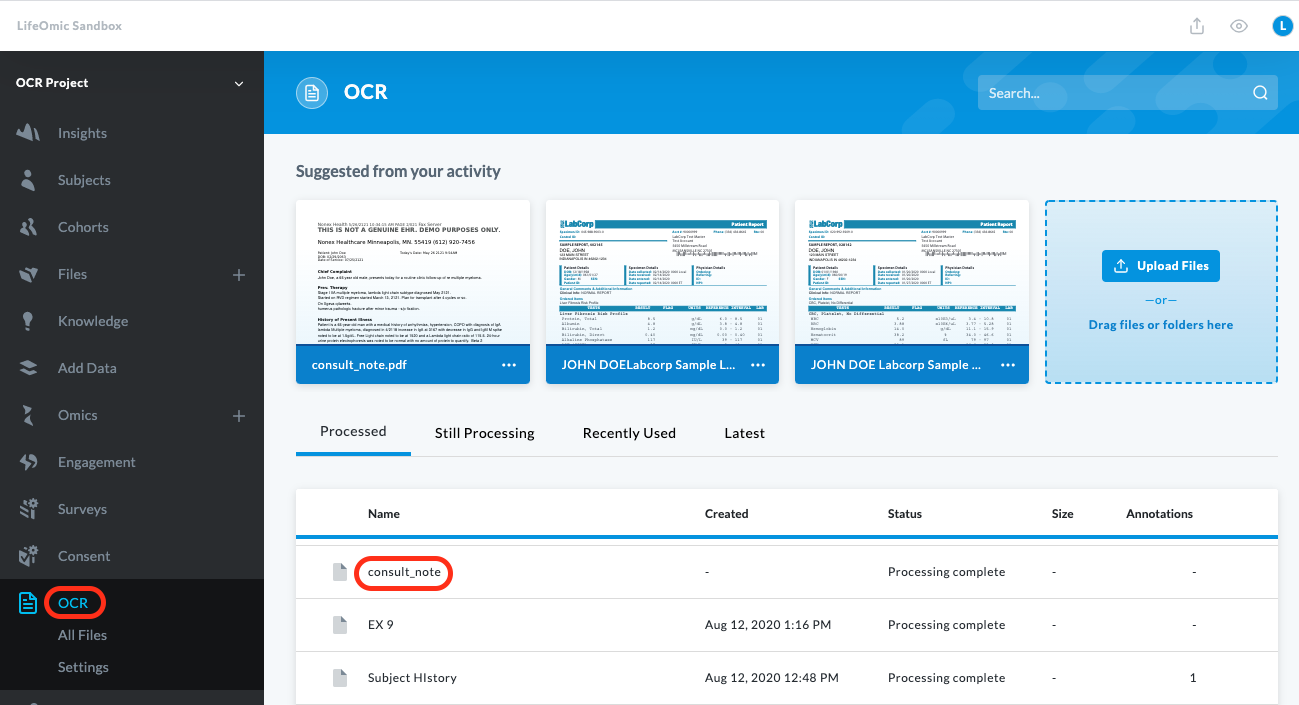
To confirm the document is also in the web application, open the LifeOmic Platform app and click OCR on the left side menu. The file name appears in the list of documents.