Create an Access Control Policy
Access Control is the ability to administer who can interact with a resource in the LifeOmic Platform. For information on access control and the ABAC implementation, see the Access Control Overview.
Create a Custom Policy for Access Control
To delete a configured policy component, mouse over the component listing to reveal the Remove icon and click the icon.
This procedure requires the default Administration>Access privileges.
-
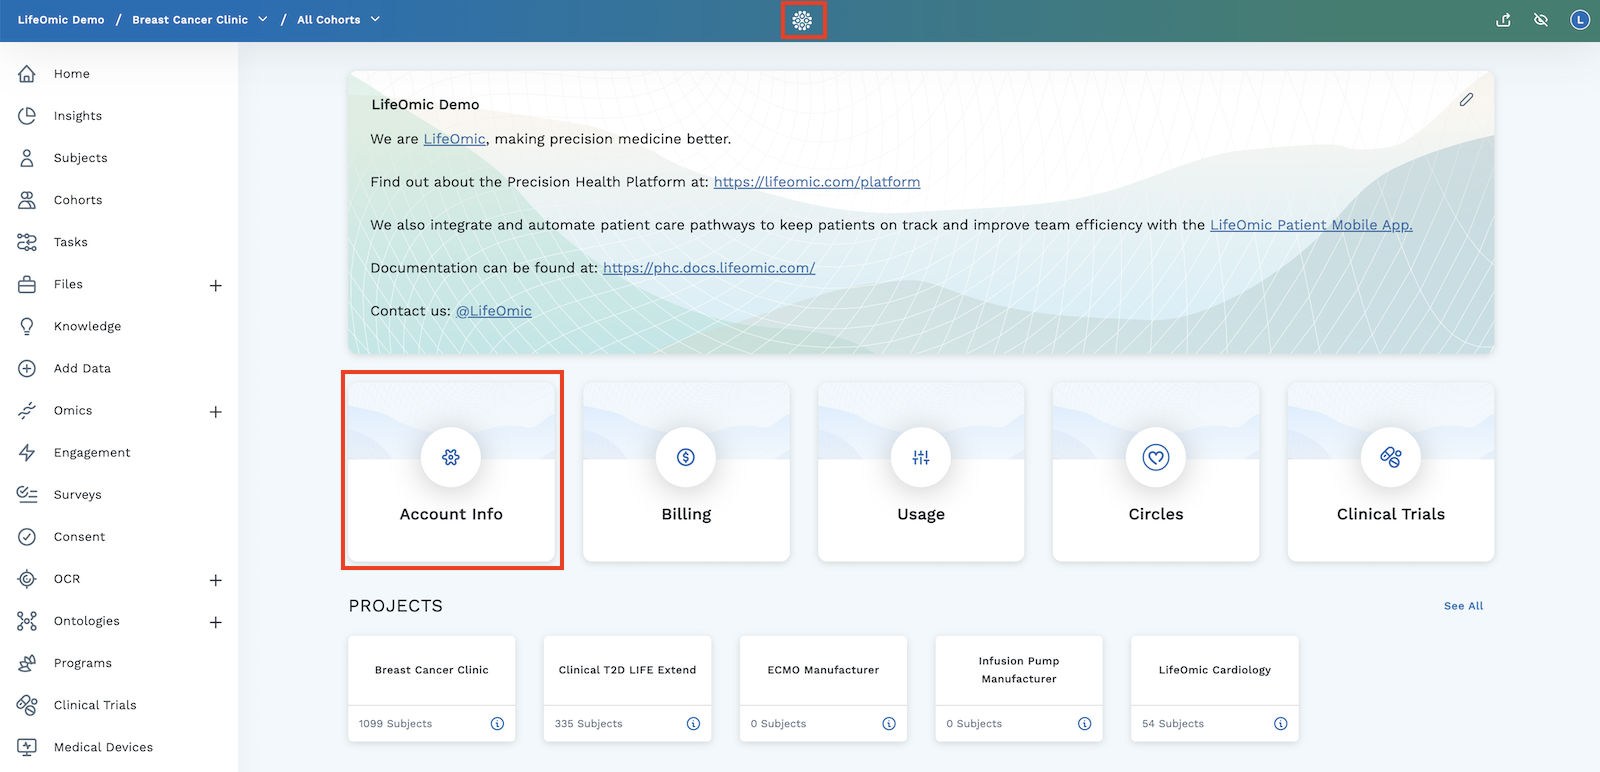
Click the logo at the top center of any page to go to the settings page.
-
Click on Account Info.
-
On the Account Info page, click on the Access Control tab and click New Policy.
-
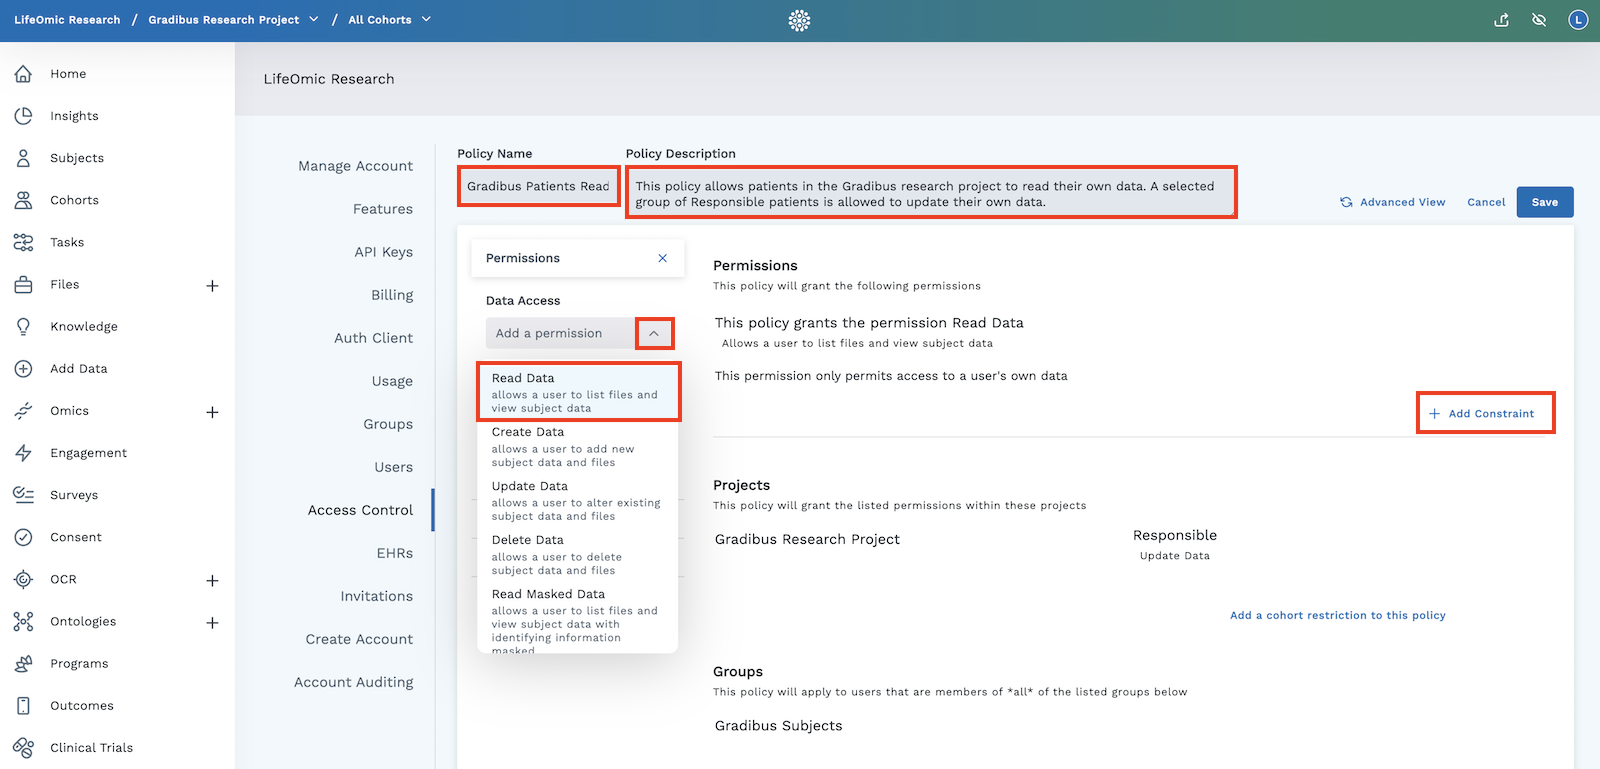
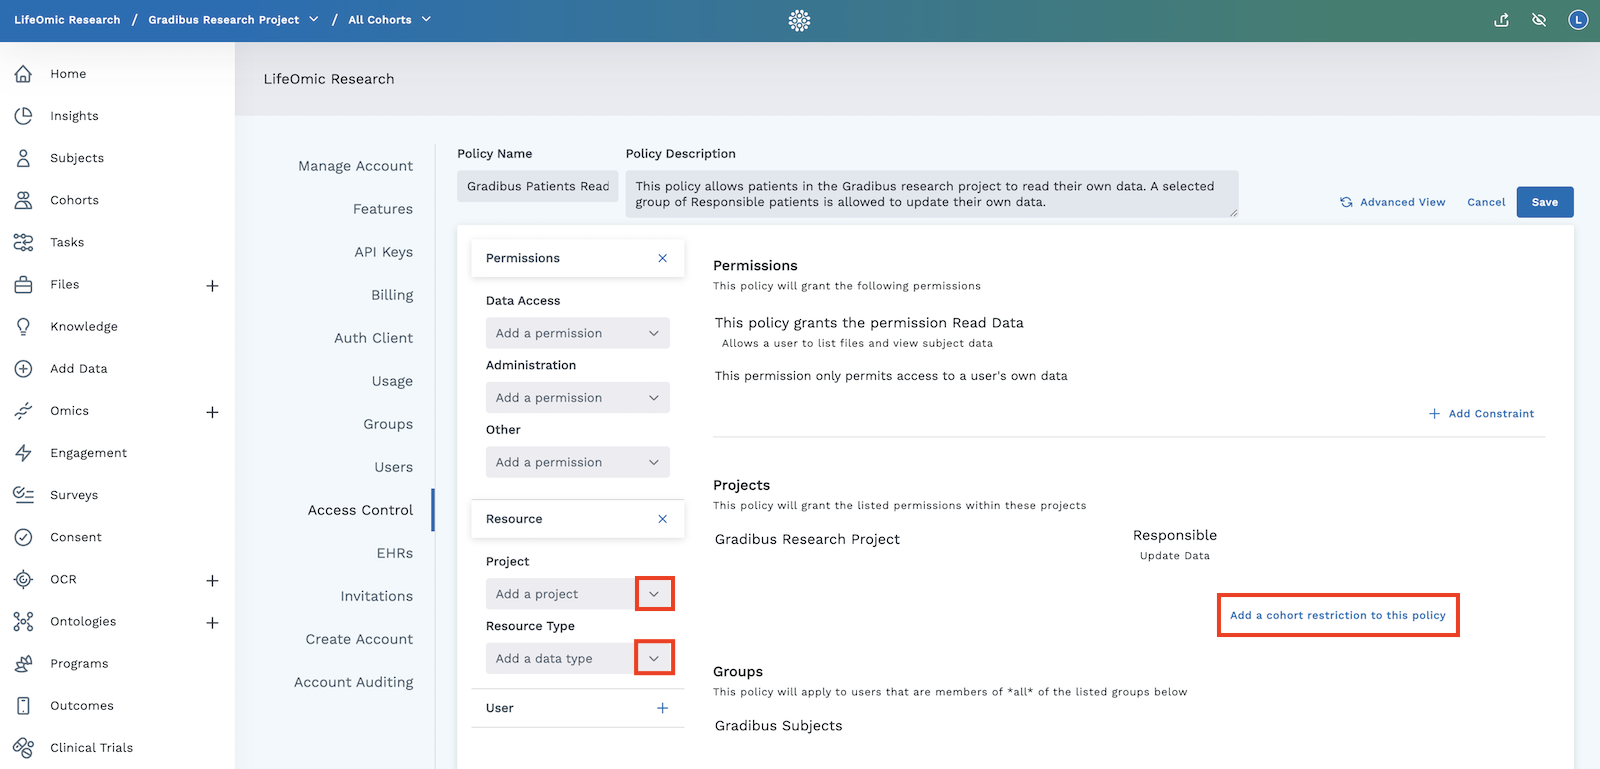
In the Policy Name and Policy Description fields, enter a useful name and description.
-
Click the Permissions icon to reveal all the menu options for the permissions component of access control.
-
To allow basic data actions, such as reading or deleting, click the Data Access menu and click an action.
-
If you want to restrict data access by resource type, click Add Constraint next to the displayed data access permission. In the dialog box that appears:
-
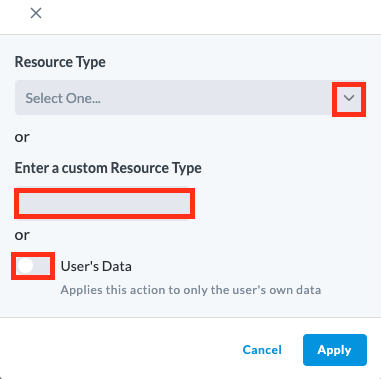
From the Resource Type menu, choose a type to restrict the action to that type of data. For example, if an employee group only needs to confirm that a subject has a signed consent form, click Consent.
-
If you did not find your specific Resource Type on the menu, enter a custom resource type in the Enter a custom Resource Type field, such as job or DocumentReference.
-
Click the User's Data switch to restrict the action to only the user's data. This option is useful for creating a limited access policy for patients and subjects.
-
Click Apply.
-
-
To allow powerful admin capabilities, such as the power to create, update, and delete projects, click the Administration menu and click a permission.
-
To allow unique capabilities, such as the ability to invite users or manage API keys, click the Other menu and click a specific permission.
-
Click the Resource icon to reveal all the menu options of the resource component of access control.
-
Click the Project menu to assign your policy to a project dataset. Selecting a project is the most common way to define the resource in a policy. Note: Assign a specific project to a policy or the policy applies to all current and future projects.
-
To restrict the policy to a specific resource type, such as responses to a questionnaire, click the Resource Type menu and select a type. Resource type restrictions apply only to Data Access actions, such as Read Data.
-
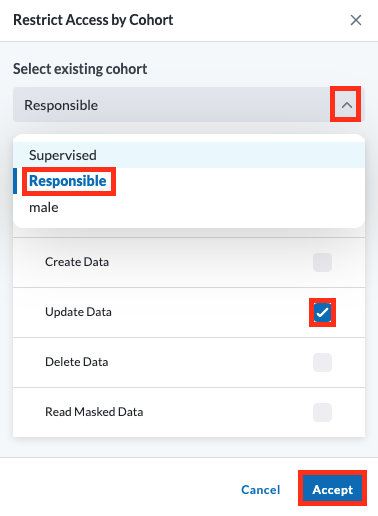
To grant additional privileges to a cohort in the selected project, click Add a cohort restriction to this policy.
-
In the dialog that appears, select the cohort from the drop down menu.
-
Click the permission that you want to grant to the selected cohort.
-
Click Accept.
-
-
Click the User icon to reveal all of the menu options for the user component of access control.
-
Click the Group Membership menu to apply the policy to a specific group and select a group. A user has to be a member of the selected group for the permission to apply.
Note: If you need to create a group, complete the Groups procedure.
cautionIf you select multiple groups, a user must belong to all of the groups for a policy to apply. A best practice is to confine a policy to a single group and make multiple policies if needed.
-
Click Save.

-
To confirm the saved policy, locate the policy under the Policy Name column on the Access Control page. Click the policy name to view or edit the policy details.
Create a Full Access Policy for a Specific Project
The LifeOmic Platform provides a straightforward way to grant full access to a project. You enable this option, when you create a new project.
-
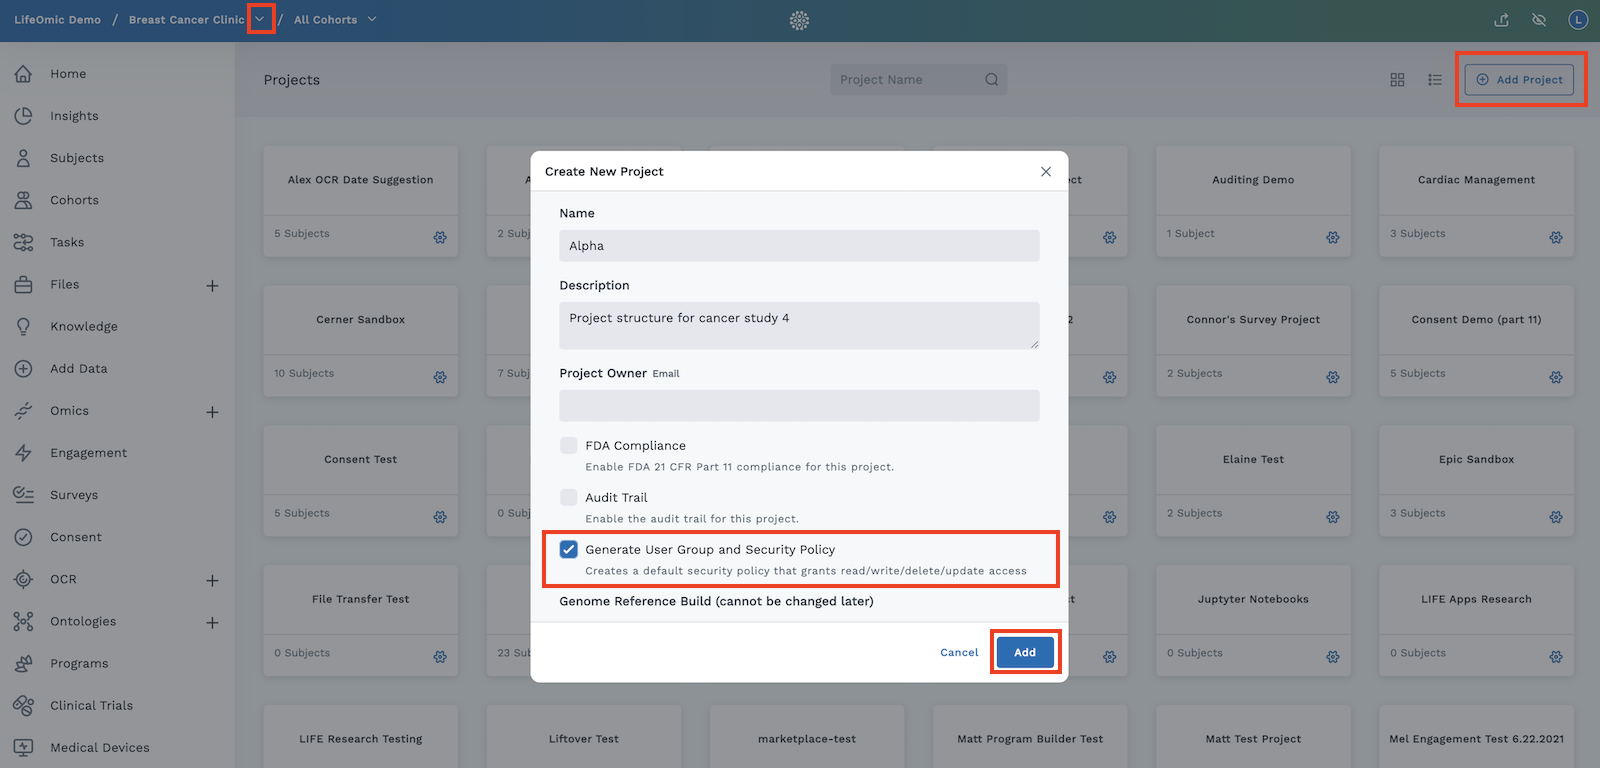
At the top left of the screen, in the account navigation structure, click the name of the project to display a list of projects, and click See All.
-
On the Project page, click Add Project.
-
Fill out the fields as needed.
-
In the Create New Project dialog, click the Generate User Group and Security Policy box.
-
Click Add to create the project.
- To confirm or edit the policy, click the logo at the top of any page to go to the settings page, click Account Info and Access Control.
- In the Policy Name column, find the policy name made up of your project name and the text "- Full Access Policy", for example, Gradibus - Full Access Policy.
- To add a new user to a group, complete the Invite a user to a group with email.
Edit Access Control Policy JSON Files
-
Locate the policy under the Policy Name column on the Access Control page and click the policy name.
-
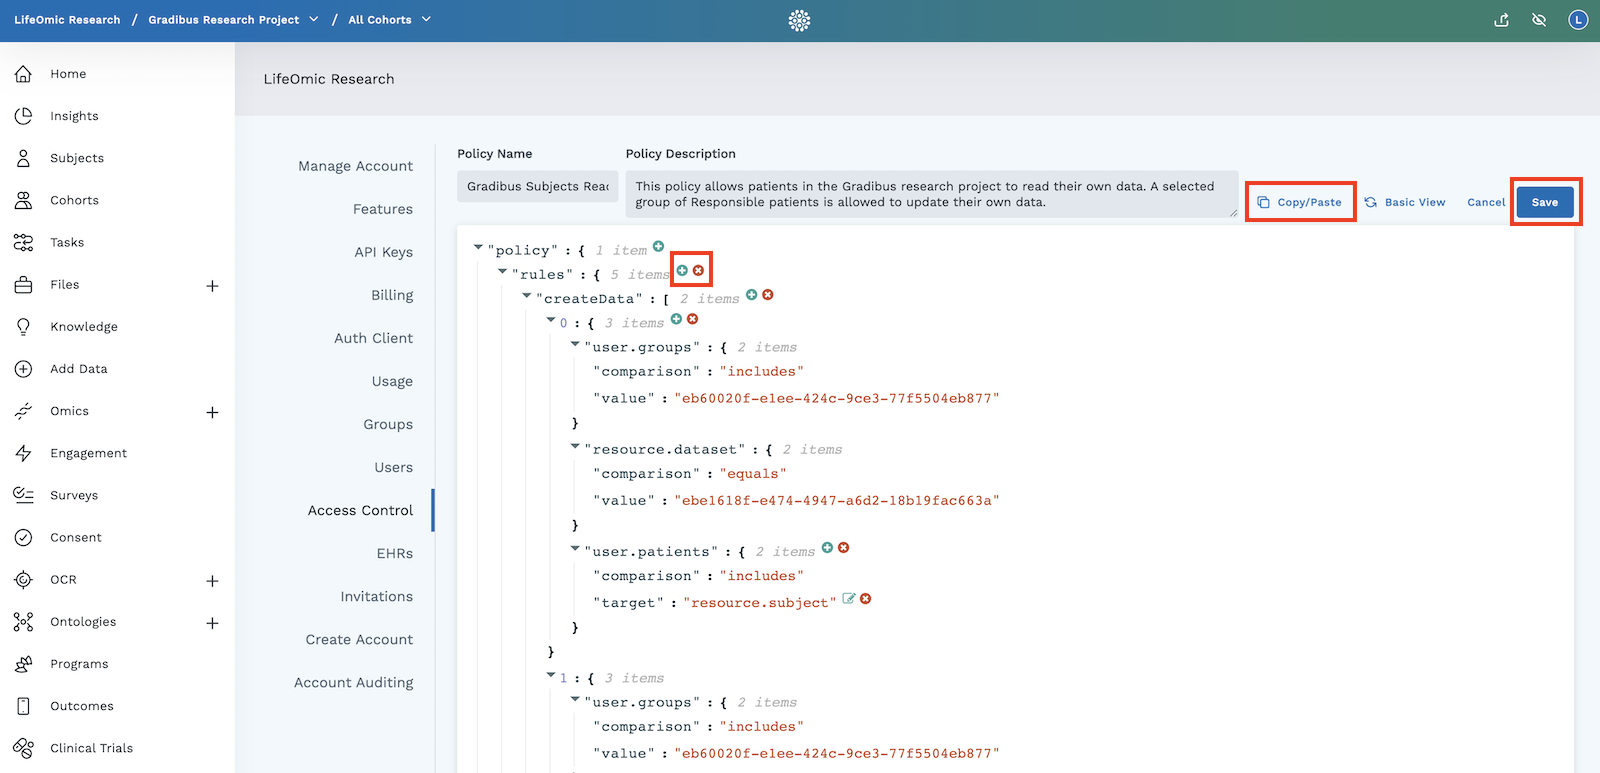
Click Advanced View to open the JSON file editor.
-
Mouse over the JSON text to see and use the integrated editing controls.
-
Click Save after modifying the JSON text.
-
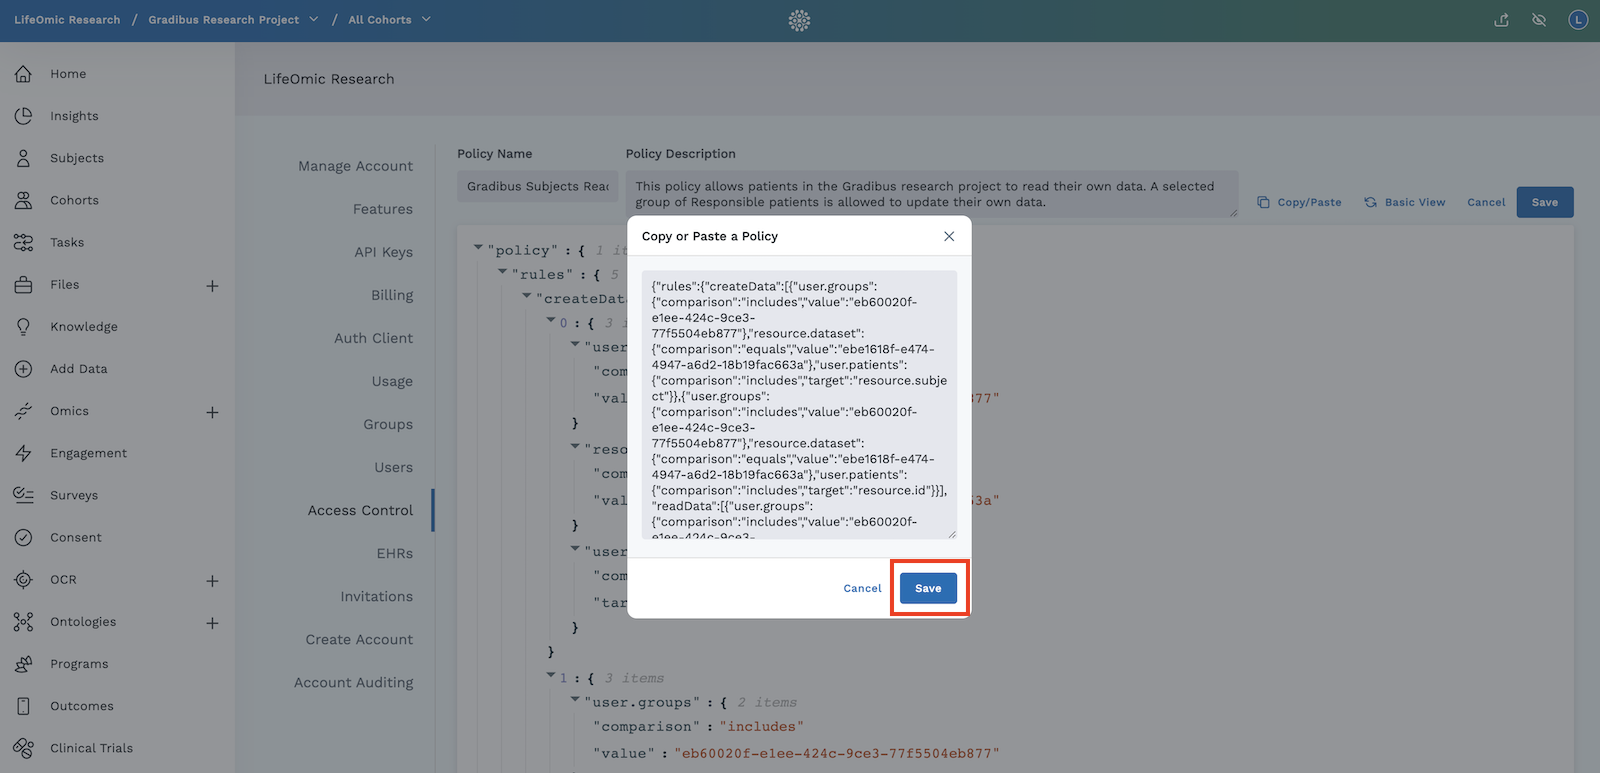
To use an external code editor, click Copy/Paste to open the Copy or Paste a Policy dialog box.
-
Copy and paste the JSON text into your own code editor to edit.
-
After you modify the text in your code editor, copy and paste the text back into the dialog box.
-
Click Save on the dialog box.
-
After the dialog box closes, click Save on the JSON editor screen.