Filter Categories
Filter Categories allow users simple or complex options in which to filter the subjects in their project. These categories are found on the Subjects tab of the LifeOmic Platform. Filter categories and options are available within the Standard tab and within the Advanced tab. Clicking the "+" beside each category opens the options available for further selection and filtering.
Choosing Available Filters
Users with the Layout Admin ABAC privilege can simplify the subjects' experience for users in their project by eliminating filter options that are not relevant. To modify which filters are available, click on Filter Types and select the checkboxes for the filters that apply to the project. Unchecking a checked box expands the filter type and allows the admin to customize the specific filter options to display rather than displaying all of the options in a category.
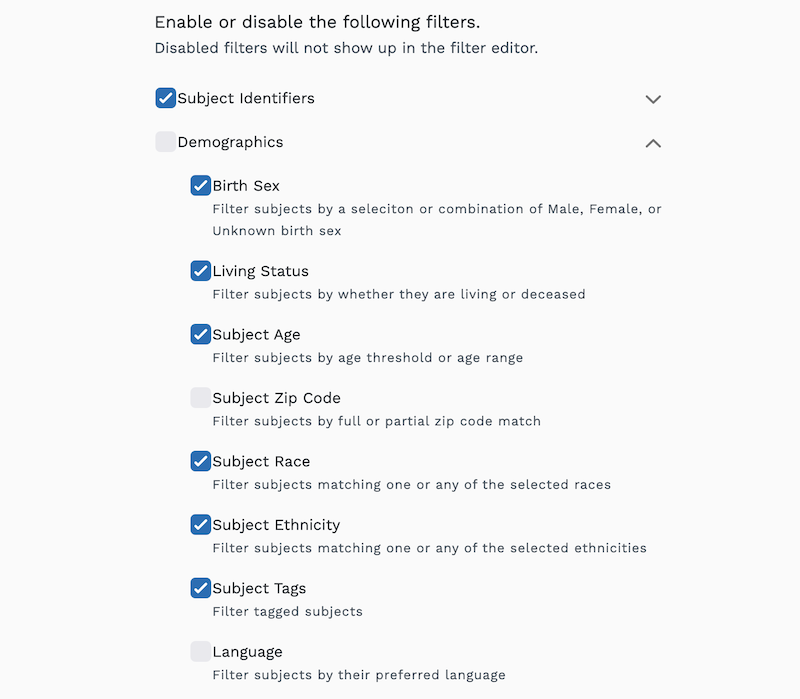
If you do not see a listed filtering option in your LifeOmic Platform, please contact your admin about adding additional filter types.
Some of these filter options are disabled in masked mode . Clicking this icon in the top right corner of the screen will put you into unmasked mode where you can view these filter options and the data that corresponds with it.
![]()
Working with Filters
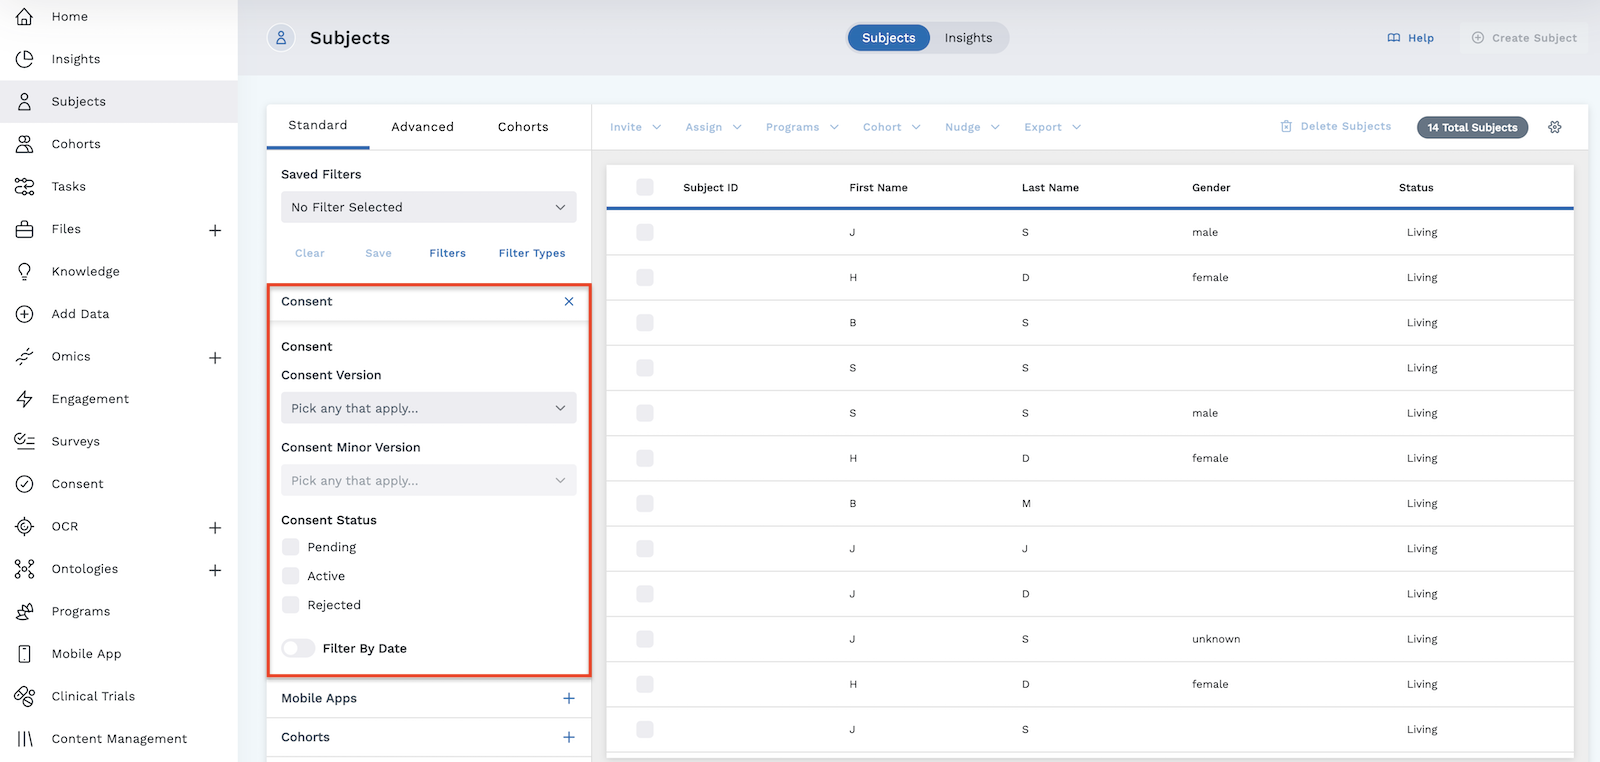
Click on the filter to open the available options for that specific filter. For example, clicking on Consent expands the filtering section, providing options specifically related to consent. Click the "x" to the right of the row to collapse the options.
Standard Search
If a project has ontology data loaded into it, the user can choose to filter using a standard search or by ontology. If a project does not have ontology data loaded into it, only the standard search options are visible for filtering.
Under the selected filter, select the button for Standard and a search box appears. Use the box to search for the specific codes. In the example below, we expanded the filter for Encounter, chose a standard search, and selected the code for Emergency. The Occurence filter is set to >= 1. Three subjects meet these filter requirements in our project for having at least one Emergency encounter.
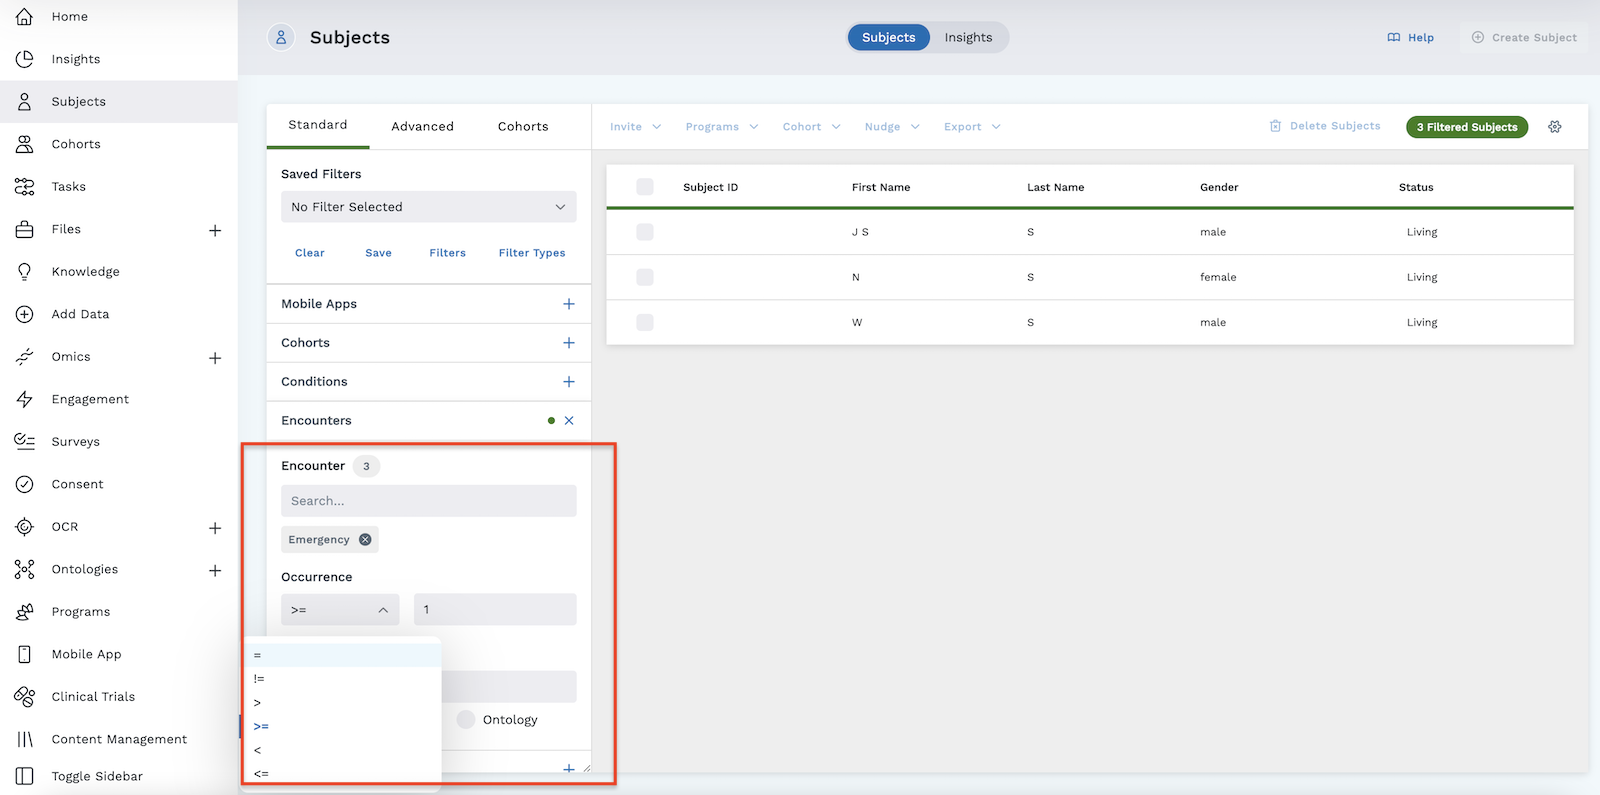
The Occurrence filter becomes visible after a selection is made in the search box, allowing you to further define the occurrence:
=is equal to>is greater than>=is greater than or equal to<is less than<=is less than or equal to
Depending on the filter, the Value filter may become visible. Use the Value filter to see inclusive and exclusive ranges:
- [] = [x,y] range is between x and y, includes both x and y
- () = (x,y) range is between x and y, excludes both x and y
- (] = (x,y] range is between x and y, excludes x but includes y
- [) = [x,y) range is between x and y, includes x but excludes y
The Omics Availability filter searches for subjects with sequencing data matching the specifications. This filter is independent of the variant filters, which have their own germline/somatic specification options.
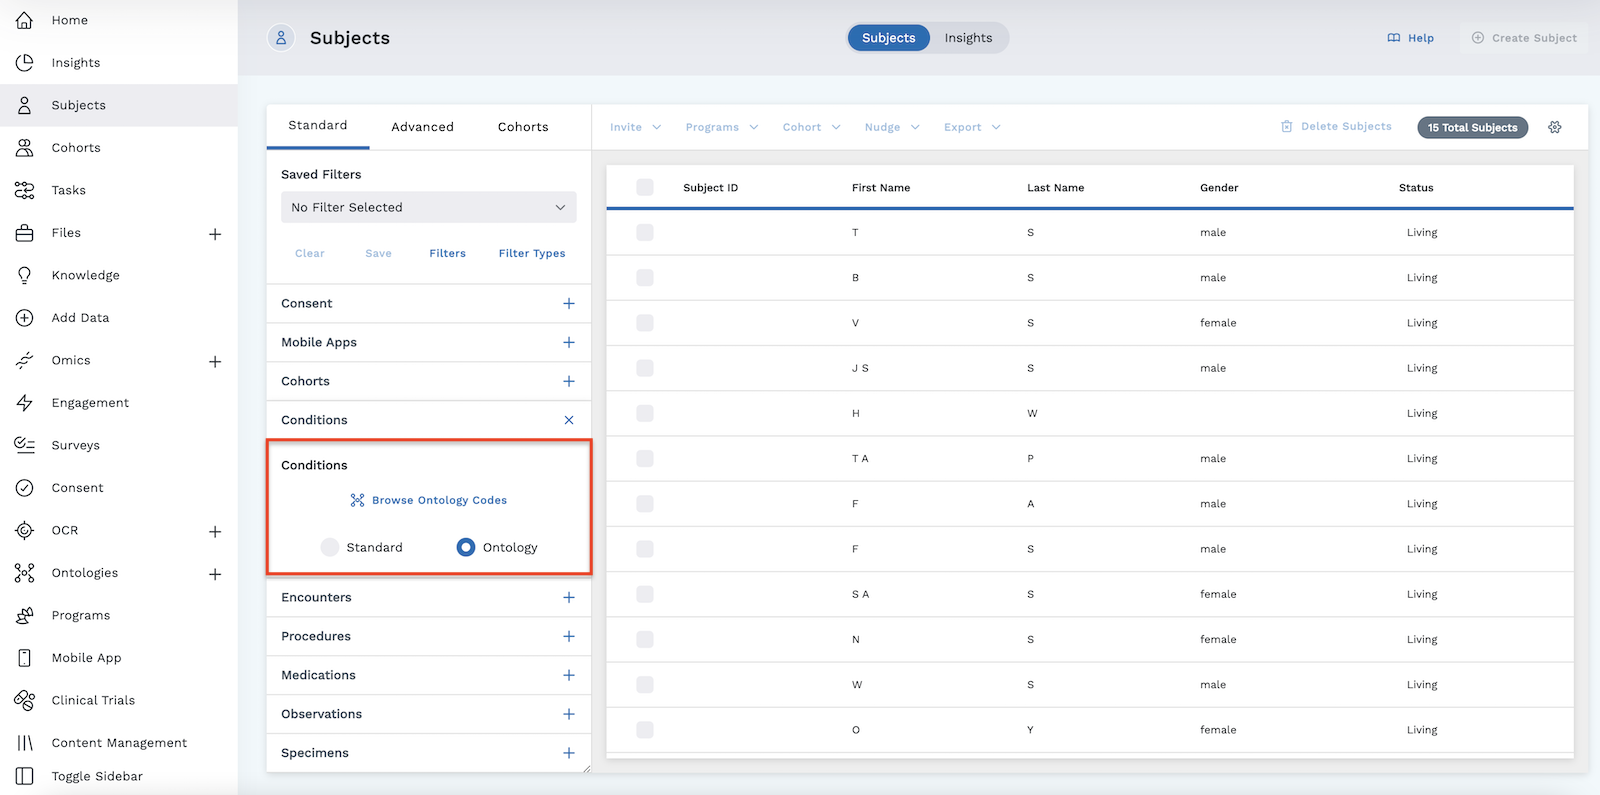
Ontology Search
If ontologies are loaded into a project, you have the option to search using ontologies rather than using the standard search. Visit the section on ontologies for more details on loading ontologies into a project.
Instead of searching for all of the possible codes that cover a certain condition, procedure, etc., you can select the ontology that encompasses all relevant codes.
For example, to search for subjects who are pregnant, the user would have to enter all codes that cover pregnancy into the standard search. Since there is a code for 10 week gestation, 11 week gestation, and so on, this becomes not only tedious, but also allows for the possibility of not searching for all potential pregnancy codes.
Run an Ontology Search
To use ontology search:
- Expand the desired filter category.
- Select the button for Ontology.
- Click the blue Browse Ontology Codes button.
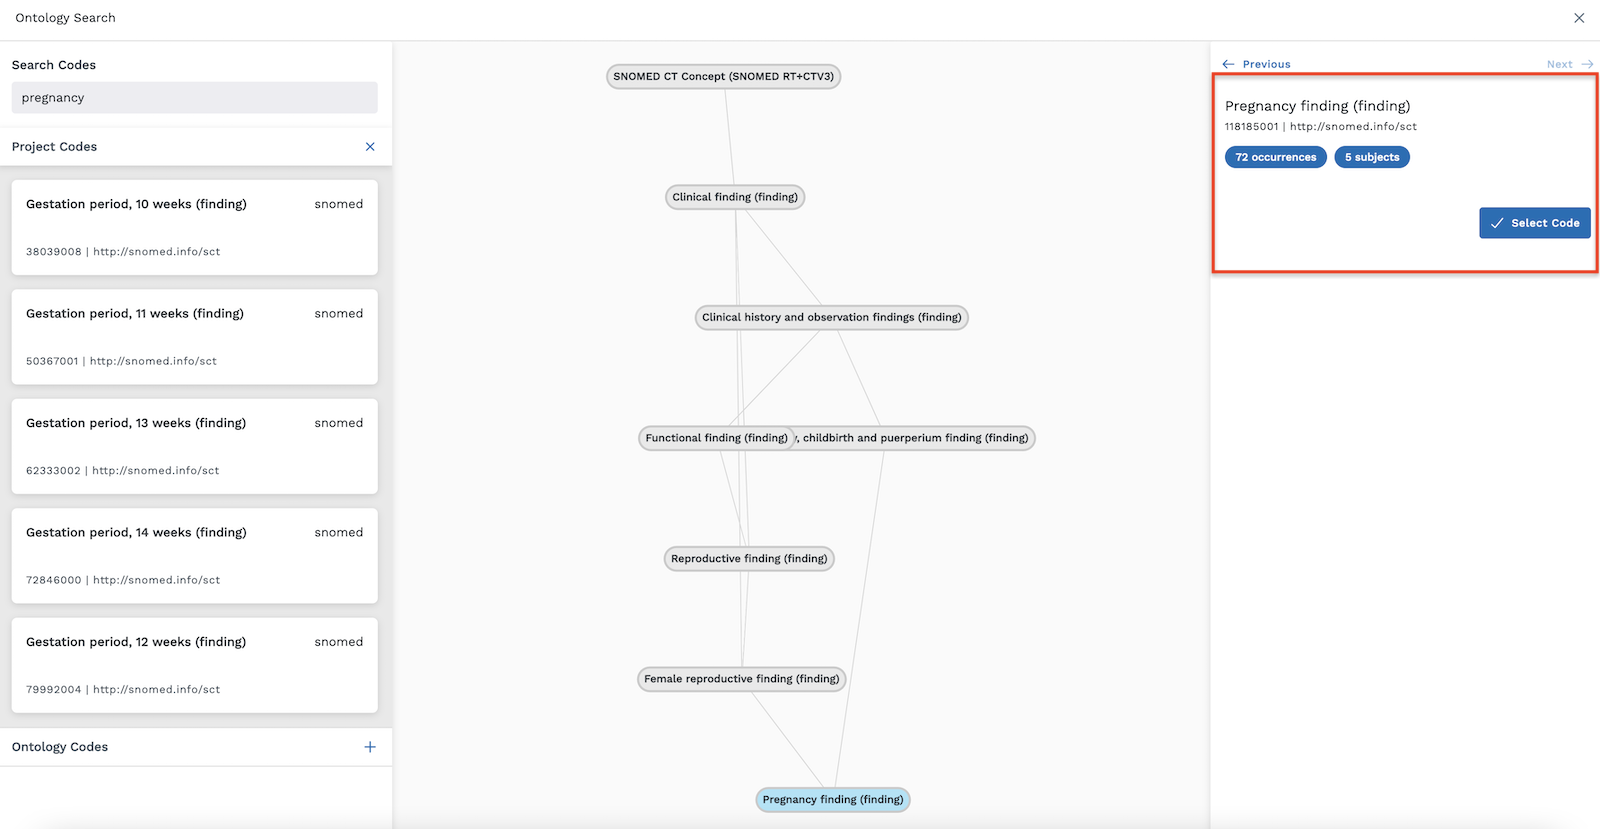
- In the window that opens, type in the desired search term in the box labeled Search Codes.
- Applicable project codes appear in the area under Project Codes. Click on one to open a conceptual tree displaying the parent and children concepts in the center viewer window.
- Click the desired ontology in the center tree. It displays on the top right of the page, along with the number of applicable matching subjects.
- When finished, click the blue Select Code button.
In the pregnancy example, we entered "pregnancy" as our search term. We clicked on the code for pregnancy with 10 weeks of gestation, and this opened the conceptual tree in the center, as shown below.
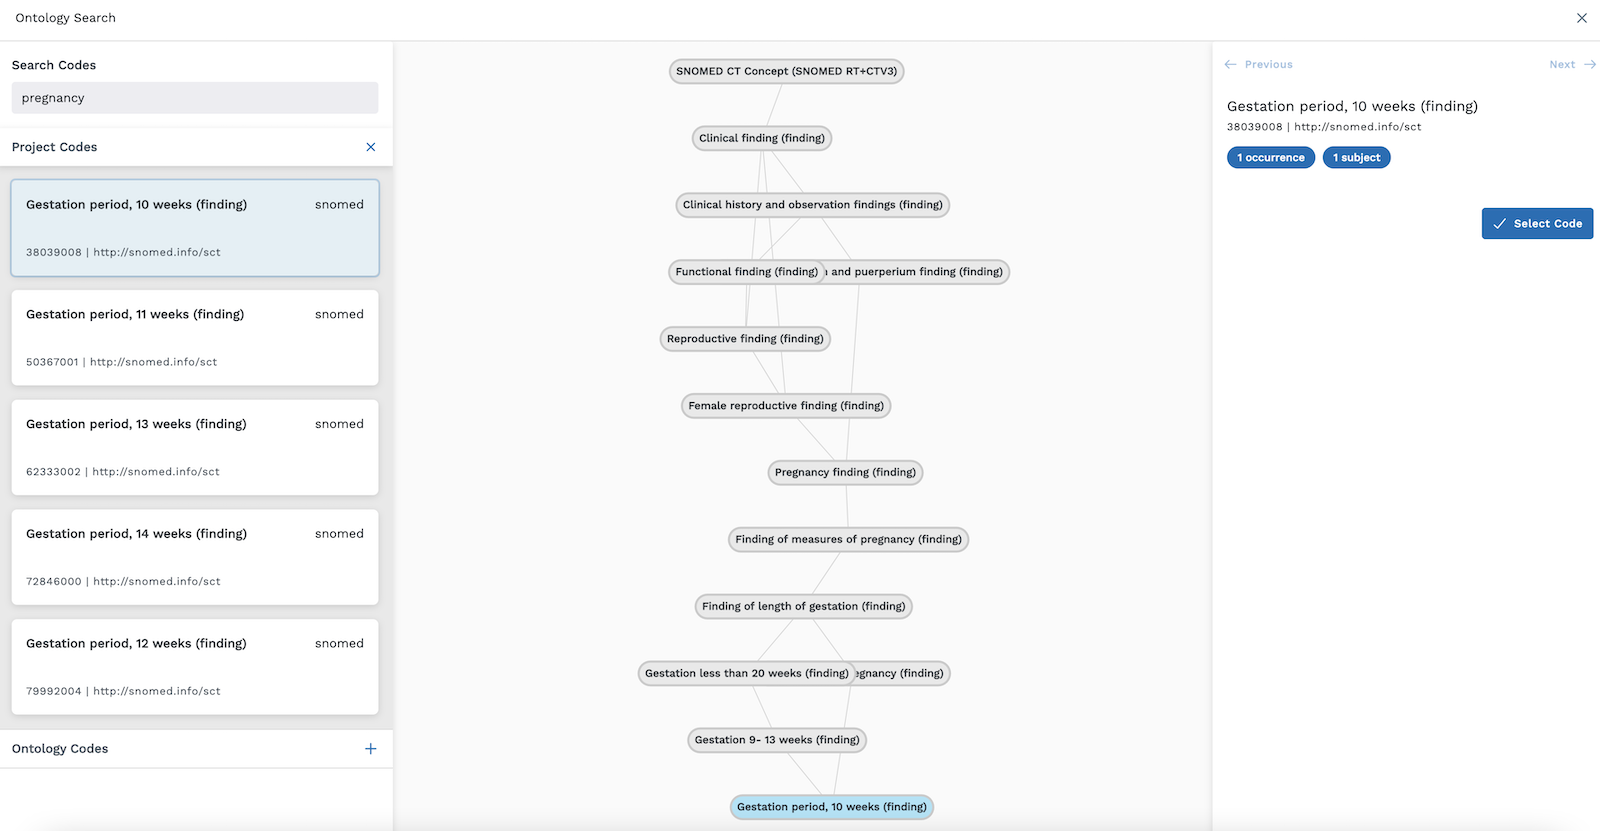
However, we're not only looking for subjects who are 10 weeks pregnant. The goal of the ontology search is to easily group and find all pregnant subjects in our project. In the center of the conceptual tree, there is a finding listed as Pregnancy. Select the "Pregnancy" parent concept in the center of the tree, and the Pregnancy finding displays at the top right of the screen. If we click the blue Select Code button, this now becomes the new ontology search filter as we return to the subject viewer.