SMART on FHIR App
The LifeOmic Platform SMART on FHIR app integrates into Cerner and Epic EHRs. It establishes a trusted, API-driven relationship between your LifeOmic Platform account and your EHR account and streamlines data ingestion. After you use the app to import data from the EHR into the LifeOmic Platform, you can use the LifeOmic Platform suite of tools to examine and manipulate this dataset. The LifeOmic Platform can also publish data out to the EHR when the EHR allows this.
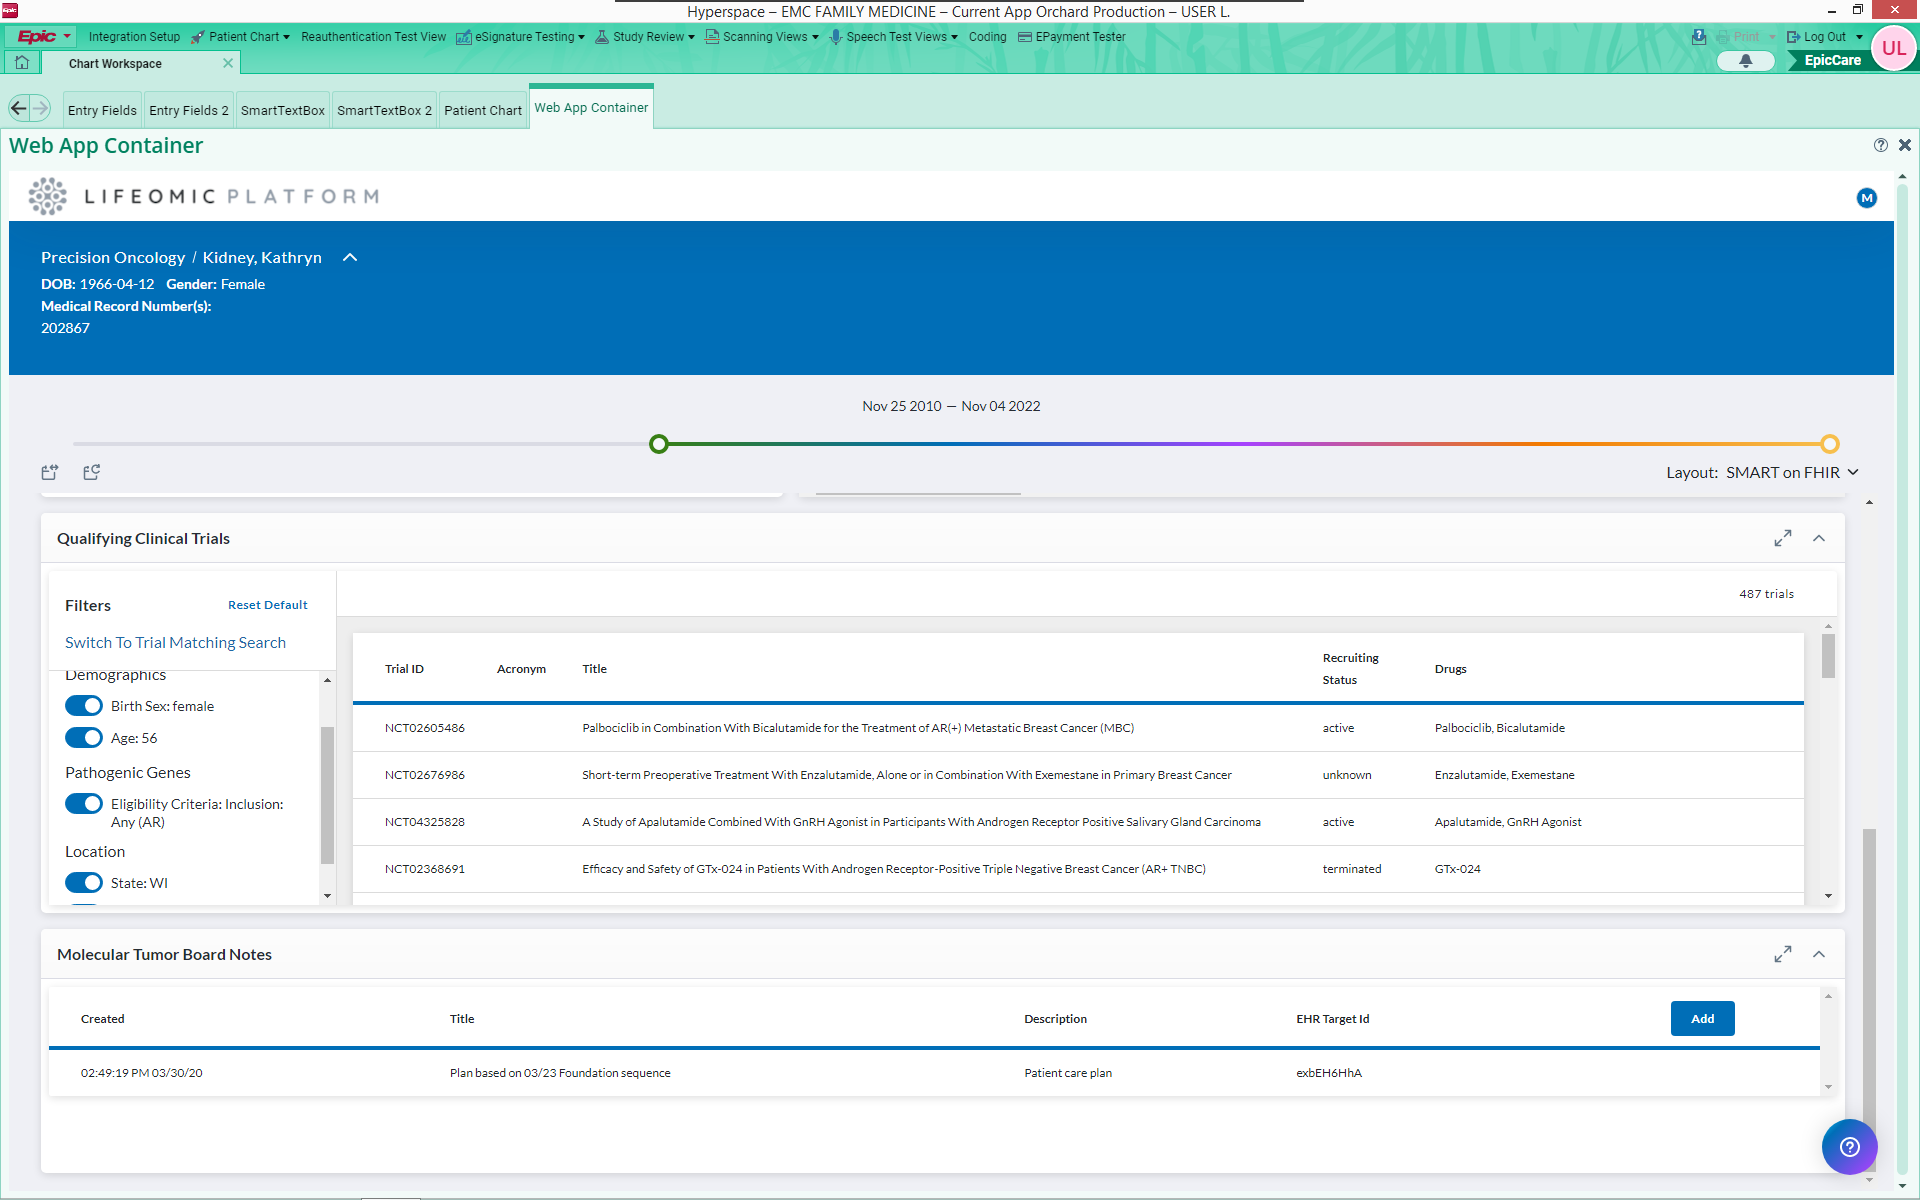
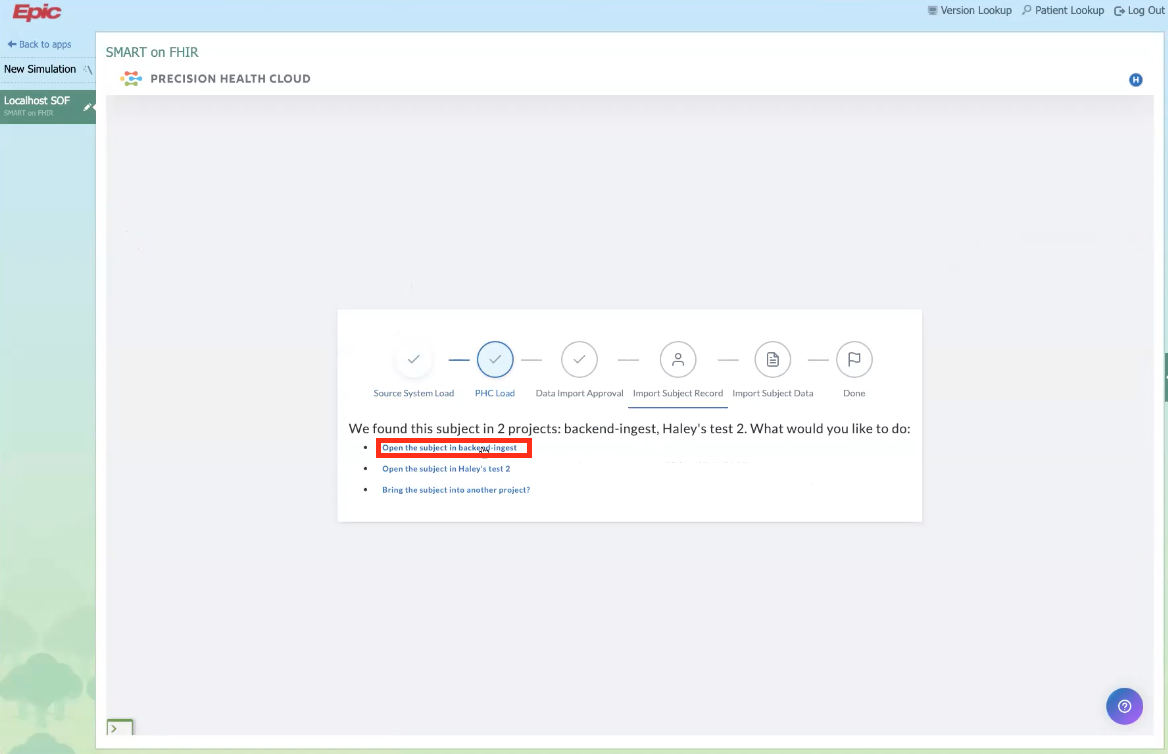
The SMART on FHIR app is available to users through both the Cerner and Epic user interfaces. The screenshot below shows the app as it appears in Epic Hyperspace, the core front-end software for healthcare providers and administrative staff.

Configuring EHR ingestion is a complex process. Please contact LifeOmic for assistance.
A user needs to have the Ingest from EHR permission to complete this procedure. This permission is not included in any default access control policies. To add this permission, complete the Create an Access Control Policy procedure.
SMART on FHIR Demographic Ingestion
When you create a subject for a project, the LifeOmic Platform can initiate an automatic ingestion of that individual's data from the EHR. The ingestion brings in the clinical data stored in the EHR. It also updates demographic information, such as postal and email addresses.
This feature saves you from the need to perform a manual data push for that subject. The relevant EHR data is identified using the subject's MRN, and the subject identity is confirmed with the last name and DOB.
Automatic ingestion requires that the SMART on FHIR app is configured for the EHR.
Use the SMART on FHIR App to Import Data
To use the SMART on FHIR app, you log into the LifeOmic Platform and create an EHR configuration and include a JSON file. You only need to set up this EHR configuration once. Once the EHR configuration is done, you log into the EHR and navigate to the SMART on FHIR app embedded in the EHR and kick off the initial ingestion.
If you want to download an updated dataset in the future, you can either use the SMART on FHIR app embedded in the EHR again or Refresh SMART on FHIR Patient Data from the Subject Screen in the LifeOmic Platform.
Configure a Cerner or Epic EHR for the SMART on FHIR App
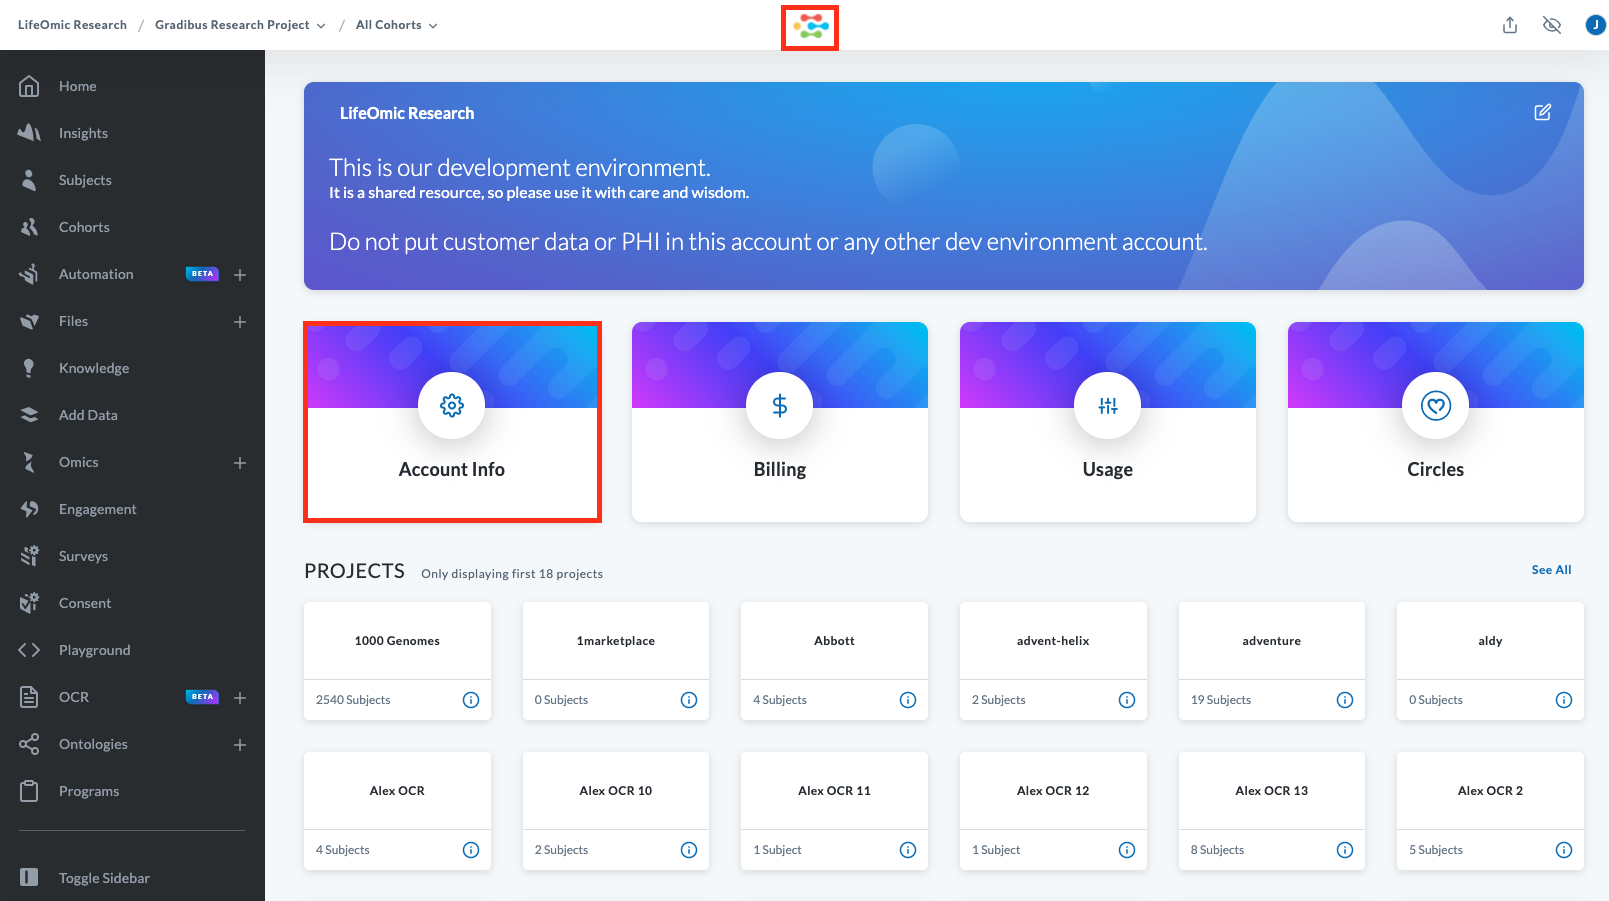
- From any page, click the logo at the top of the page.
- From the home page, click the Account Info tile.
- Click the EHRs tab.
- Click Add to display the EHR Details dialog.
- For Status, choose Enabled.
- For EHR Name, enter a specific name.
- For EHR Type, pick a listed EHR ingestion type, such as Cerner.
- For API Base URL, obtain the URL endpoint to use for the ingestion of FHIR data from the EHR vendor. For example,
https://fhir-ehr-code.cerner.com/dstu2/ec2458f2-1e24-41c8-b71b-0e701af7583d. - For API Auth Type, choose from the listed options. Listed options are specific to the the EHR type.
- For API Key, obtain this credential from the EHR vendor. You may need to create credentials on their site.
- For API Secret, obtain this credential from the EHR vendor.
- For Ingestion Model, choose Asynchronous. Asynchronous allows ingestion in the background. This is normally the best option, since large data ingestions can take several hours. Use synchronous for small data ingestions. Synchronous pauses the system until the ingestion completes.
- For Delay (in Seconds) Between Records, enter 0.5.
- For the Additional Configuration, paste the JSON file supplied by LifeOmic. For more information about this file, see the Additional Configuration JSON Example below.
- Click Save.

Additional Configuration JSON Example
The JSON configuration provides details to the EHR. These include:
authScope- This indicates the data that you care about. It lists the different data to pull down.resourceType- Reiterates authScope with FHIR resource types.fhirVersion- FHIR version supported for the EHR.2indicates DSTU-2. (The LifeOmic Platform can also support version 4.)publishable- Toggles the ability to send data up to the EHR. This flag enables the Publish button in the LifeOmic Platform UI.publishCoding- The coding to use when writing resources back to the EHR.rules- Various instructions on how to tweak the data, such as the default number of years of data to ingest or download filters.
{
    "authScope": "system/Binary.read system/Condition.read system/DiagnosticReport.read system/DocumentReference.read system/MedicationAdministration.read system/MedicationOrder.read system/MedicationStatement.read system/Observation.read system/Patient.read system/Procedure.read system/Encounter.read system/ProcedureRequest.read system/DocumentReference.write",
    "resourceTypes": [
        "Patient",
        "Condition",
        "Observation",
        "DocumentReference",
        "DiagnosticReport",
        "Procedure",
        "MedicationOrder",
        "MedicationAdministration",
        "MedicationStatement",
        "Encounter",
        "ProcedureRequest"
    ],
    "fhirVersion": 2,
    "publishable": true,
    "publishCoding": {
        "coding": [
            {
                "system": "https://fhir.cerner.com/e0580676-1eec-46da-9b06-83dd927e062a/codeSet/72",
                "code": "1939007620",
                "display": "OP-Hem/Onc Precision Genomics clinical note",
                "userSelected": true
            }
        ]
    },
    "rules": {
        "defaultNumberOfYearsToIngest": 1,
        "limitingFilters": [
            {
                "name": "Condition",
                "filters": []
            },
            {
                "name": "Encounter",
                "filters": []
            },
            {
                "name": "Observation",
                "filters": [
                    {
                        "field": "_lastUpdated",
                        "op": "ge",
                        "value": "@{lastIngestedDate}",
                        "valueFunctionType": "date"
                    },
                    {
                        "field": "_count",
                        "op": "eq",
                        "value": 100
                    }
                ]
            },
            {
                "name": "DocumentReference",
                "filters": [
                    {
                        "field": "_count",
                        "op": "eq",
                        "value": 250
                    }
                ]
            },
            {
                "name": "DiagnosticReport",
                "filters": [
                    {
                        "field": "date",
                        "op": "ge",
                        "value": "@{lastIngestedDate}",
                        "valueFunctionType": "datetime"
                    },
                    {
                        "field": "_count",
                        "op": "eq",
                        "value": 250
                    }
                ]
            },
            {
                "name": "Procedure",
                "filters": [
                    {
                        "field": "date",
                        "op": "ge",
                        "value": "@{lastIngestedDate}",
                        "valueFunctionType": "datetime"
                    }
                ]
            },
            {
                "name": "MedicationOrder",
                "filters": [
                    {
                        "field": "_lastUpdated",
                        "op": "ge",
                        "value": "@{lastIngestedDate}",
                        "valueFunctionType": "datetime"
                    },
                    {
                        "field": "_count",
                        "op": "eq",
                        "value": 250
                    }
                ]
            },
            {
                "name": "MedicationAdministration",
                "filters": [
                    {
                        "field": "effectivetime",
                        "op": "ge",
                        "value": "@{lastIngestedDate}",
                        "valueFunctionType": "date"
                    },
                    {
                        "field": "_count",
                        "op": "eq",
                        "value": 250
                    }
                ]
            },
            {
                "name": "MedicationStatement",
                "filters": [
                    {
                        "field": "_count",
                        "op": "eq",
                        "value": 250
                    }
                ]
            },
            {
                "name": "ProcedureRequest",
                "filters": [
                    {
                        "field": "_lastUpdated",
                        "op": "ge",
                        "value": "@{lastIngestedDate}",
                        "valueFunctionType": "datetime"
                    },
                    {
                        "field": "_count",
                        "op": "eq",
                        "value": 250
                    }
                ]
            }
        ]
    }
}
Import Patient Data from the EHR with the SMART on FHIR App
Once you have configured EHR ingestion on the LifeOmic Platform, you need to log into the EHR and navigate to the embedded SMART on FHIR app to kick off the ingestion.
The ingestion process depends on establishing a trusted relationship between the EHR and the LifeOmic Platform. Your LifeOmic Platform and EHR usernames can also be linked. LifeOmic can do this by configuring an alternate OIDC provider and saved logins under the Auth Clients section of the LifeOmic Platform. For more information, see Auth Clients and Single Sign-on
Please contact LifeOmic to configure the EHR trusted relationship.
Note: This procedure is different for each EHR. This below steps are specific to Cerner Millenium.
Note: For more details on authentication with Cerner APIs, see the Cerner Authentication information.
-
Open a browser window and launch and log into Cerner Powerchart.

-
Navigate to a patient and then navigate to the patient data.
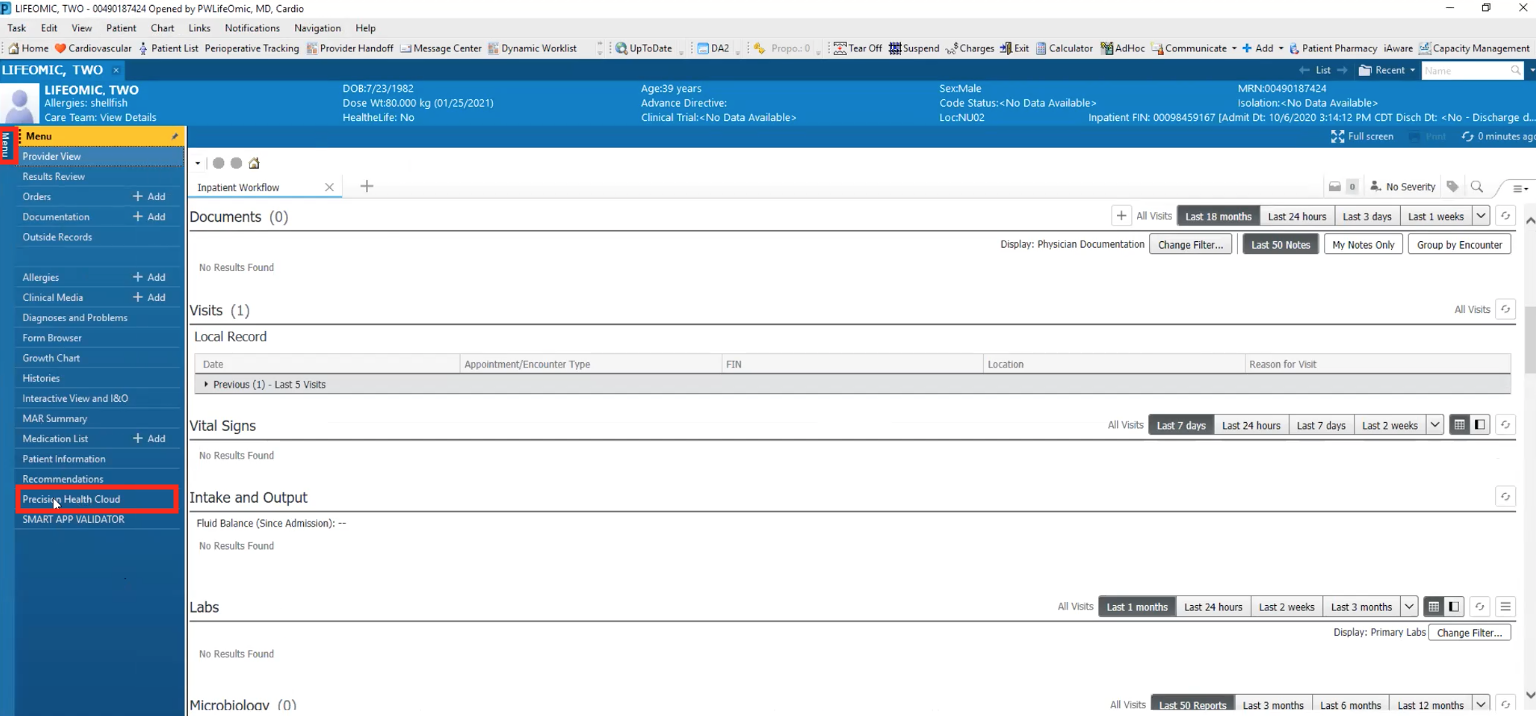
-
On the left side of the screen, click Menu to expand the menu and click Precision Health Cloud to launch the SMART on FHIR app.
Note: The first launch of the LifeOmic Platform SMART on FHIR app from the EHR requires you to enter your LifeOmic Platform credentials. Click the Save Credentials check box at the initial login to prevent subsequent logins from requiring credentials.
-
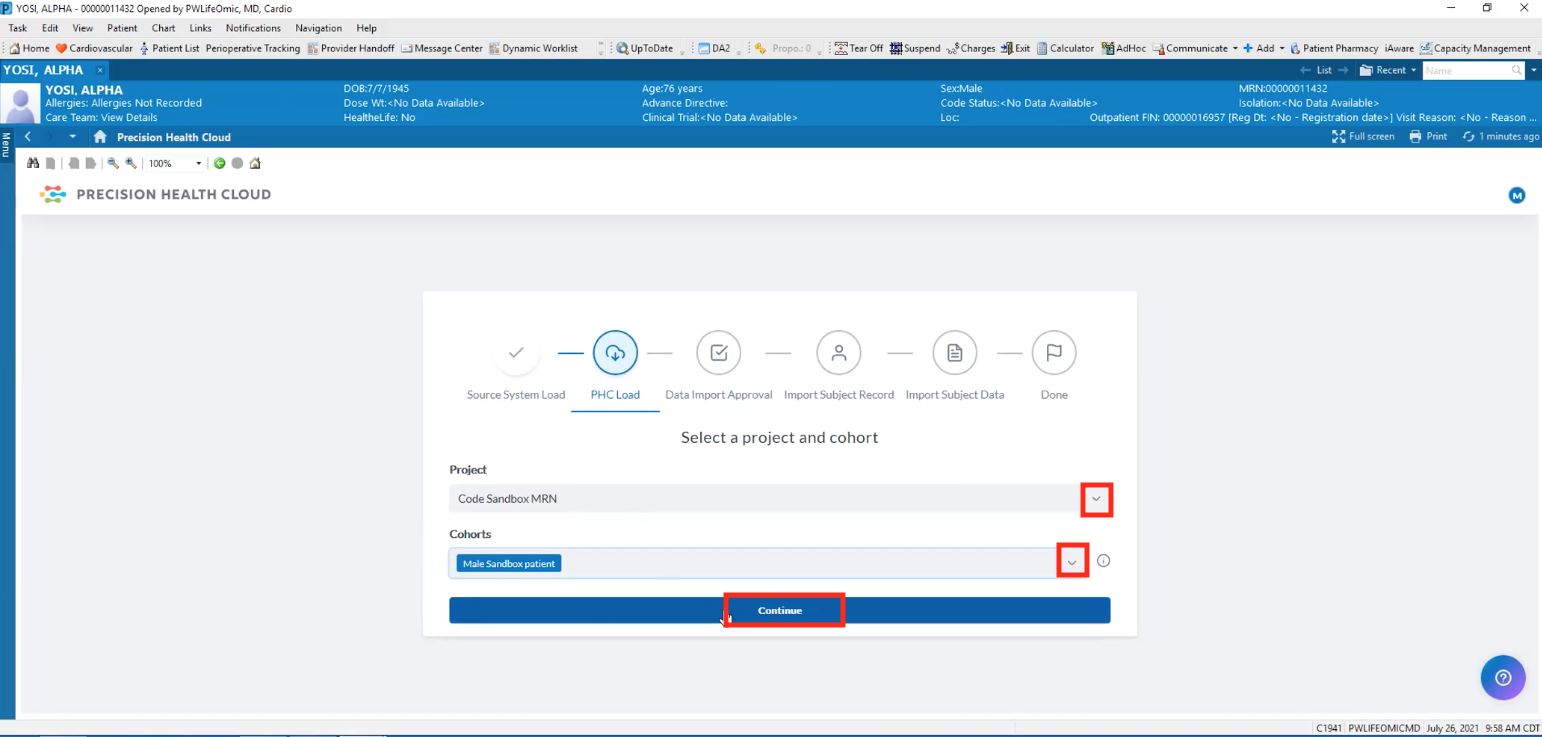
An import dialog appears with several stages. At the Load stage, select a Project, select Cohorts, and click Continue.
-
At the Data Import Approval stage, check that the patient information is correct and click Accept to begin the import process. After the subject record imports, you are returned to the LifeOmic Platform SMART on FHIR home screen.
The subject record is imported first and synchronously. The patient record includes identifying patient info, such as the patient's name and medical record number (MRN). The MRN from the EHR is retained as the MRN for the LifeOmic Platform. This import completes quickly.
The subject data is imported after the subject record. The subject data is the patient's clinical data and is imported asynchronously in the background. This can be a large quantity of data with a lengthy import process.
-
To confirm a successful import, log into the LifeOmic Platform and click the Subjects tab on the left side of the user interface and find the patient's name. Patients appear in Subjects after the subject record import. For more information, see Subjects.
Indicate a Genomics Test Order for a Patient
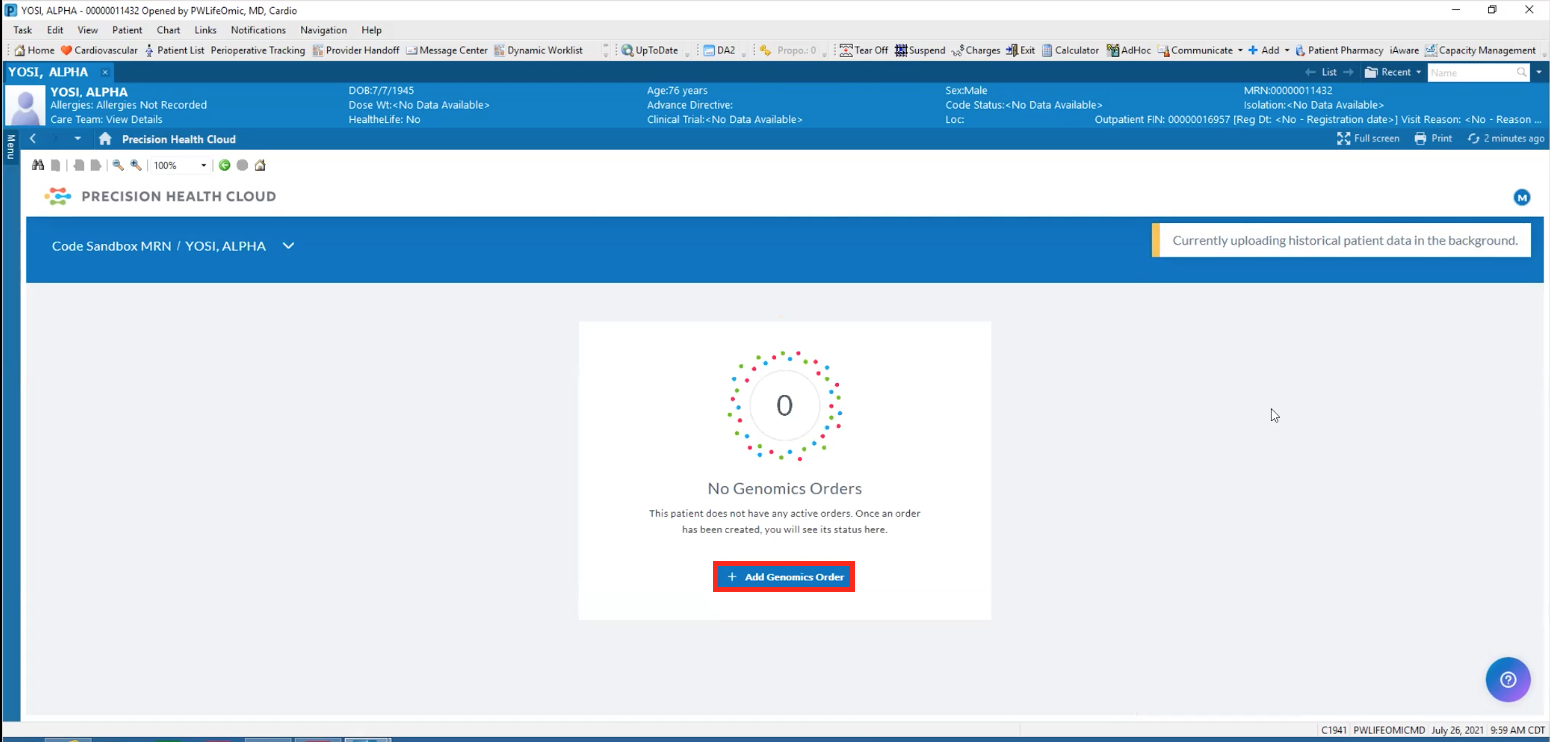
The SMART on FHIR app allows you to indicate that a genetic test has been ordered for a patient and to provide additional information on the test.
- On the LifeOmic Platform SMART on FHIR home screen, click the Add Genomics Order.
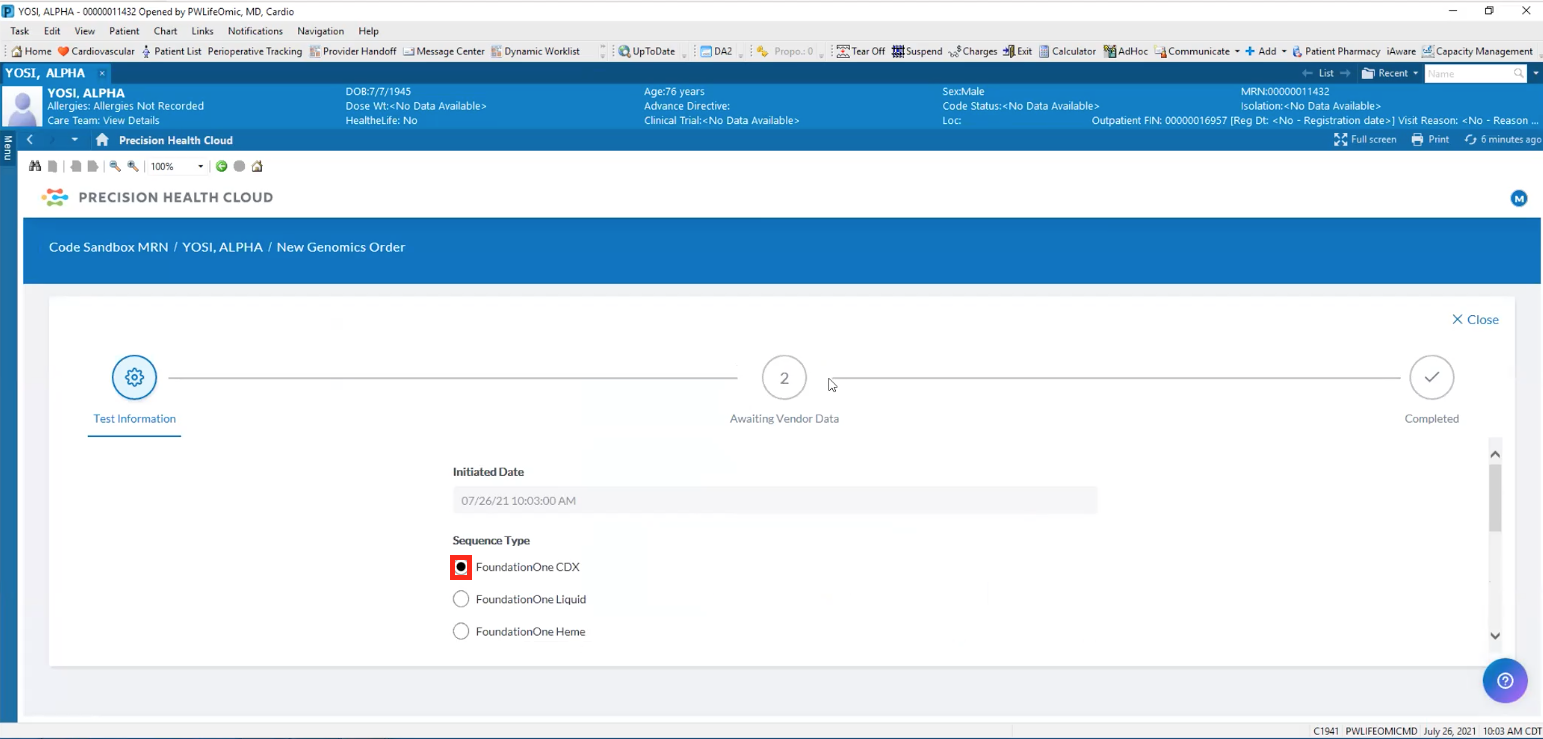
- Under Sequence Type, choose the genomics test vendor and scroll down.
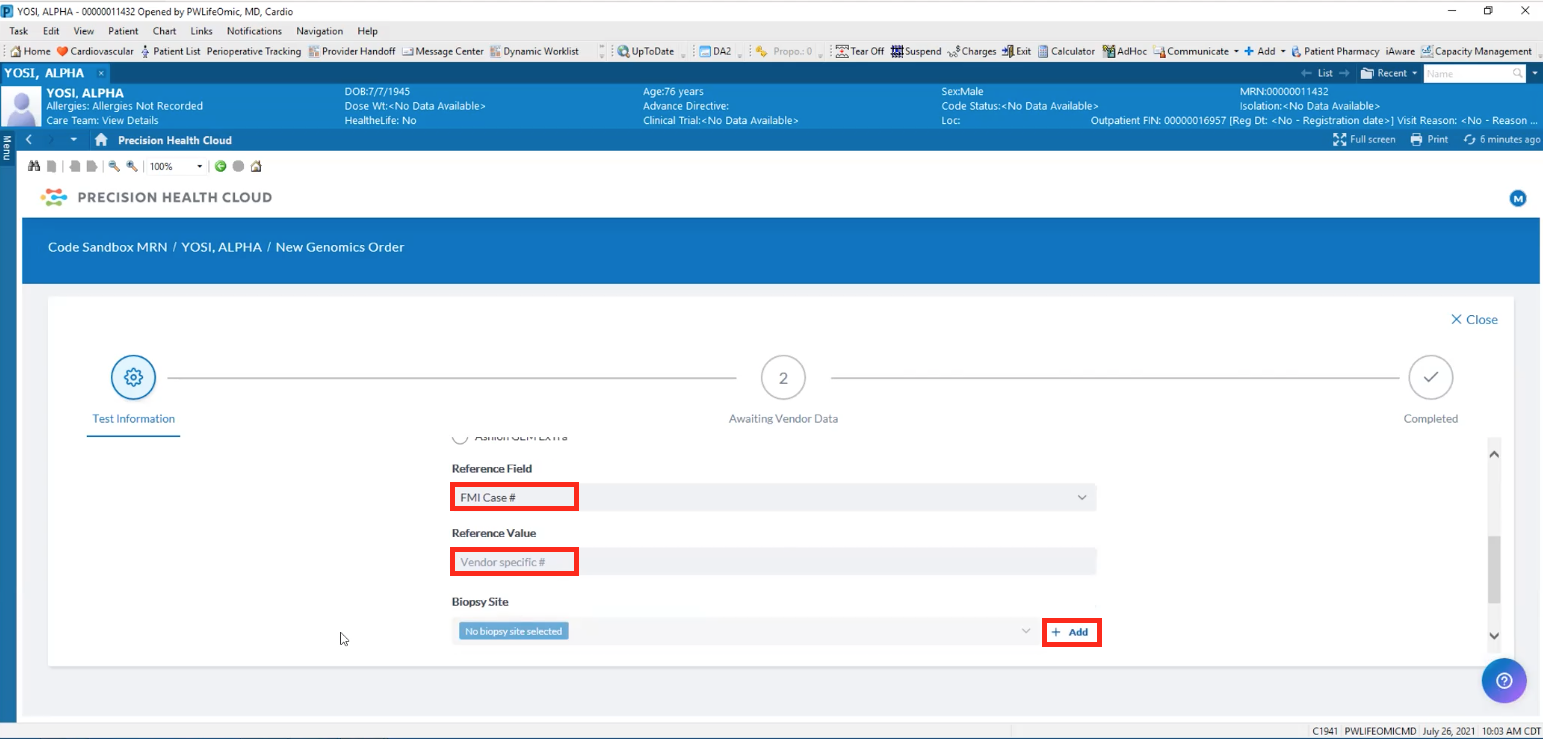
- In the Reference Field, enter the case number or other information (optional).
- In the Reference Value, enter any vendor specific number or other information (optional).
- In the Biopsy Site, click the Add and select from a configured ontology, such as SNOMED CT, to specify the area of the body. If you do not have an ontology configured, see Ontologies to set one up.
- Click Submit.
Refresh SMART on FHIR Patient Data from the LifeOmic Platform Subject Screen
When you begin to work with a patient, you may want to pull in their latest EHR data. You can refresh the SMART on FHIR data ingestion for a patient from the LifeOmic Platform subjects screen. Refreshing the data does not interrupt any regularly scheduled ingestion. This option does not appear for patients without data supplied from the SMART on FHIR app.
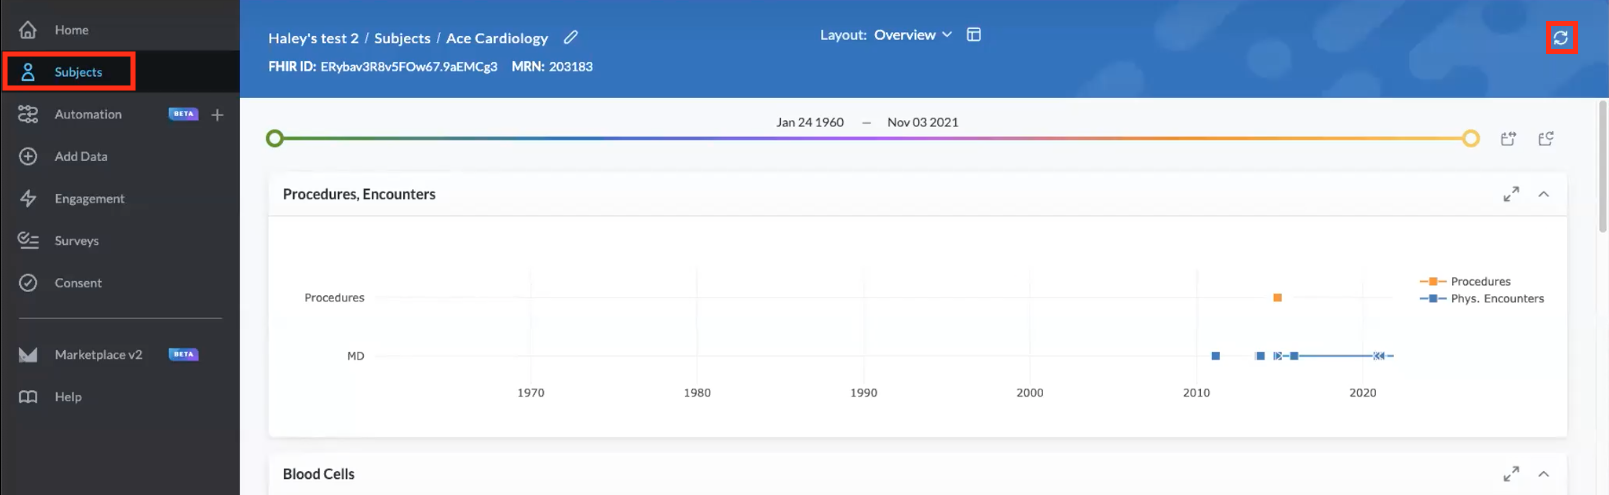
- On the left side of the LifeOmic Platform screen, click Subjects.
- Click on a patient.
- Click the SMART on FHIR refresh button on the right side of the screen.
 A Successfully started ingestion dialog appears to confirm the process.
Add a Layout from the LifeOmic Platform to your SMART on FHIR App
The LifeOmic Platform allows you to create a custom Subject Viewer layout and import this layout into your SMART on FHIR app.
- From your LifeOmic Platform project, complete the Add a Layout procedure.
- From your EHR, launch or reload the SMART on FHIR app to begin the import process.
- In the import dialog that appears, click the option for the existing project where you created the layout.
- Confirm that the new layout appears in the SMART on FHIR app.