Add and Manage EHRs
The LifeOmic Platform integrates several EHRs. The following procedures are for a general EHR integration. For a Cerner or Epic EHR integration, see the SMART on FHIR App article.
To get more information on a specific EHR, including how to obtain API credentials, refer to their API documentation.
Configure a Cerbo, InBody, or BCDA EHR
- From any page in the app, click the logo at the top of the page.
- From the home page, click the Account Info tile.
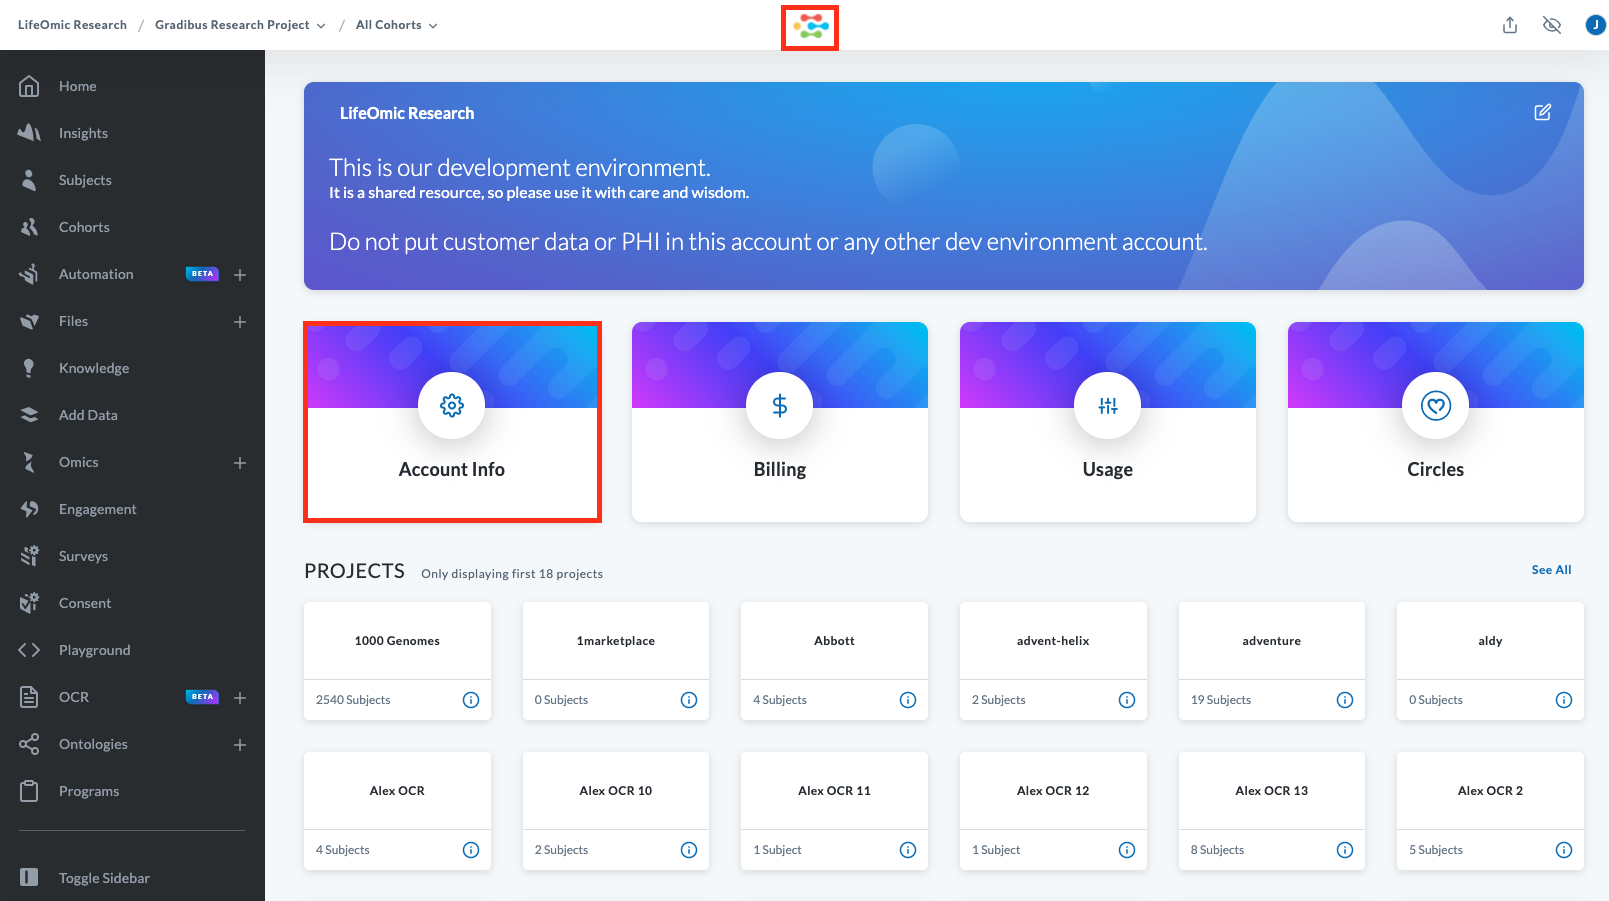
- Click the EHRs tab.
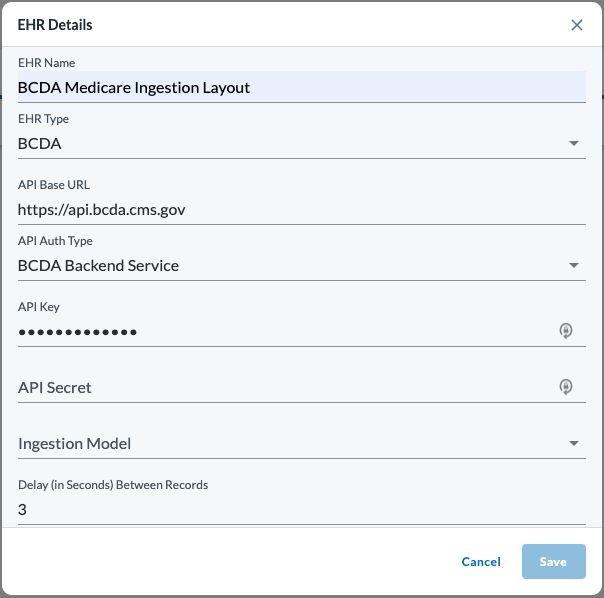
- Click Add to display the EHR Details dialog.
- For Status, choose Enabled.
- For EHR Name, enter a specific name.
- For EHR Type, pick a listed EHR ingestion type, such as BCDA.
- For API Base URL, obtain the URL endpoint to use for the ingestion of FHIR data from the EHR vendor. For example,
https://api.bcda.cms.gov. - For API Auth Type, choose from the listed options, such as BCDA Backend Service. Listed options are specific to the EHR type.
- For API Key, use the credential supplied by your EHR for your account. Note: Contact your EHR for the process to obtain your credentials. You may generate the credentials on their portal or obtain it directly from their team.
- For API Secret, obtain this credential from the EHR vendor.
- For Ingestion Model:
- Choose Asynchronous for large data ingestions that can take several hours. Asynchronous allows ingestion in the background.
- Choose Synchronous for small data ingestions. Synchronous pauses the system until the ingestion completes.
- For Delay (in Seconds) Between Records, use the controls to set a desired interval or leave unset for no delay. Three seconds is a general guideline.
- Leave the Additional Configuration section blank and click Save.
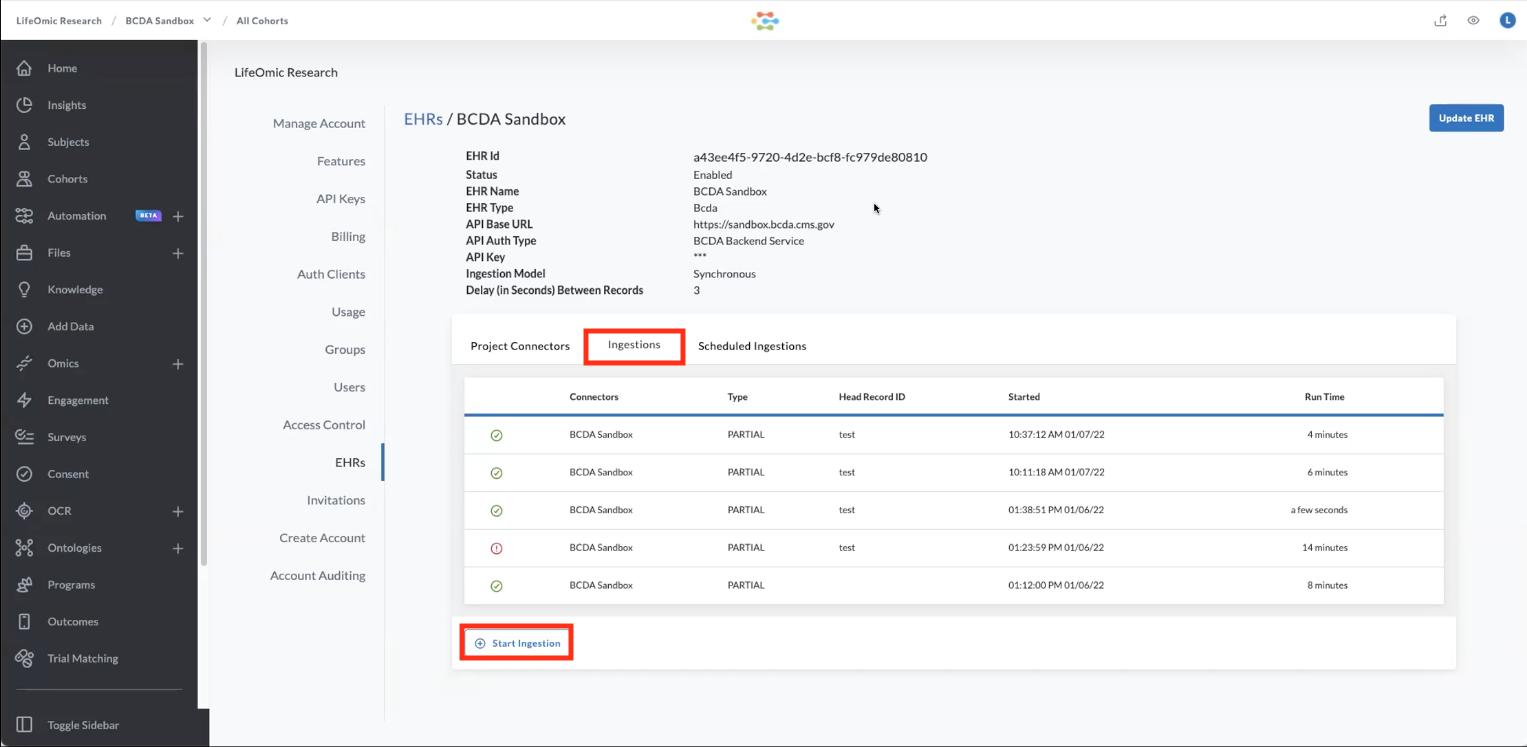
- To start an ingestion, click the Ingestions tab and Start Ingestion or set up a Scheduled Ingestion.
- To confirm a successful ingestion, log into the app, click the Subjects tab on the left side, and find the patient's name. Patients appear in Subjects after the subject record import. For more information, see Subjects.
Manage EHRs with the LifeOmic Platform App
-
From any page, click the logo at the top of the page.
-
From the home page, click the Account Info tile.
-
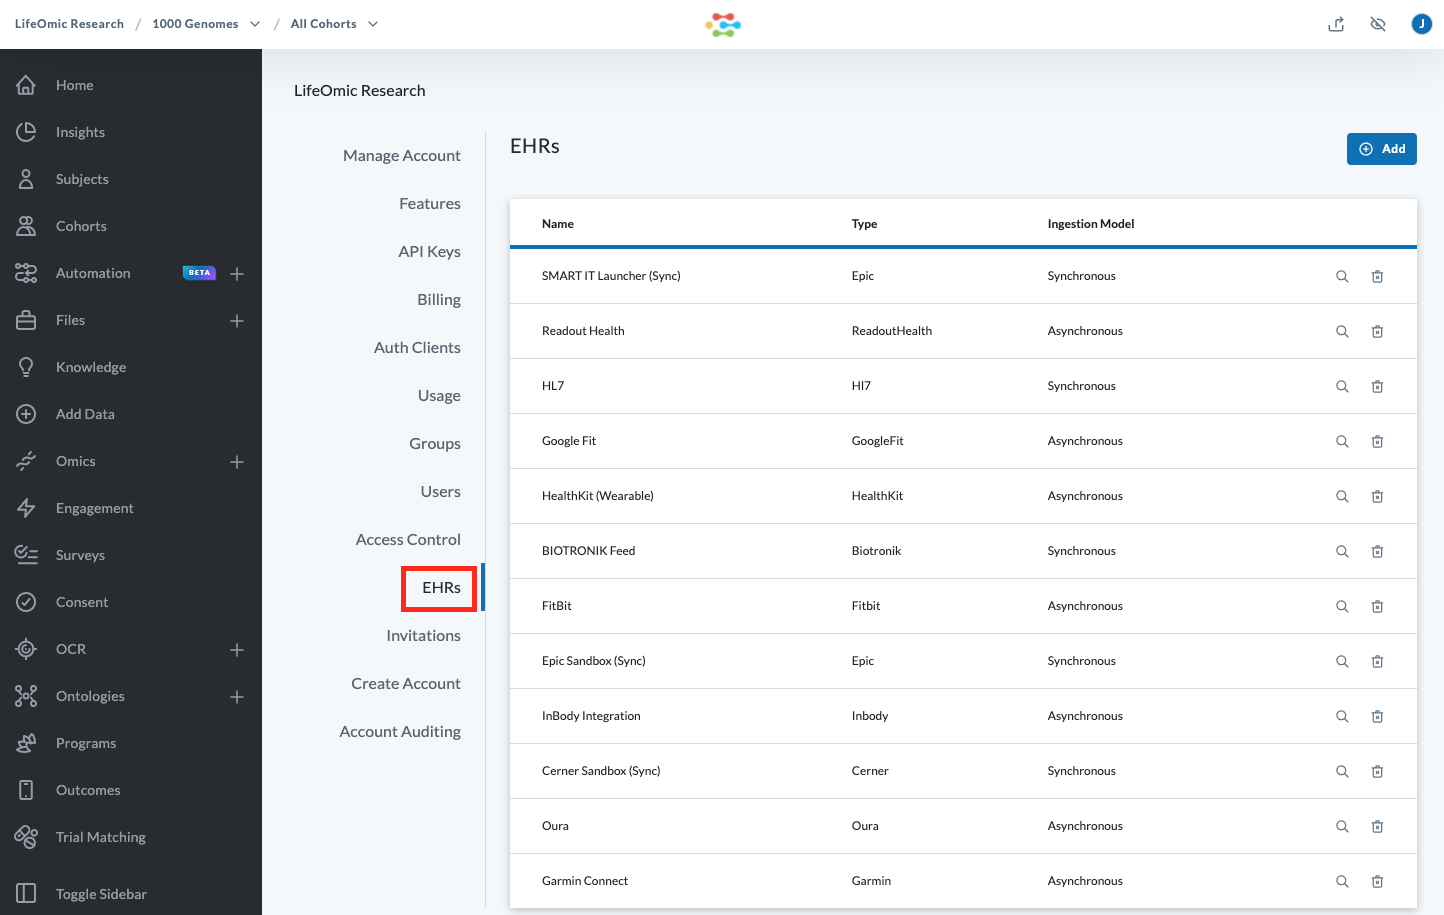
Click the EHRs tab to list the currently integrated EHRs.
-
To remove an EHR, click the delete icon.
-
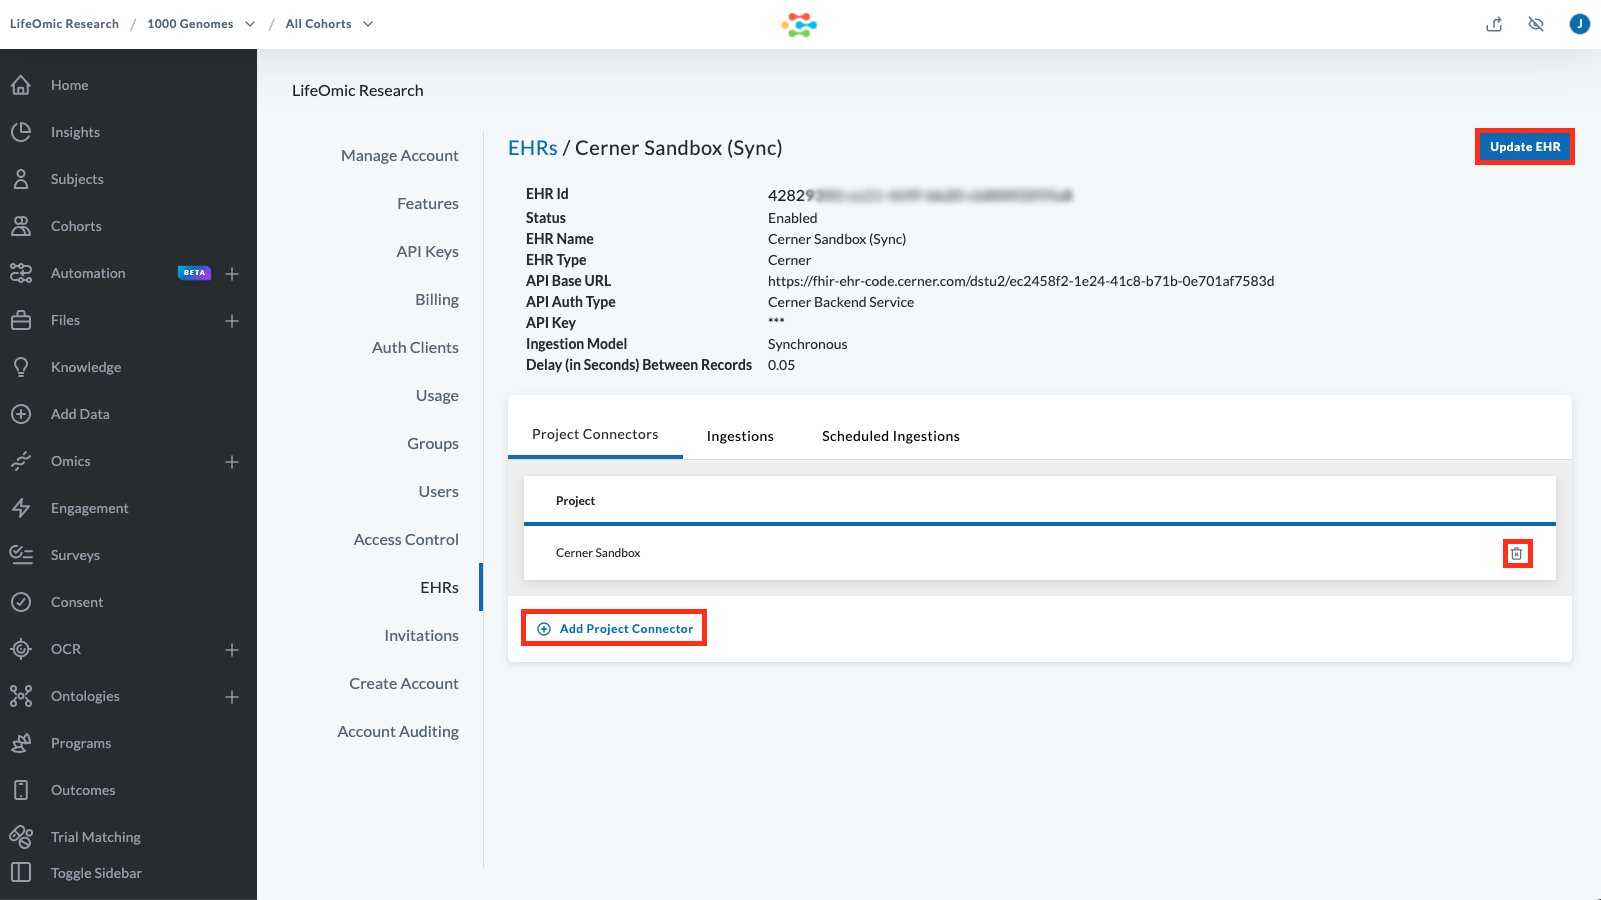
To examine the details of an EHR, click the details icon on the EHR row. From the EHR Detail view, you have several options.
-
From the default Project Connectors tab view, click Update EHR to display and configure the EHR details.
-
Click the delete icon on the Project row to remove the connector.
-
Click Add Project Connector to display the Add Project Connector dialog and use the drop down to select a project and click Save.
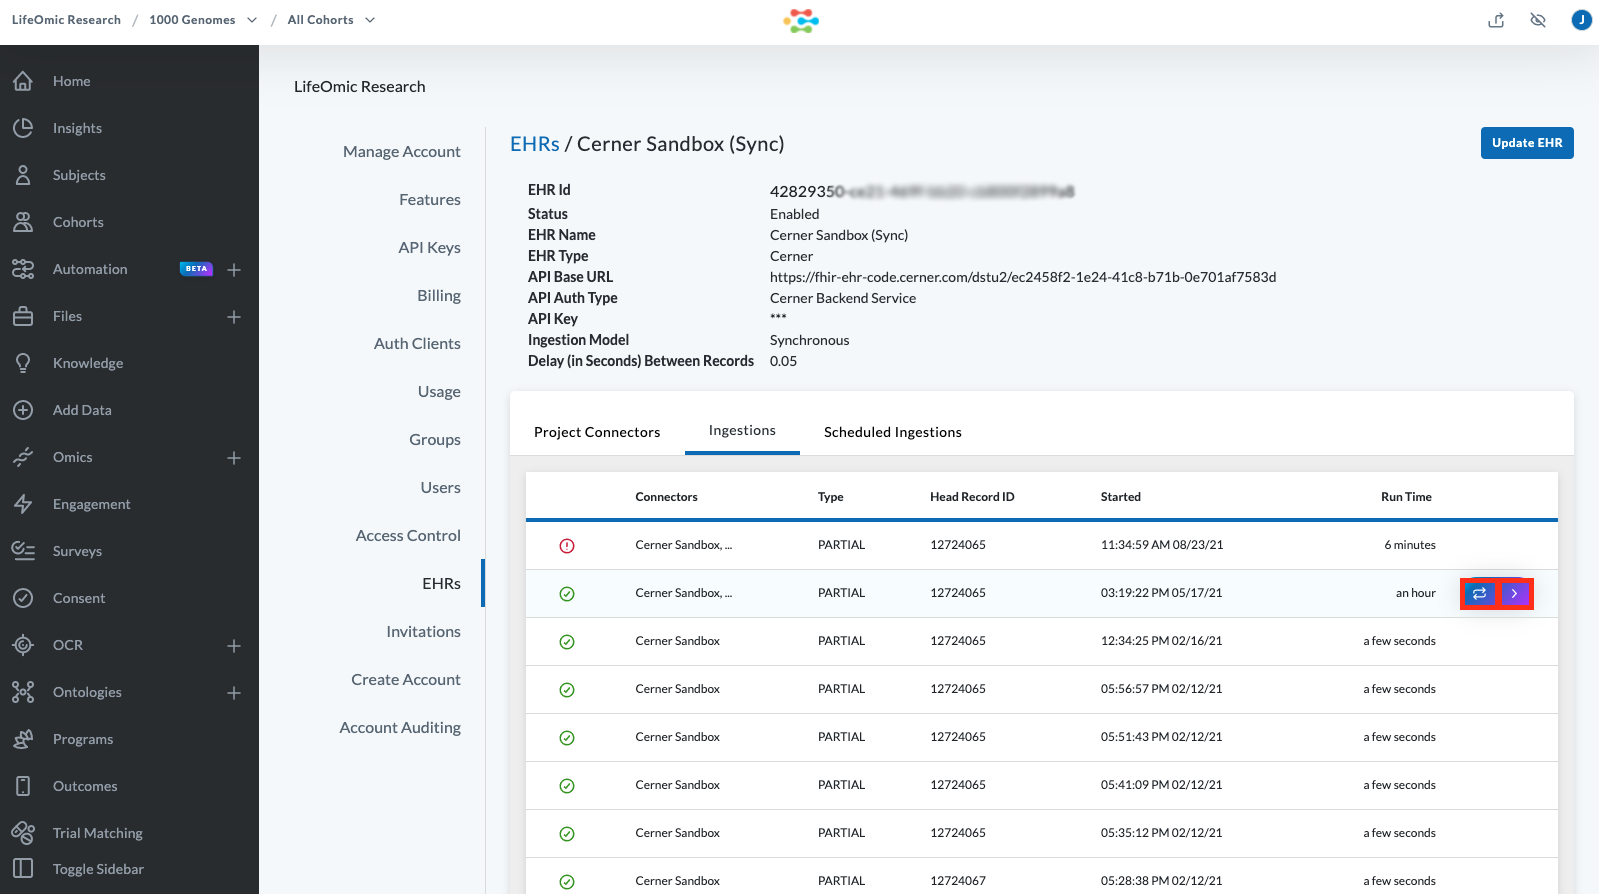
-
From the Ingestions tab, mouse over a row to reveal the menu controls.
-
Click the Rerun Ingestion icon to kick off an ingestion.
-
Click the to display the details of an ingestion.
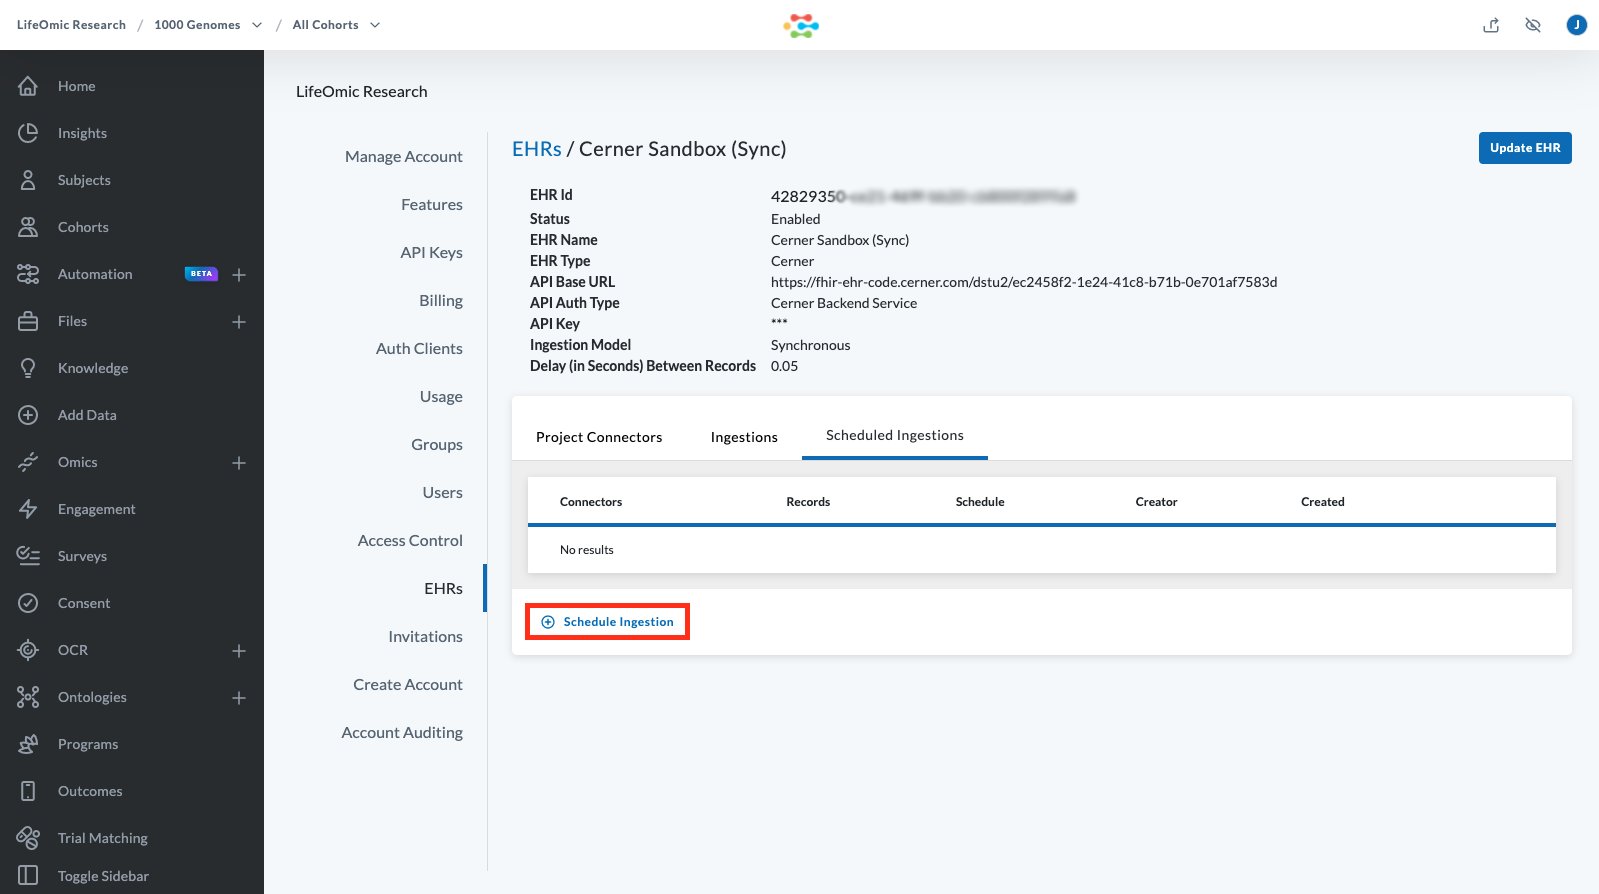
-
From the Scheduled Ingestions tab, click Schedule Ingestion to display the Start Ingestion dialog.
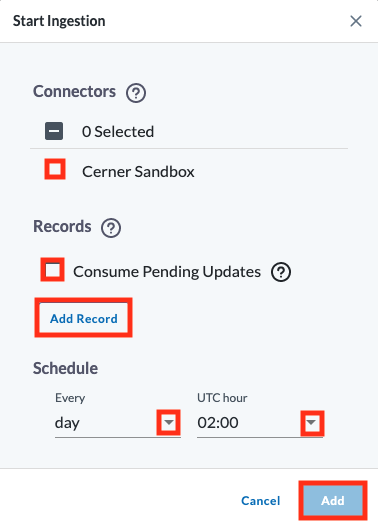
-
On the Start Ingestion dialog, under Connectors, select a connector or multiple connectors.
-
Select Consume Pending Updates to ingest any data already in the queue.
-
Under Records, leave unselected to ingest all records. Click Add Record and select PATIENT or DOCUMENT for a specific record. For the PATIENT ID or DOCUMENT ID, use the ID from the EHR source, such as Cerner or Epic.
-
Under Schedule, select day or hour and the time of day in the Coordinated Universal Time (UTC) zone.
-
Click Add.
-