Auth Clients and Single Sign-on
The LifeOmic Platform allows you to configure third-party authentication clients for Single Sign-on (SSO). This makes the login process easier and frees you from having to create usernames and passwords for new users. It also provides an extra layer of security for an organization's account.
The LifeOmic Platform offers preconfigured options to set up Facebook and Google authentication as identity providers. It also offers a Custom Identity Provider option that allows you to set up a wide variety of SSO providers.
For more information, see the Authentication FAQ.
SAML Support
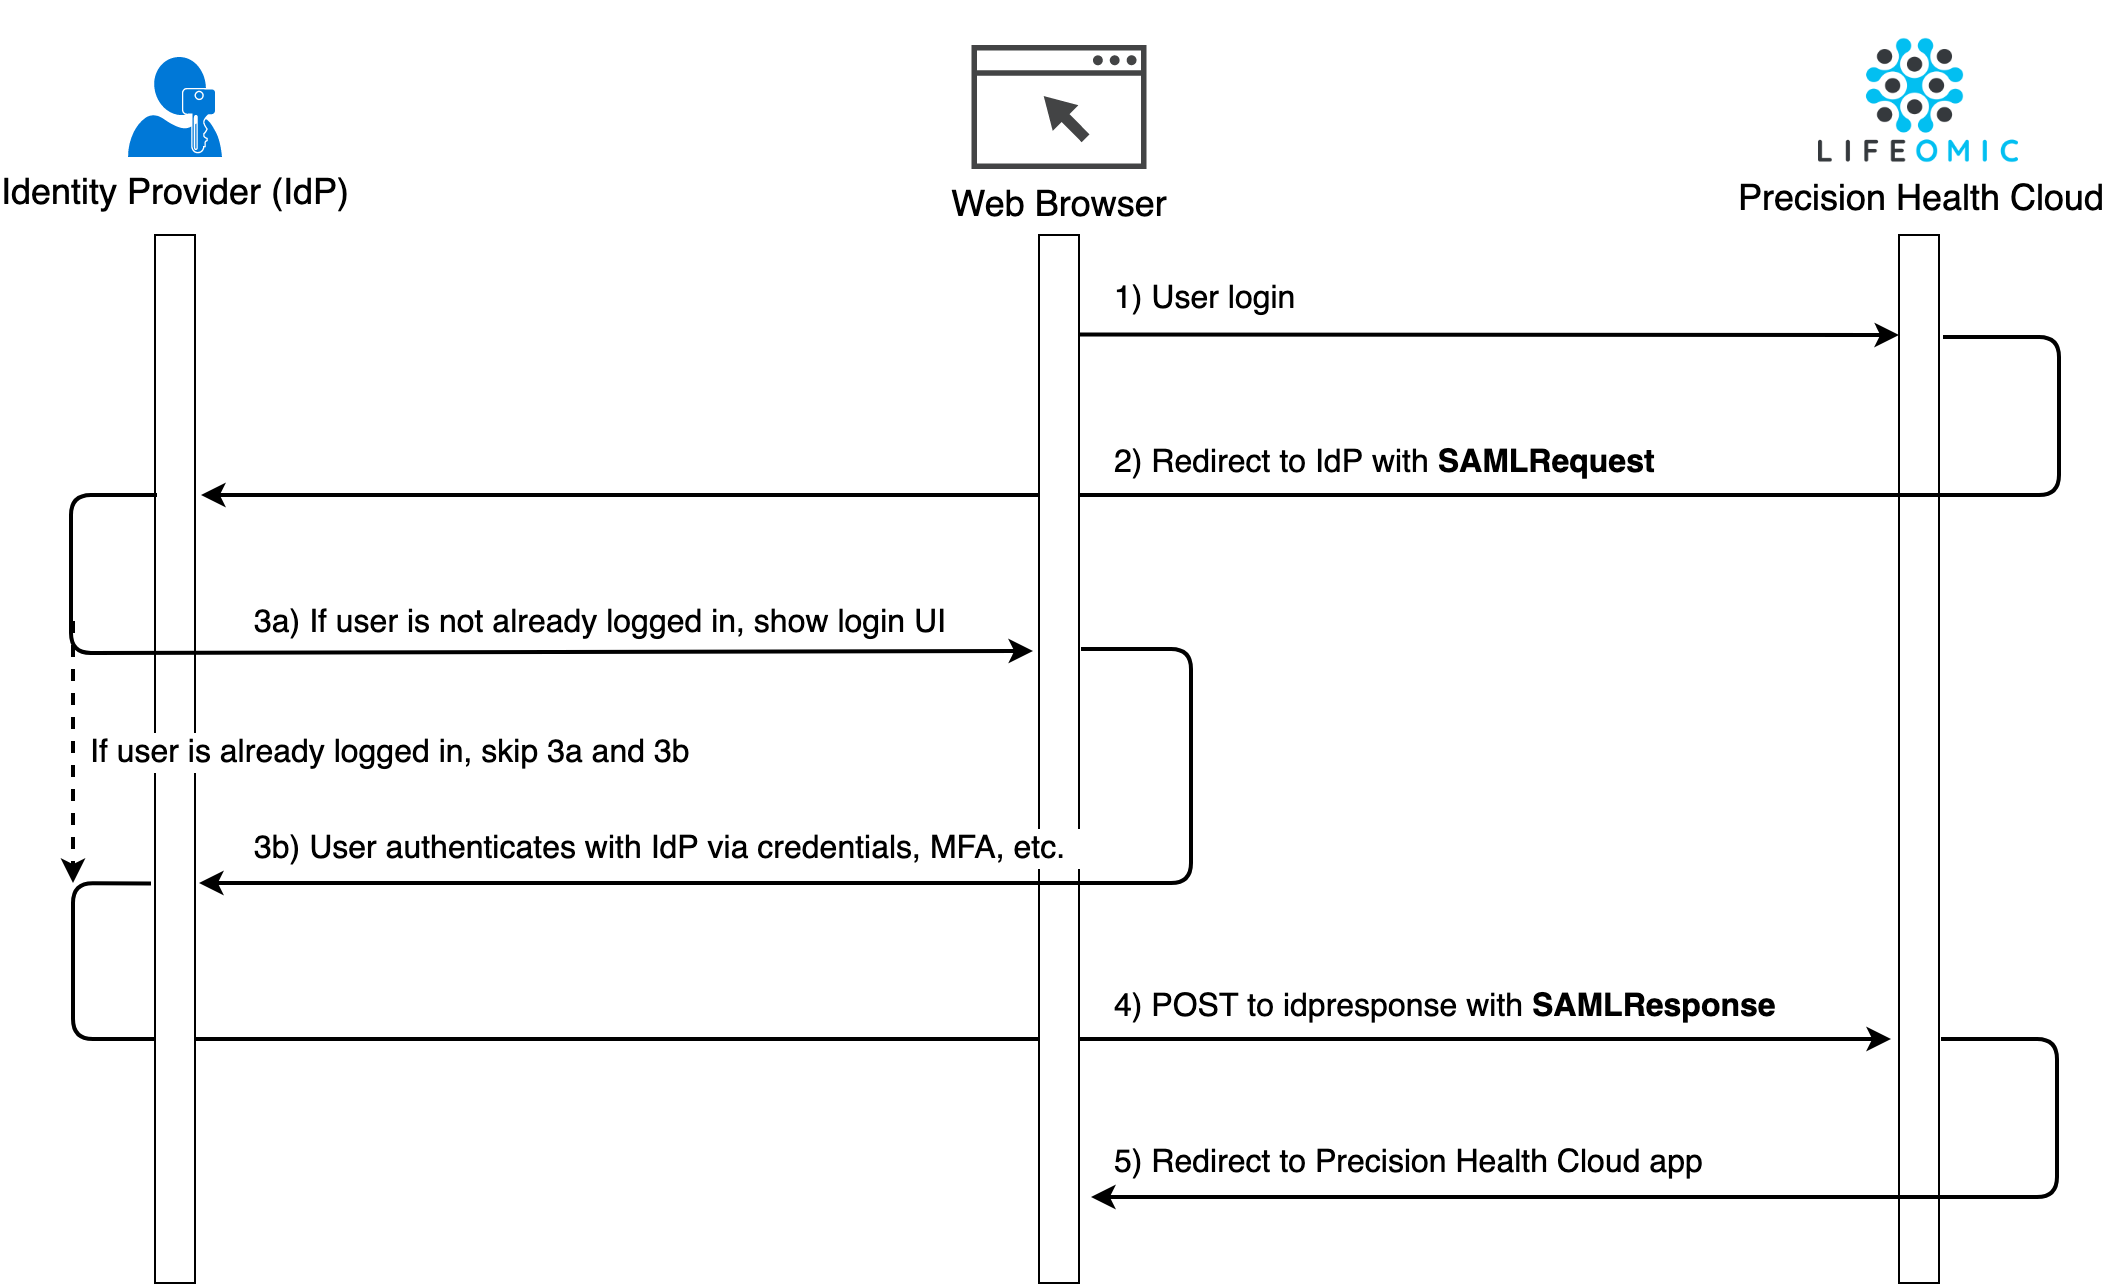
The LifeOmic Platform supports the SAML 2.0 protocol. Only SP-initiated SSO is supported. IdP-initiated SSO is not supported.
The Auth Client tab is only available for Enterprise account customers. The tab does not appear at other account levels. To become a LifeOmic Enterprise customer, contact your LifeOmic representative.
Configure an Authentication Client
Configuring an SSO client is an advanced operation. Assistance from LifeOmic is available.
A user needs to belong to the default Admin group or have those permissions to complete this procedure. To add a user to the default Admin group, complete the Add a user to a group with the Users tab procedure.
-
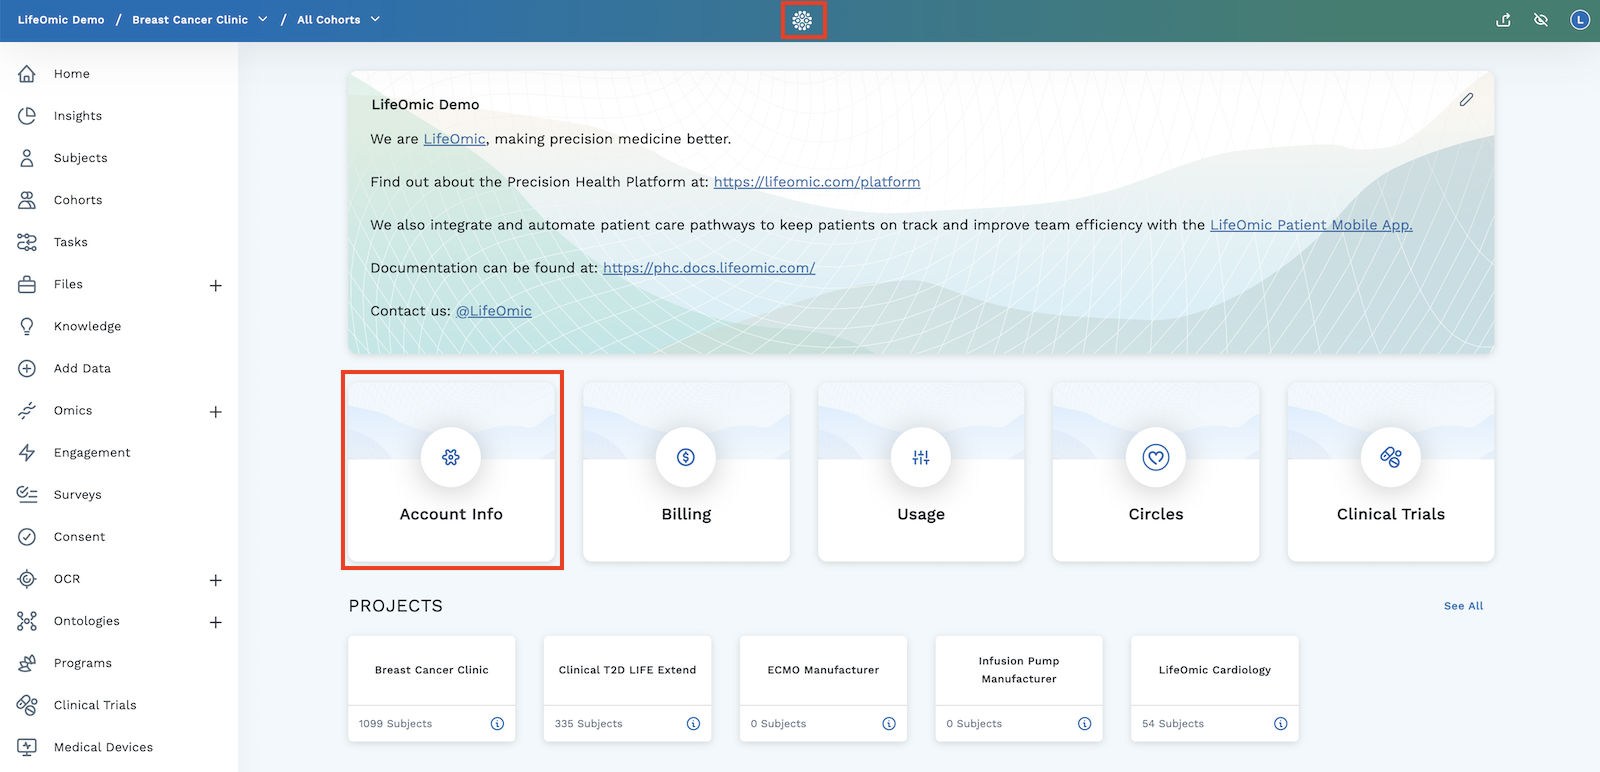
From any page, click the logo at the top of the page.
-
From the home page, click the Account Info tile.
-
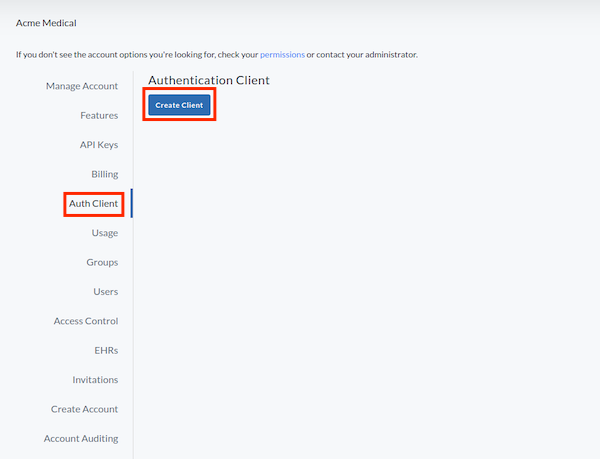
From the account info page, click Auth Client to see the currently configured Authentication Client.
-
To add a new client, click Create Client.
 note
noteOnly one Web client is allowed per account. If you need to delete an existing client, click the icon next to the client name.
-
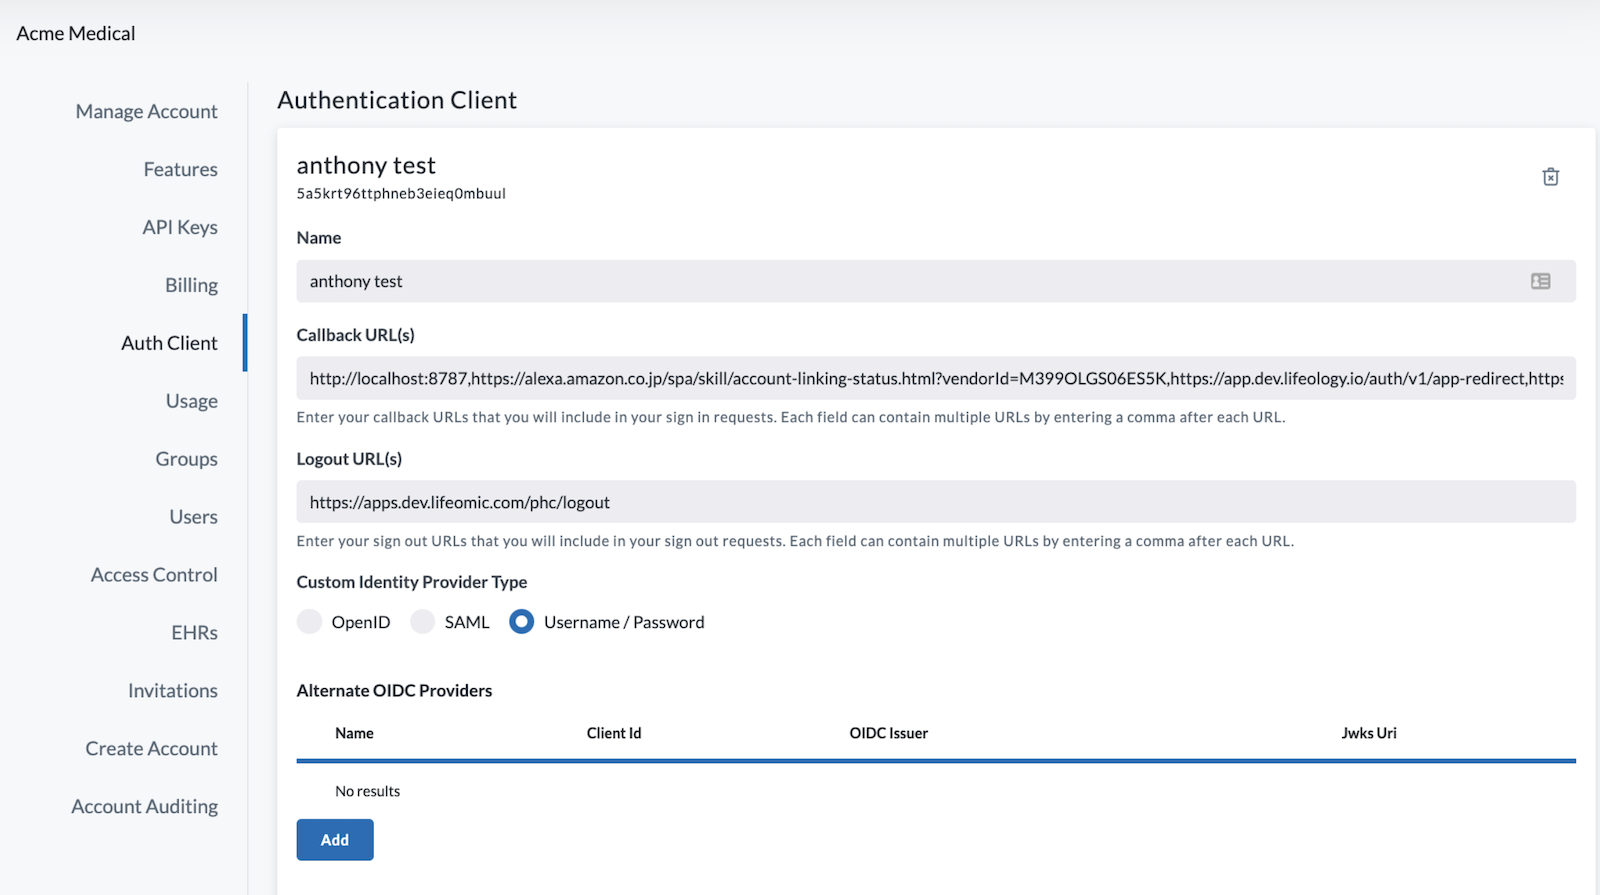
Enter a name in the Name field.
-
The Callback URL(s) and the Logout URL(s) populate automatically.
-
Under Custom Identity Provider Type select from:
- OpenID (if you enter an issuer (URL) in the issuer textbox, it autopopulates the other validating information requested for openID setup)
- SAML
- Username/Password
-
An Alternate OIDC Providers is usually not required. An Alternate OIDC Provider is required for use with SMART on FHIR applications. See below for more information on alternate OIDC providers.
-
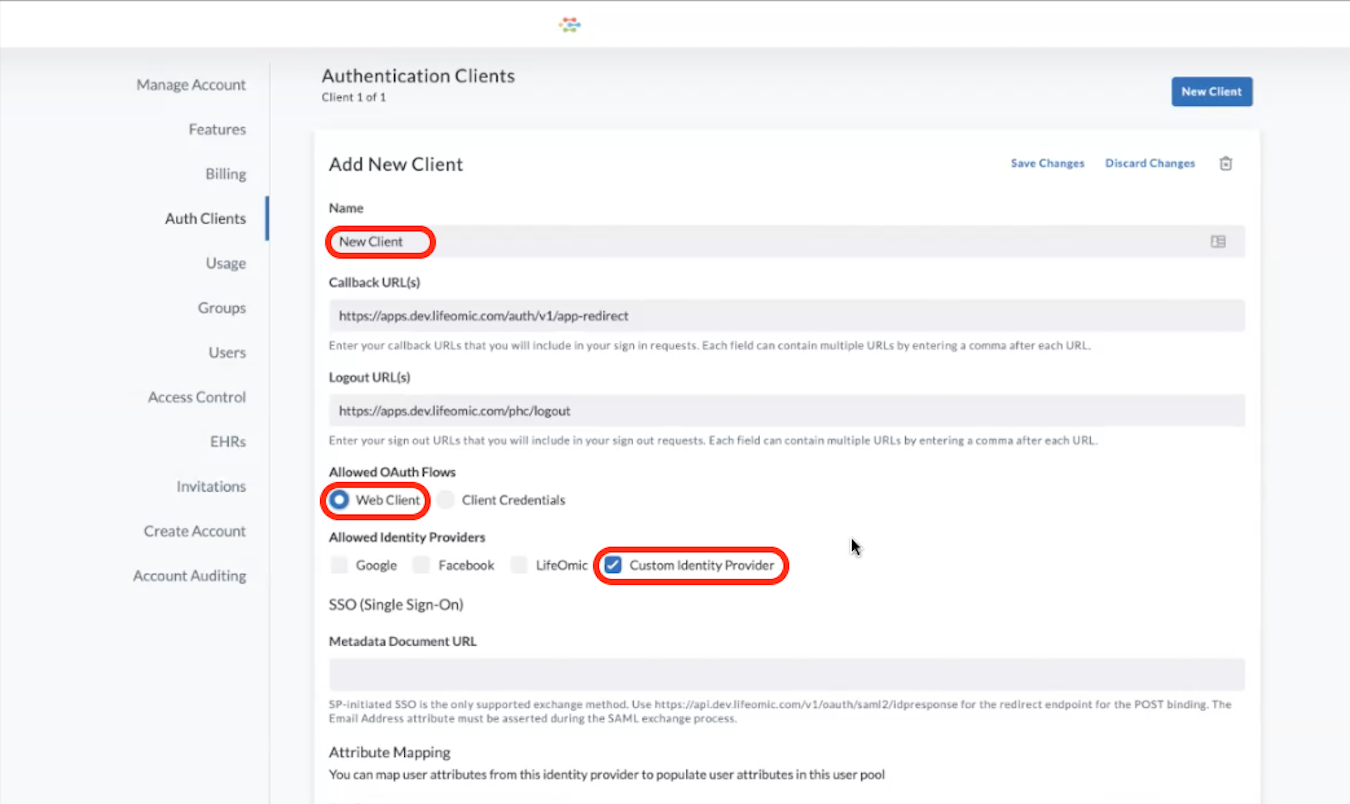
Click Save Changes.
Configure a Custom Identity Provider
The information needed for a custom identity provider is specific to that provider and is normally publicly available. For example, when you want to configure Microsoft Azure, consult the Microsoft Azure documentation to find the necessary information for the fields in the SSO (Single Sign-On) section of the application.
Example Configuration for customer123 Account
This example is for an organization leveraging Shibboleth IdP
- Callback URLs:
https://apps.us.lifeomic.com/auth/v1/app-redirect - Logout URLs:
https://customer123.apps.us.lifeomic.com/phc/logout - Metadata document URL:
https://customer123.idp.example.com/shibboleth-idp/shibboleth - Email attribute mapping:
urn:oid:0.9.2342.19200300.100.1.3 - Name attribute mapping:
urn:oid:2.16.840.1.113730.3.1.241
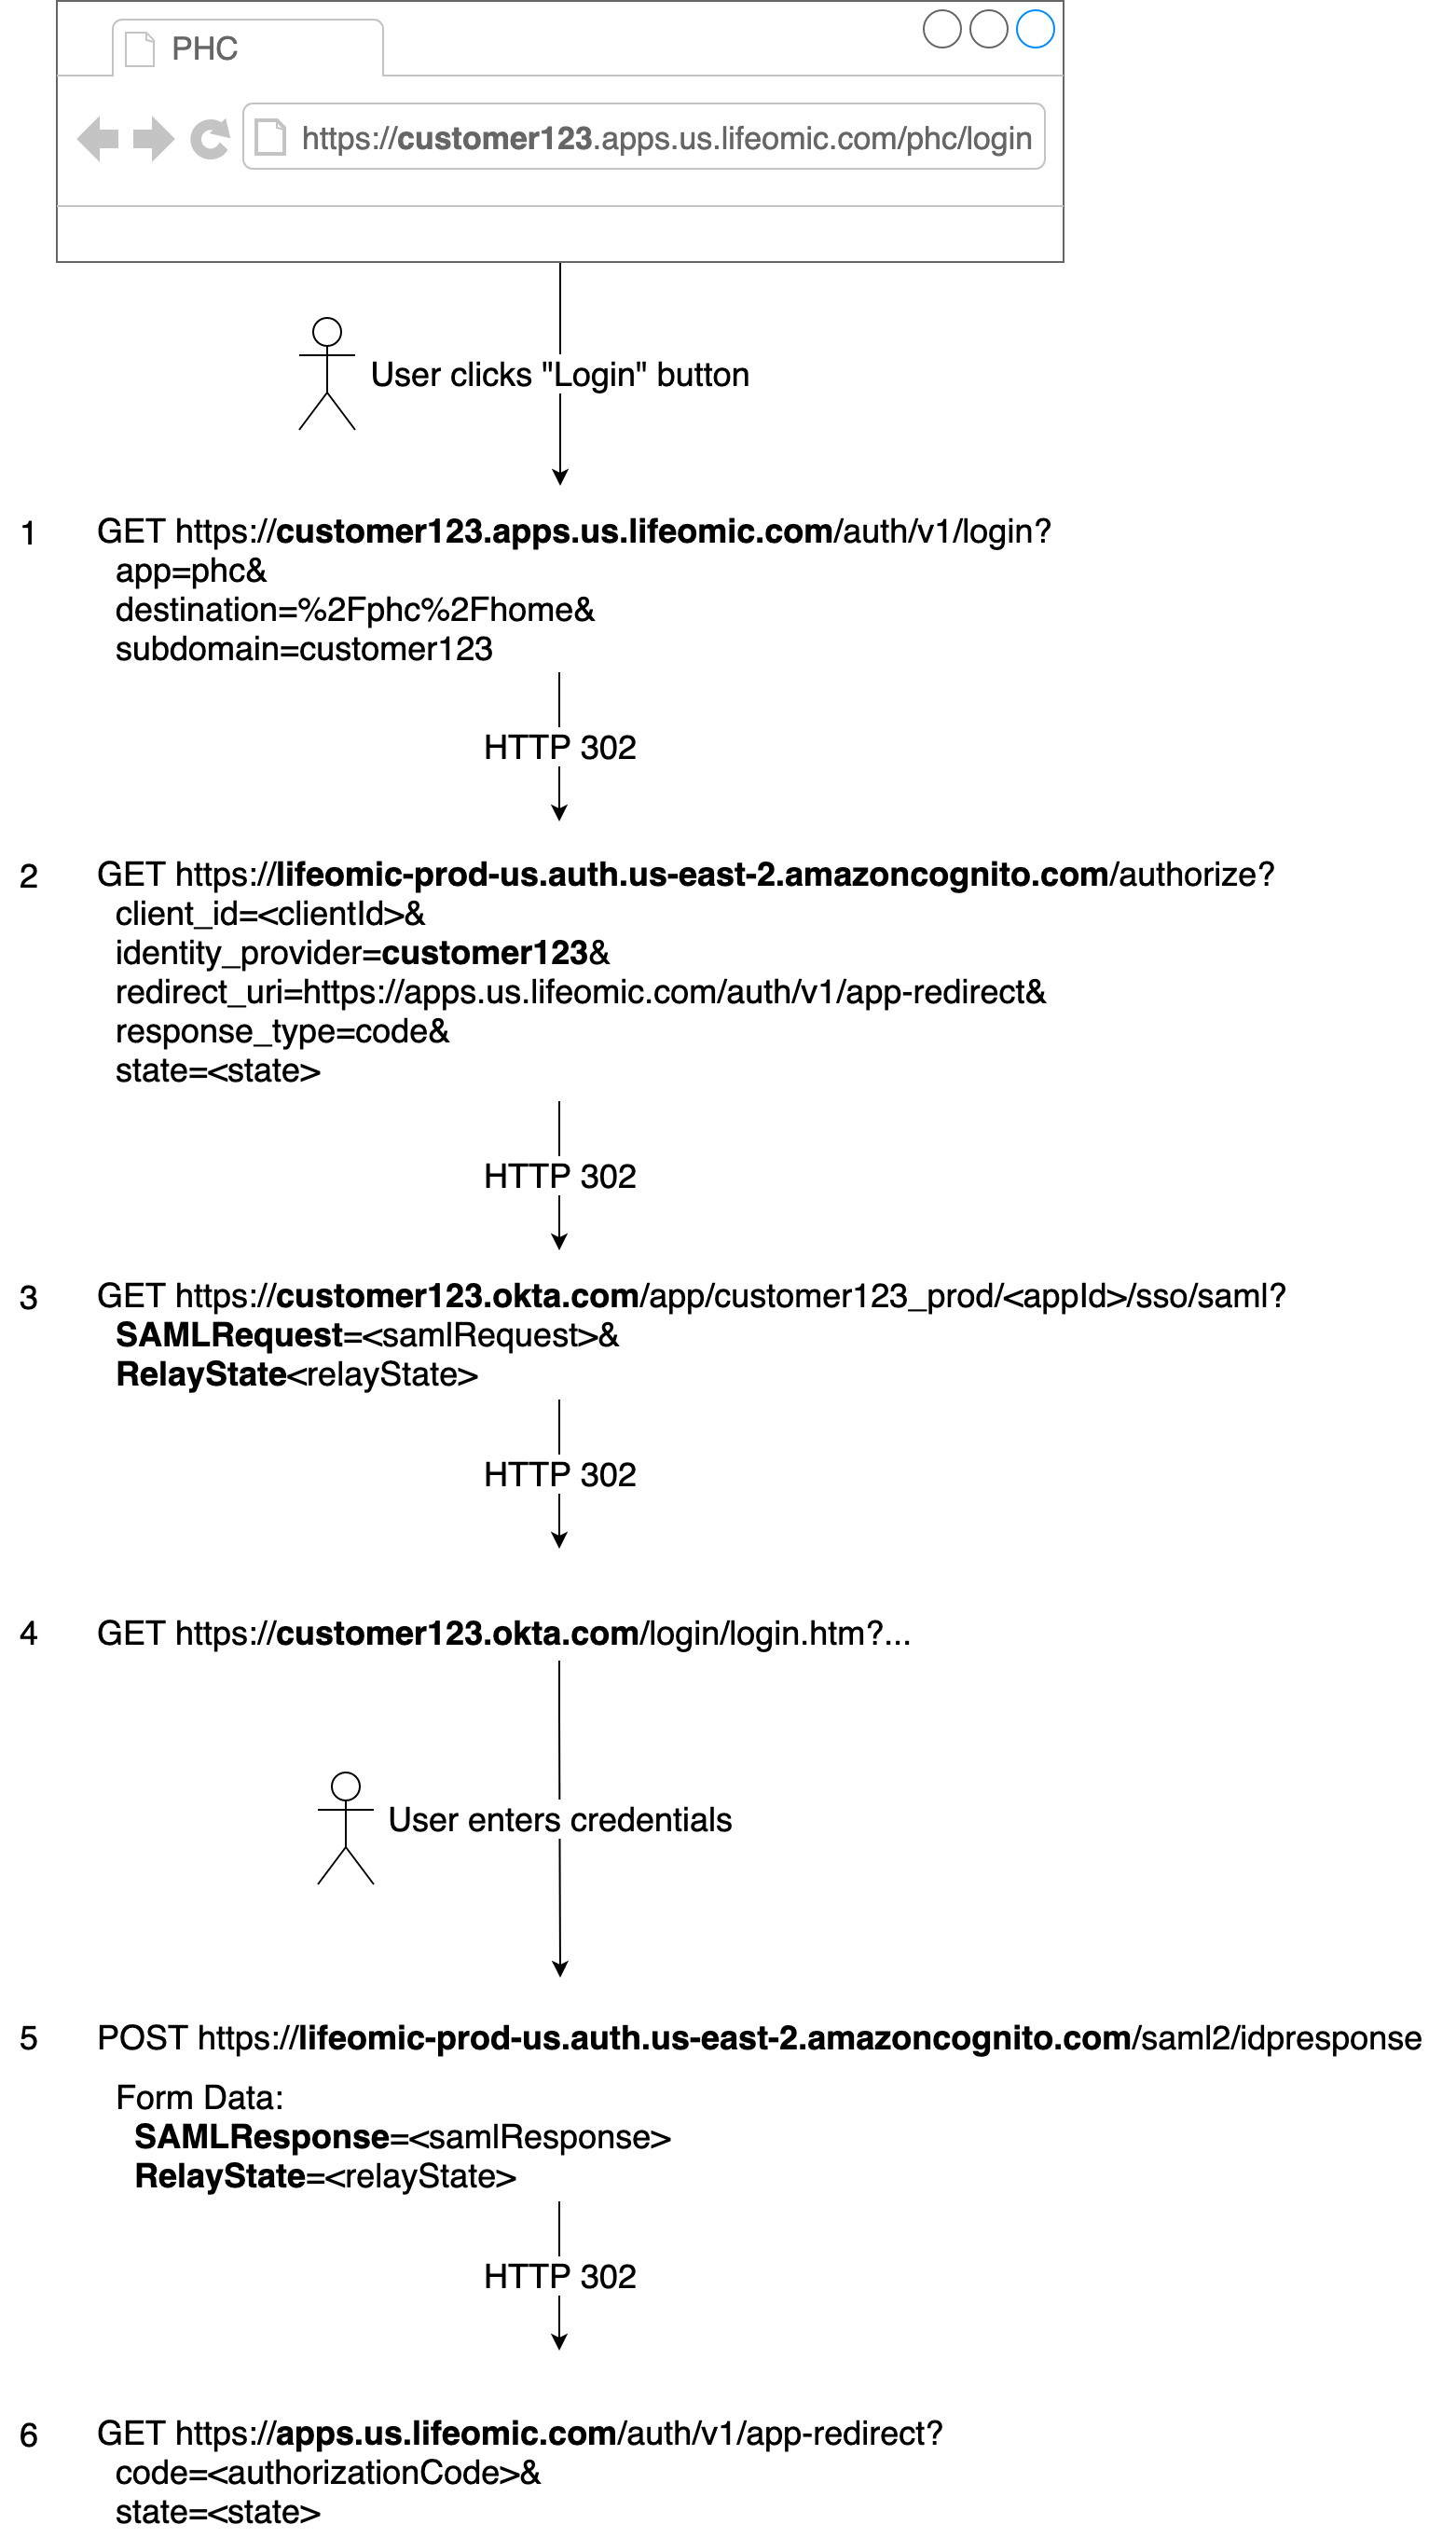
Example User/Browser Flow
In addition to the diagrams below, you can also reference the AWS Cognito documentation.
Example URLs and parameters, using Okta for the IdP:
Configure an Alternate OIDC Provider
Configuring an alternate OIDC provider is used to link identities from an external Open ID Connect (OIDC) provider to the LifeOmic Platform users. Once an OIDC identity has been linked to a platform user, the user will no longer need to log into the LifeOmic Platform when they have previously authenticated with the OIDC provider. Typically this is used in our SMART on FHIR app so that EHR users don't have to log into the LifeOmic Platform when they launch the app. To configure the alternate OIDC provider you will need to specify the following:
- Name: a name you want to use to identify the provider
- Client Id: the OAuth2 client id for the parent application that authenticates with the OIDC provider. For Cerner EHRs this will be a UUID and can be obtained from Cerner.
- OIDC Issuer: the OAuth2 issuer URL for the provider. For Cerner EHRs this
will be of the form
https://authorization.cerner.com/tenants/TENANT_ID/oidc/idsps/TENANT_ID/whereTENANT_IDis the ID of your Cerner tenant and can be obtained from Cerner. - Jwks URL: A URL that can be fetched to get the JSON Web Key Sets for the
provider. For Cerner EHRs this is
https://authorization.cerner.com/jwk
Linking OIDC Subjects to LifeOmic Platform Users
After the alternate OIDC provider has been configured, then any of our applications that run in the context of the OIDC provider (e.g. our SMART on FHIR app) will prompt the user for a password on first use, and then will link their OIDC user to the LifeOmic Platform user automatically so they will not have to log in to the application on subsequent uses.
An administrator that has both Account and Access privileges can also manually link an OIDC user to the LifeOmic Platform SSO user, so that the OIDC user will never have to log into the application. To manually link an OIDC user, follow this procedure:
- Hover over the provider row and then click the icon to bring up the list of linked users.
- Click the Link New Identity button.
- Enter the user's OIDC username (e.g. EHR username) in the OIDC User Name field.
- Enter the user's LifeOmic Platform SSO username in the User Name field. If you
don't know the user's LifeOmic Platform username then you can use the User Search
field to find it. The LifeOmic Platform SSO usernames will usually be of the form
accountid_person@yourdomain.comwhereaccountidis the ID of your LifeOmic Platform account, andperson@yourdomain.comis the user's email address. The exact format of the username will vary depending on the SAML provider that is being used.