Groups
You add users to the LifeOmic Platform by creating a group and adding individuals to that group. All the platform users are members of at least one group. You invite a user to their initial group with an email that gives them access.
Several default groups exist, including Administrators, Users, and Subjects. These default groups have matching access control policies and may be sufficient for the needs of a simple organization. Before you create a custom group, View existing groups and access control policies to see if the default groups meet your needs.
The term user means someone who uses or configures the LifeOmic Platform, such as a health professional, researcher, or admin. Subjects are often patients or subjects of a study that supply the LifeOmic Platform data. Subjects may have limited interaction with the platform, such as answering a survey or being able to view their own data, or they may never interact with the platform.
If these menu items do not appear, contact your admin for additional permissions.
View existing groups and access control policies
-
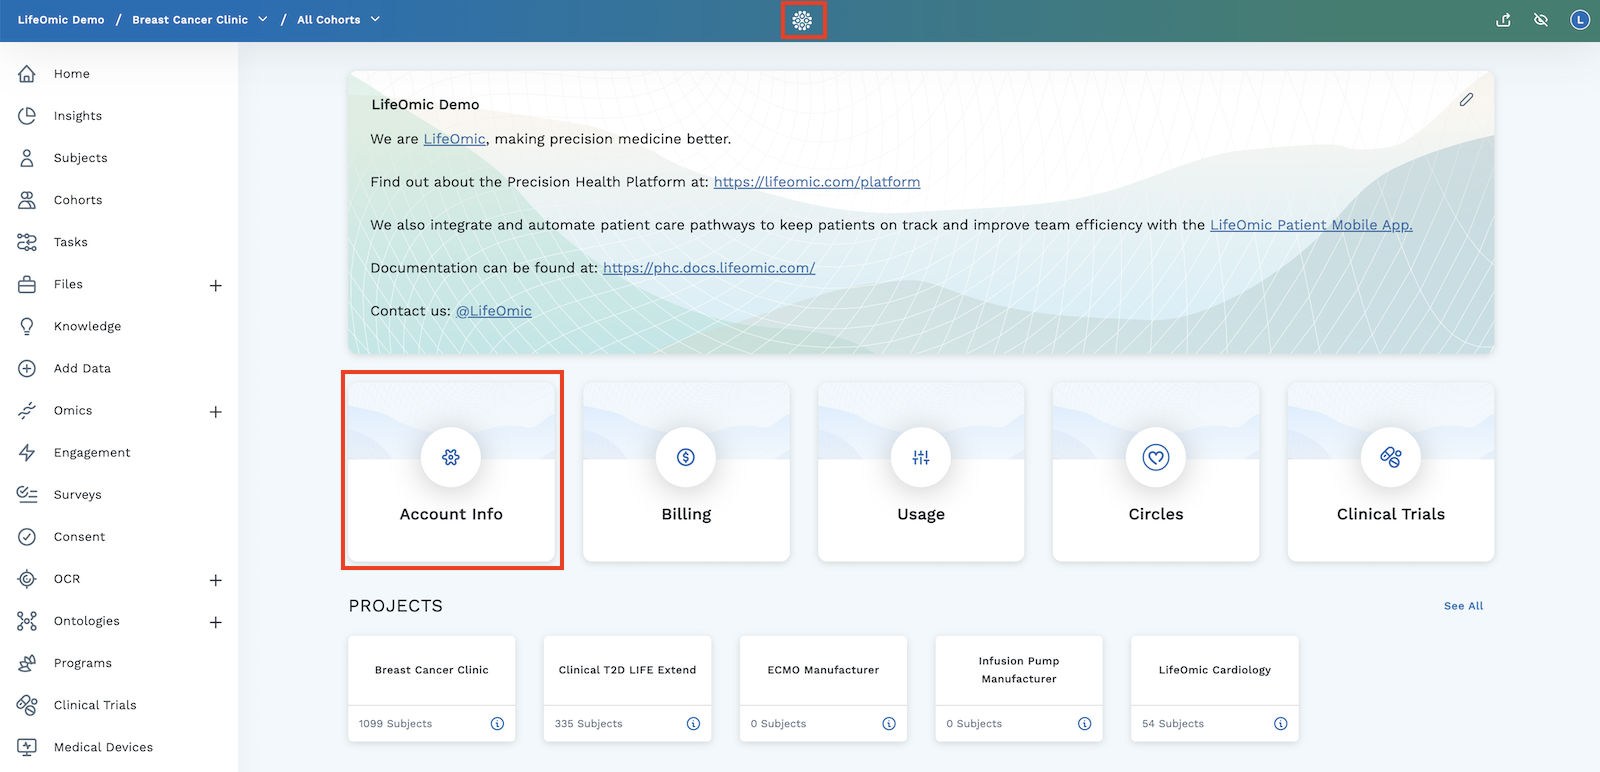
Click the logo at the top of the page.
-
Click Account Info to display the Account Info page.
-
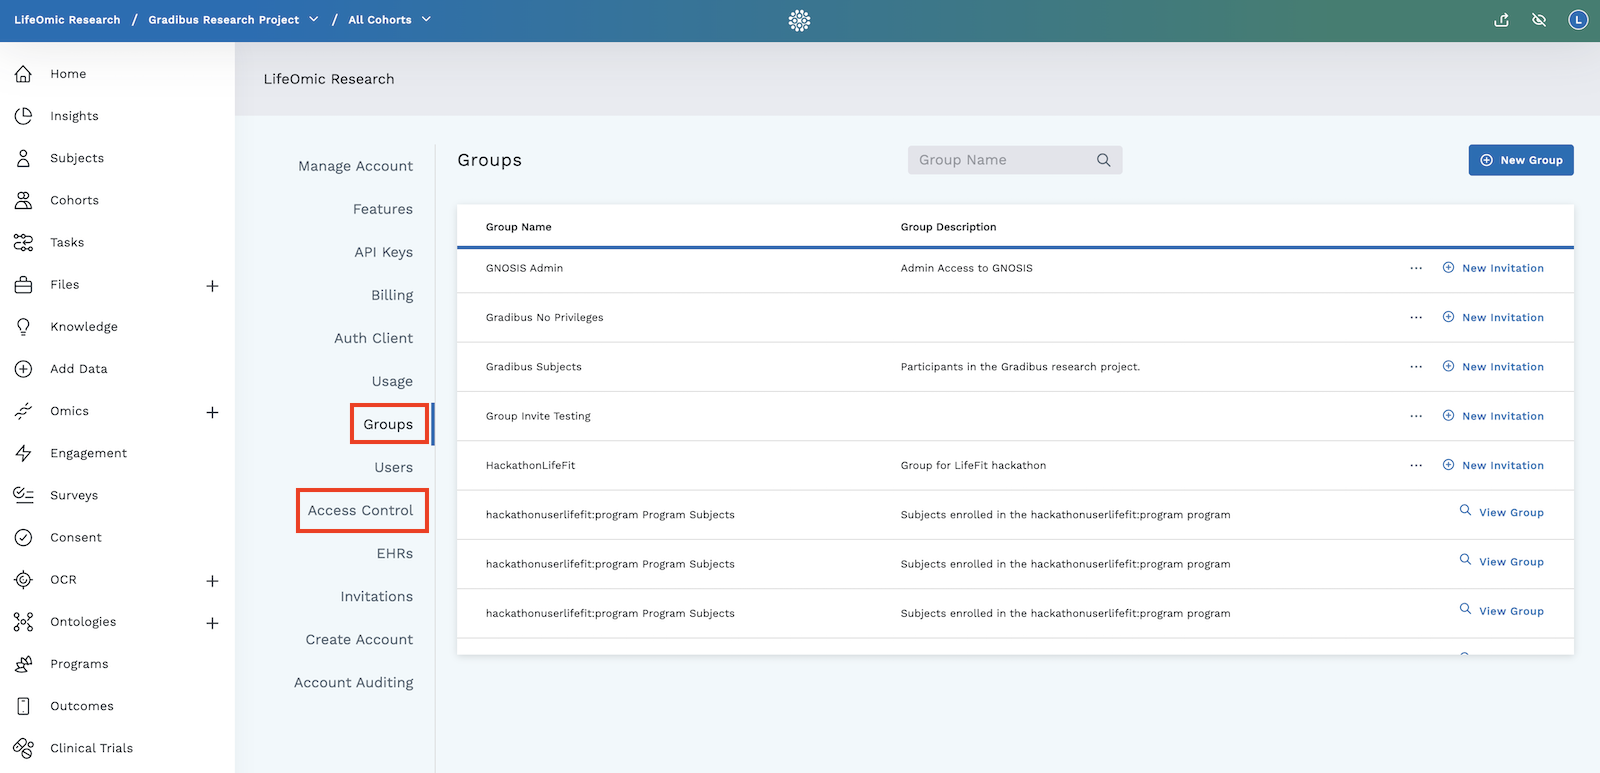
On the Account Info page, click on the Groups tab or the Access Control tab.
Create, edit, or delete a group
-
Click the logo at the top of the page.
-
Click Account Info to display the Account Info page.
-
On the Account Info page, click on the Groups tab.
-
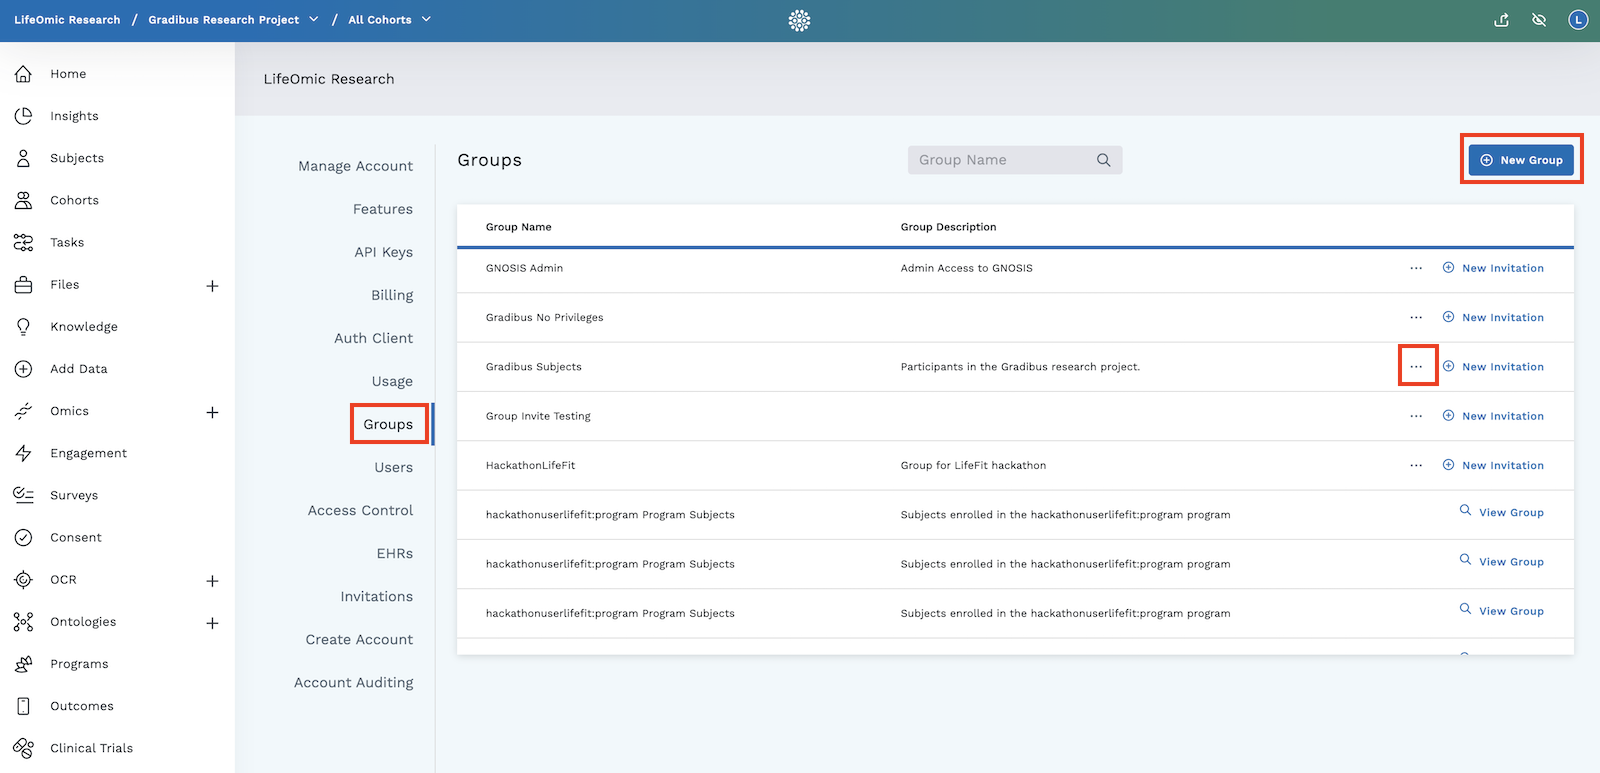
To create a new group, click New Group.
- Enter a Group Name.
- Enter a Group Description (optional).
- Click Add.
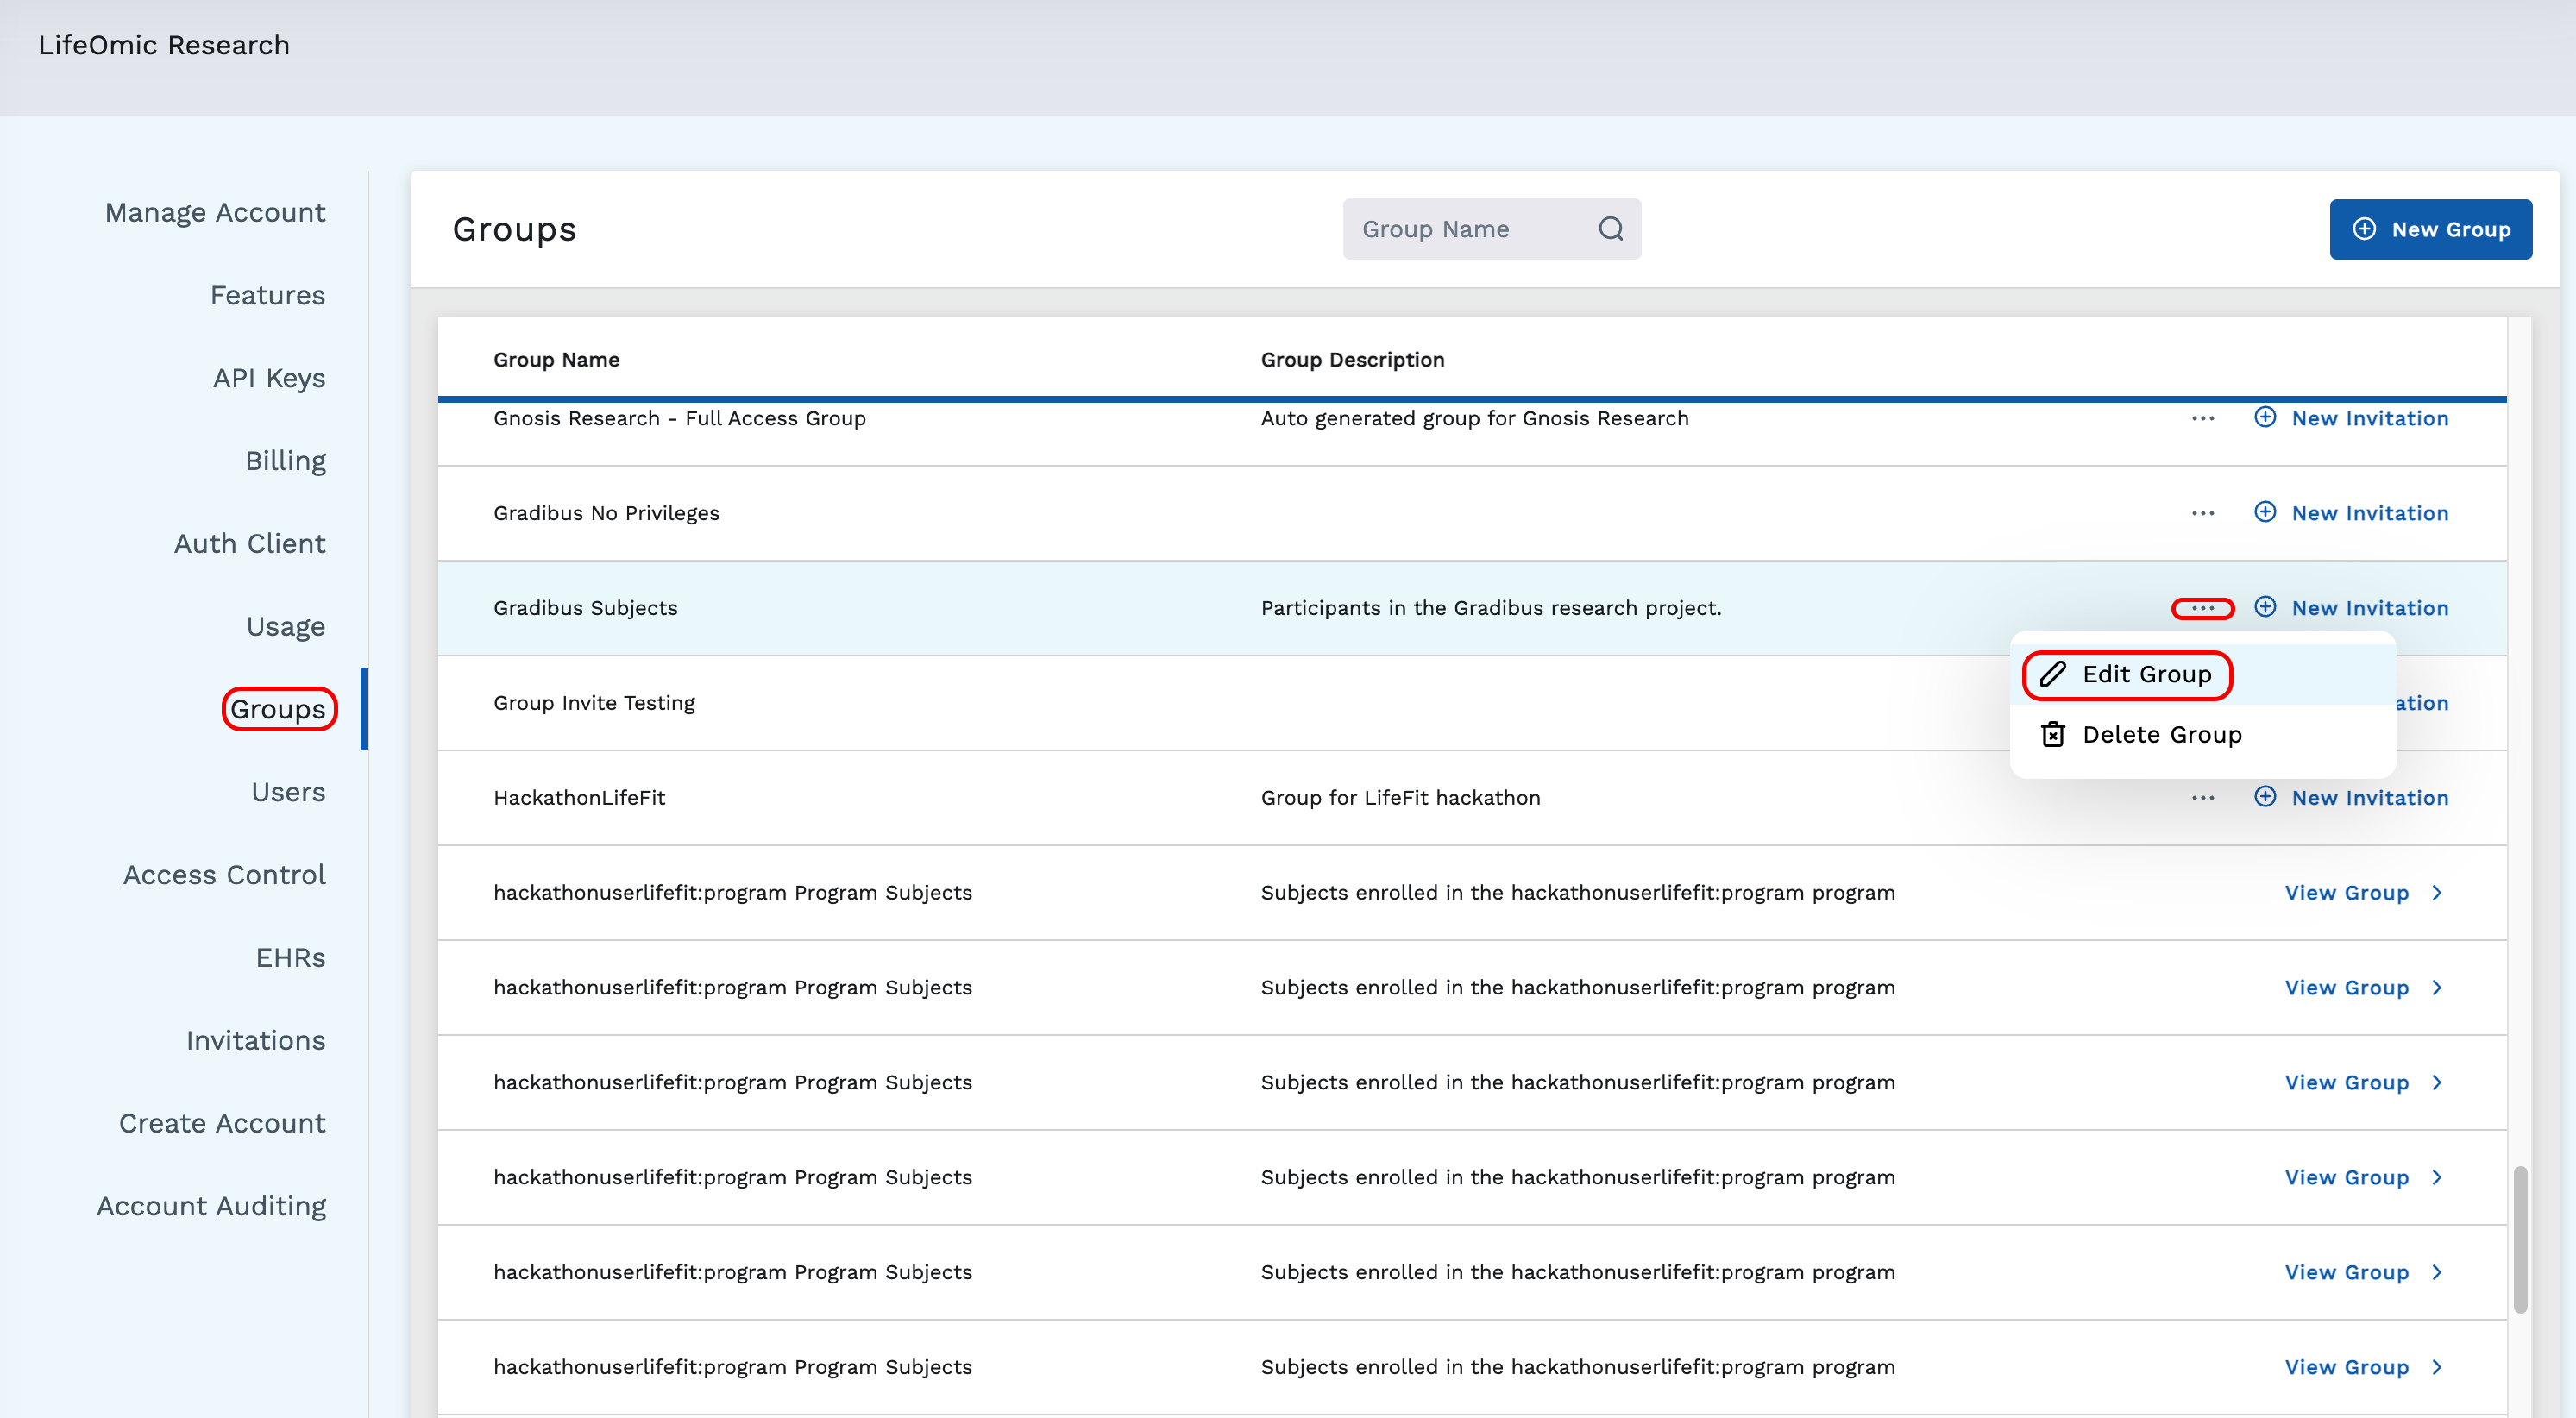
-
To edit a group, click the ... next to the group's Group Description and click Edit Group.
-
To delete a group, click the ... next to the group's Group Description and click Delete Group.
Invite a user to a group with email
You must invite users to their first group with this email invitation to the LifeOmic Platform. After a user joins their first group, the admin can easily add them to additional groups, see Add a user to a group with the Users tab.
-
Click the logo at the top of the screen to go to the home screen and then click on Account Info.
-
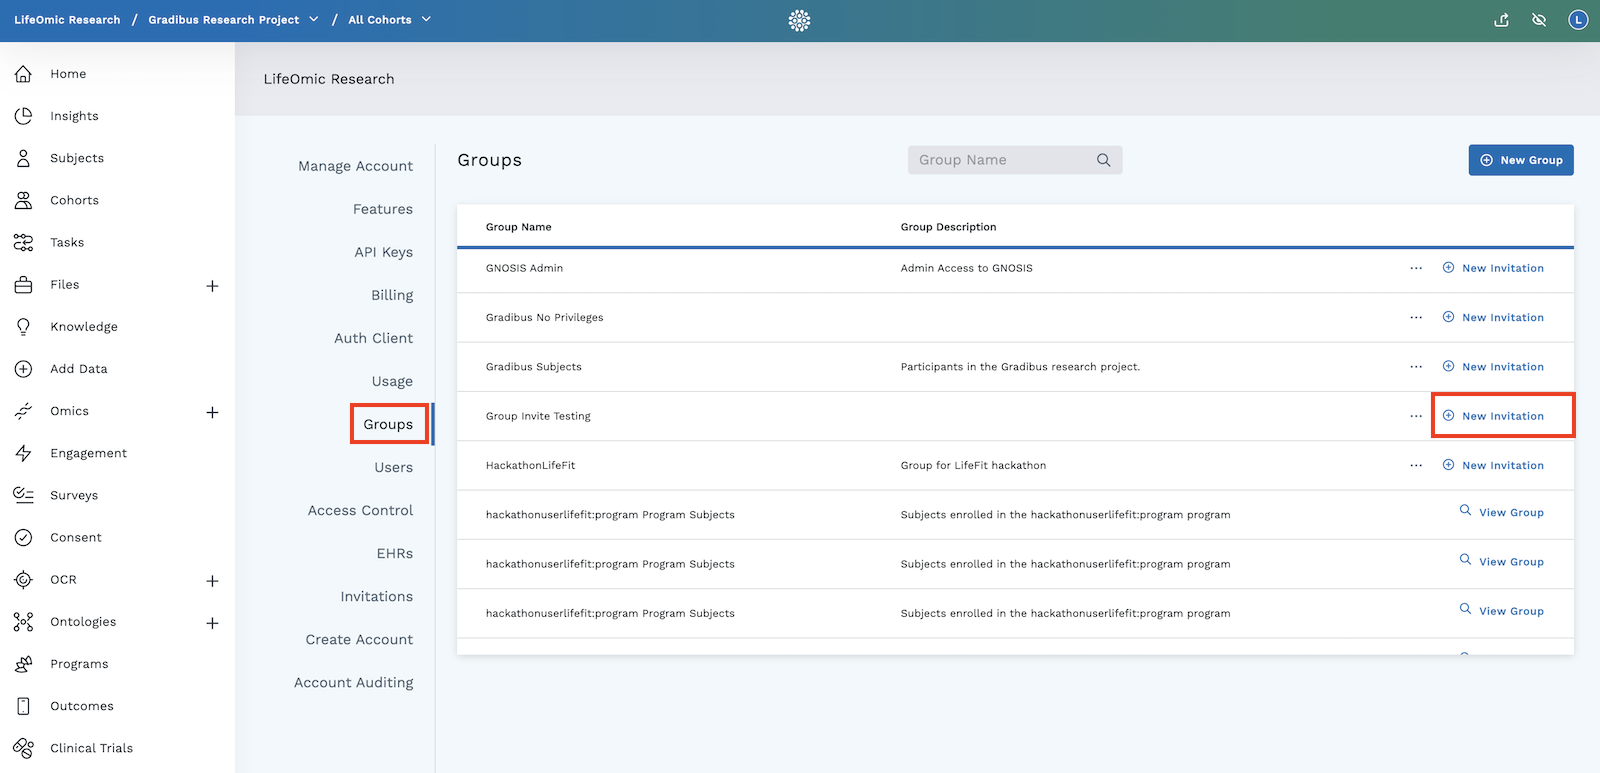
On the Account Info page, click on the Groups tab, find your desired group, and click New Invitation.
-
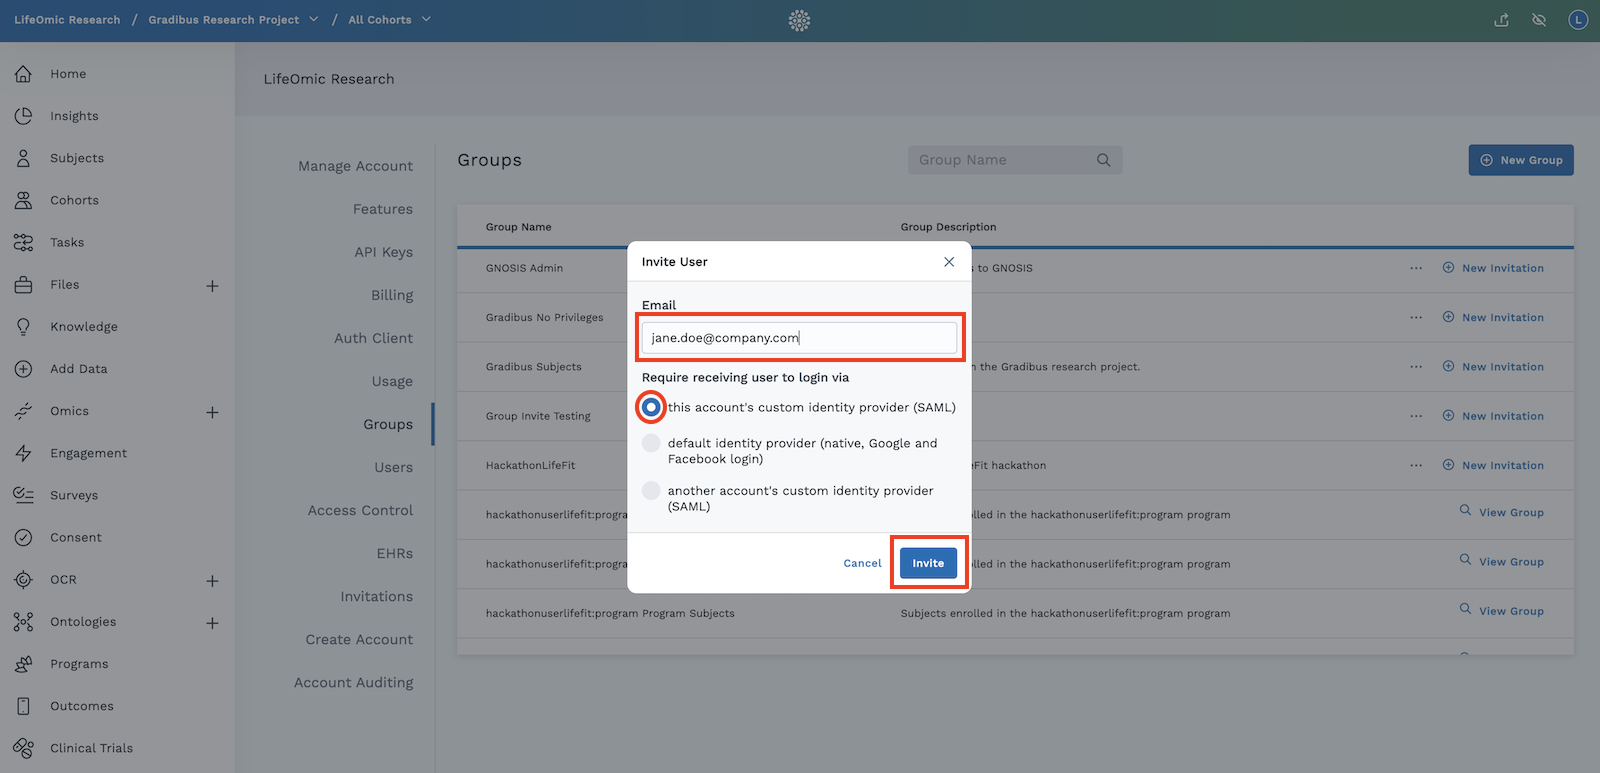
On the Invite User dialog that appears, fill in the Email field, click on the login method you want, and click Invite.
Invitations expire after thirty days and are no longer displayed on the Invitations page. Repeat the Invite users to a group procedure to renew an invitation.
Accept an email invitation
When an administrator invites a user, the LifeOmic Platform automatically generates and sends an invitation email.
- Open the email and click on the Signup or login button. Your browser opens the Create Account screen.
- Enter your first name, last name, and a username. The application fills in your email fields automatically.
- Click Passwordless.
- Click SIGN UP to be logged into the application.
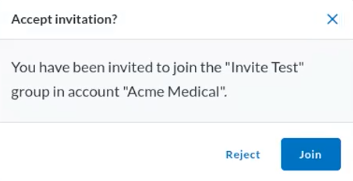
- Click Join on the Accept Invitation dialog that appears.
Add a user to a group with the Users tab
If these menu items do not appear, contact your admin for additional permissions.
-
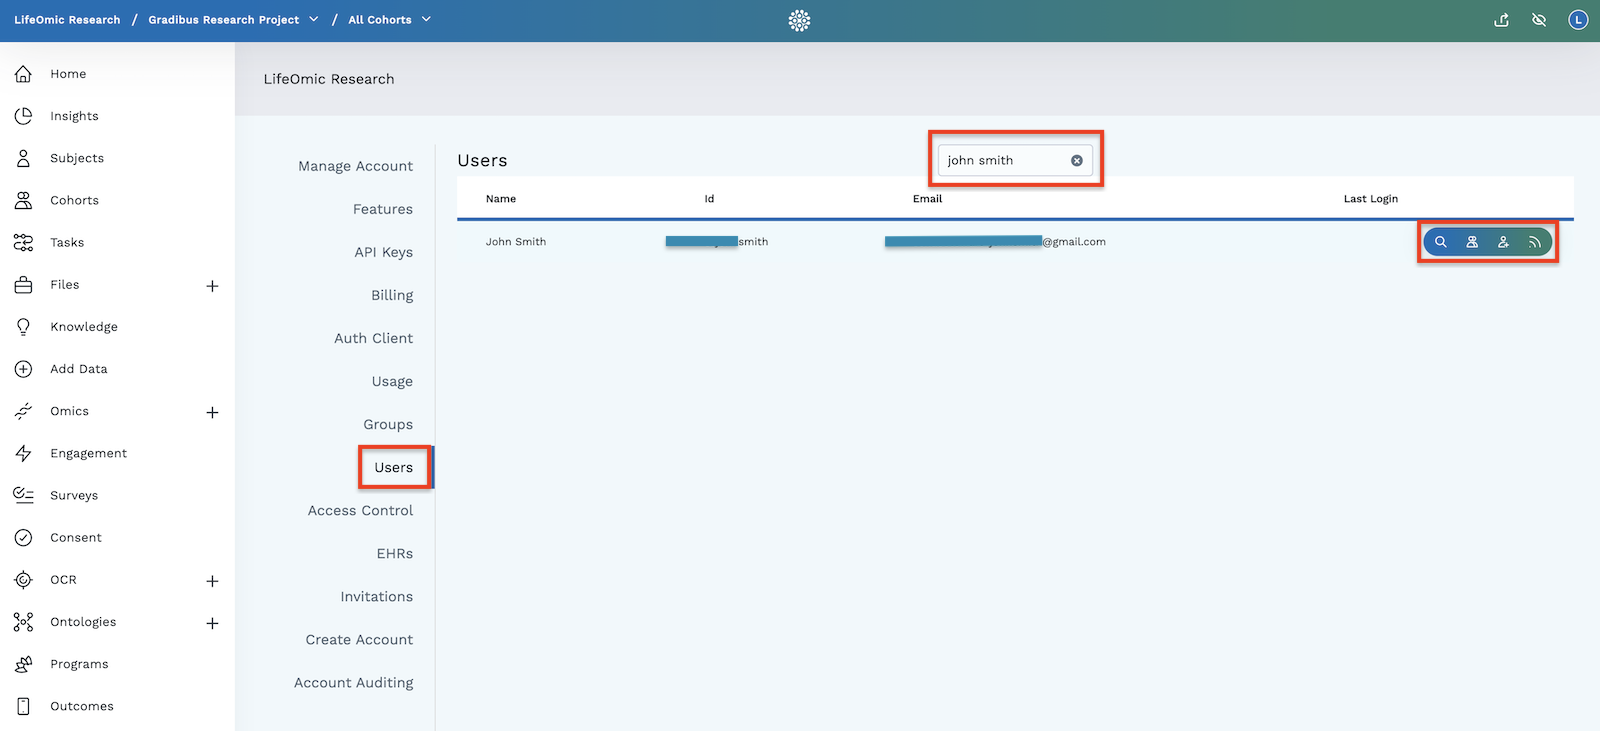
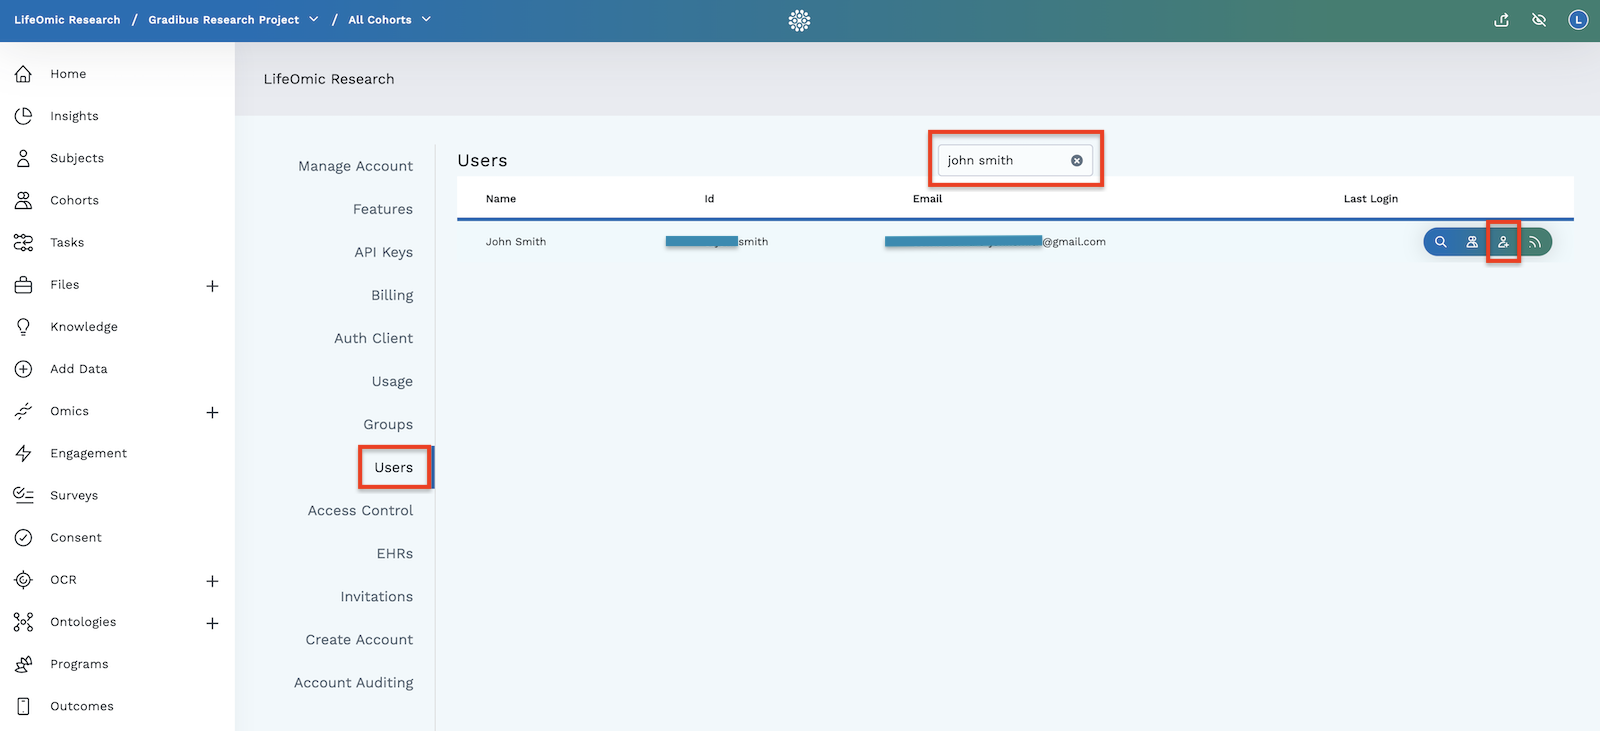
On the Account Info page, click on the Users tab and scroll or search to find your desired user.
-
Mouse over the user's row to reveal the hidden menu and click the add this user to a group icon.
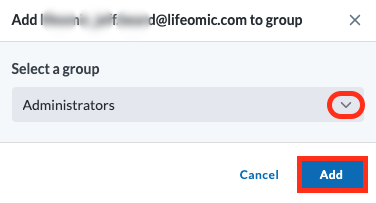
-
On the dialog that appears, click the Select a group menu to find the desired group and click Add.
Invite a LifeOmic employee to your group
You can invite a LifeOmic employee to your group and give them access to your account and projects. This can be helpful for troubleshooting and assistance with advanced provisioning.
- Click the logo at the top of any LifeOmic Platform page.
- Click Account Info to display the Account Info page.
- On the Account Info page, click the Groups tab.
- Find the row of your desired group and click on the three dot menu to display options.
- Click Edit Group.
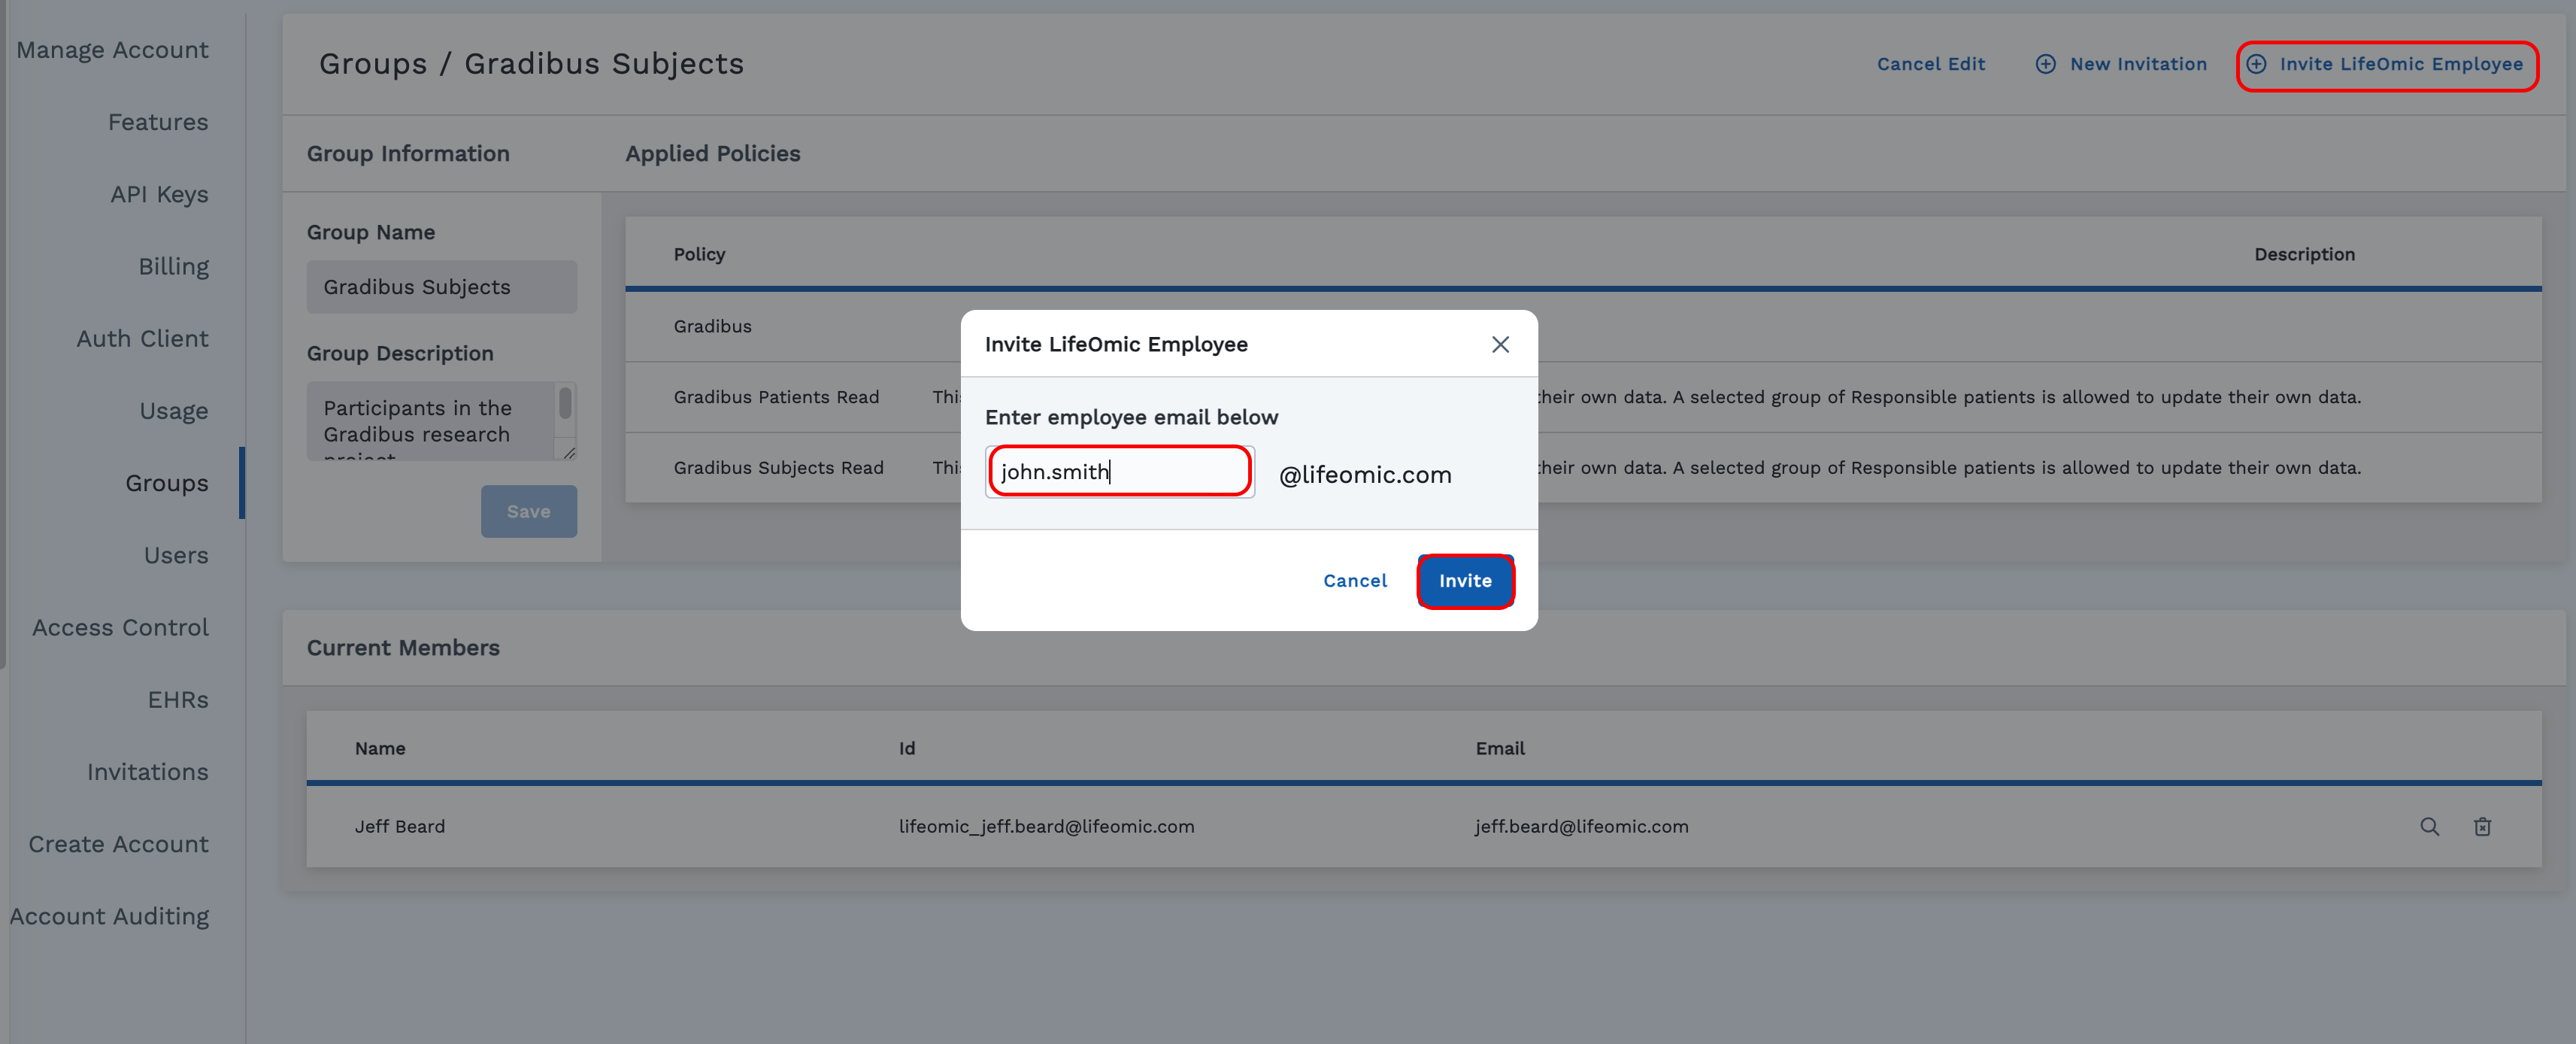
- On the Edit Group page, click Invite LifeOmic Employee.
- In the Invite LifeOmic Employee dialog that appears, enter the username portion of the employee's LifeOmic email address and click Invite. A confirmation appears after the email is sent.
View groups and policies for a user
-
Click the logo at the top of the screen to go to the home screen and then click on Account Info.
-
On the Account Info page, click on the Users tab and scroll or search for the desired user.
-
To reveal the policies that affect the user, mouse over the user's row to reveal the hidden menu and click the View the policies for this user icon.
-
To reveal the groups that contain the user, mouse over the user's row to reveal the hidden menu and click the User's Group Membership icon.
-
To add this user to a group, mouse over the user's row to reveal the hidden menu and click the Add this user to a group icon.
-
To reveal the user's audit events, mouse over the user's row to reveal the hidden menu and click the View this user's audit events icon.