Audit Trail
An Audit Trail allows you to record and track any create, delete, or update action performed within a project by any user. Once enabled, it records data from this moment going forward.
In addition to tracking changes to a project, it also tracks responses from subjects, such as survey answers.
By default, Audit Trail is not enabled as it stores a lot of data.
Audit Trail can be enabled by users with projectAdmin> Access. To grant control privileges, see Access Control.
How to enable Audit Trail
-
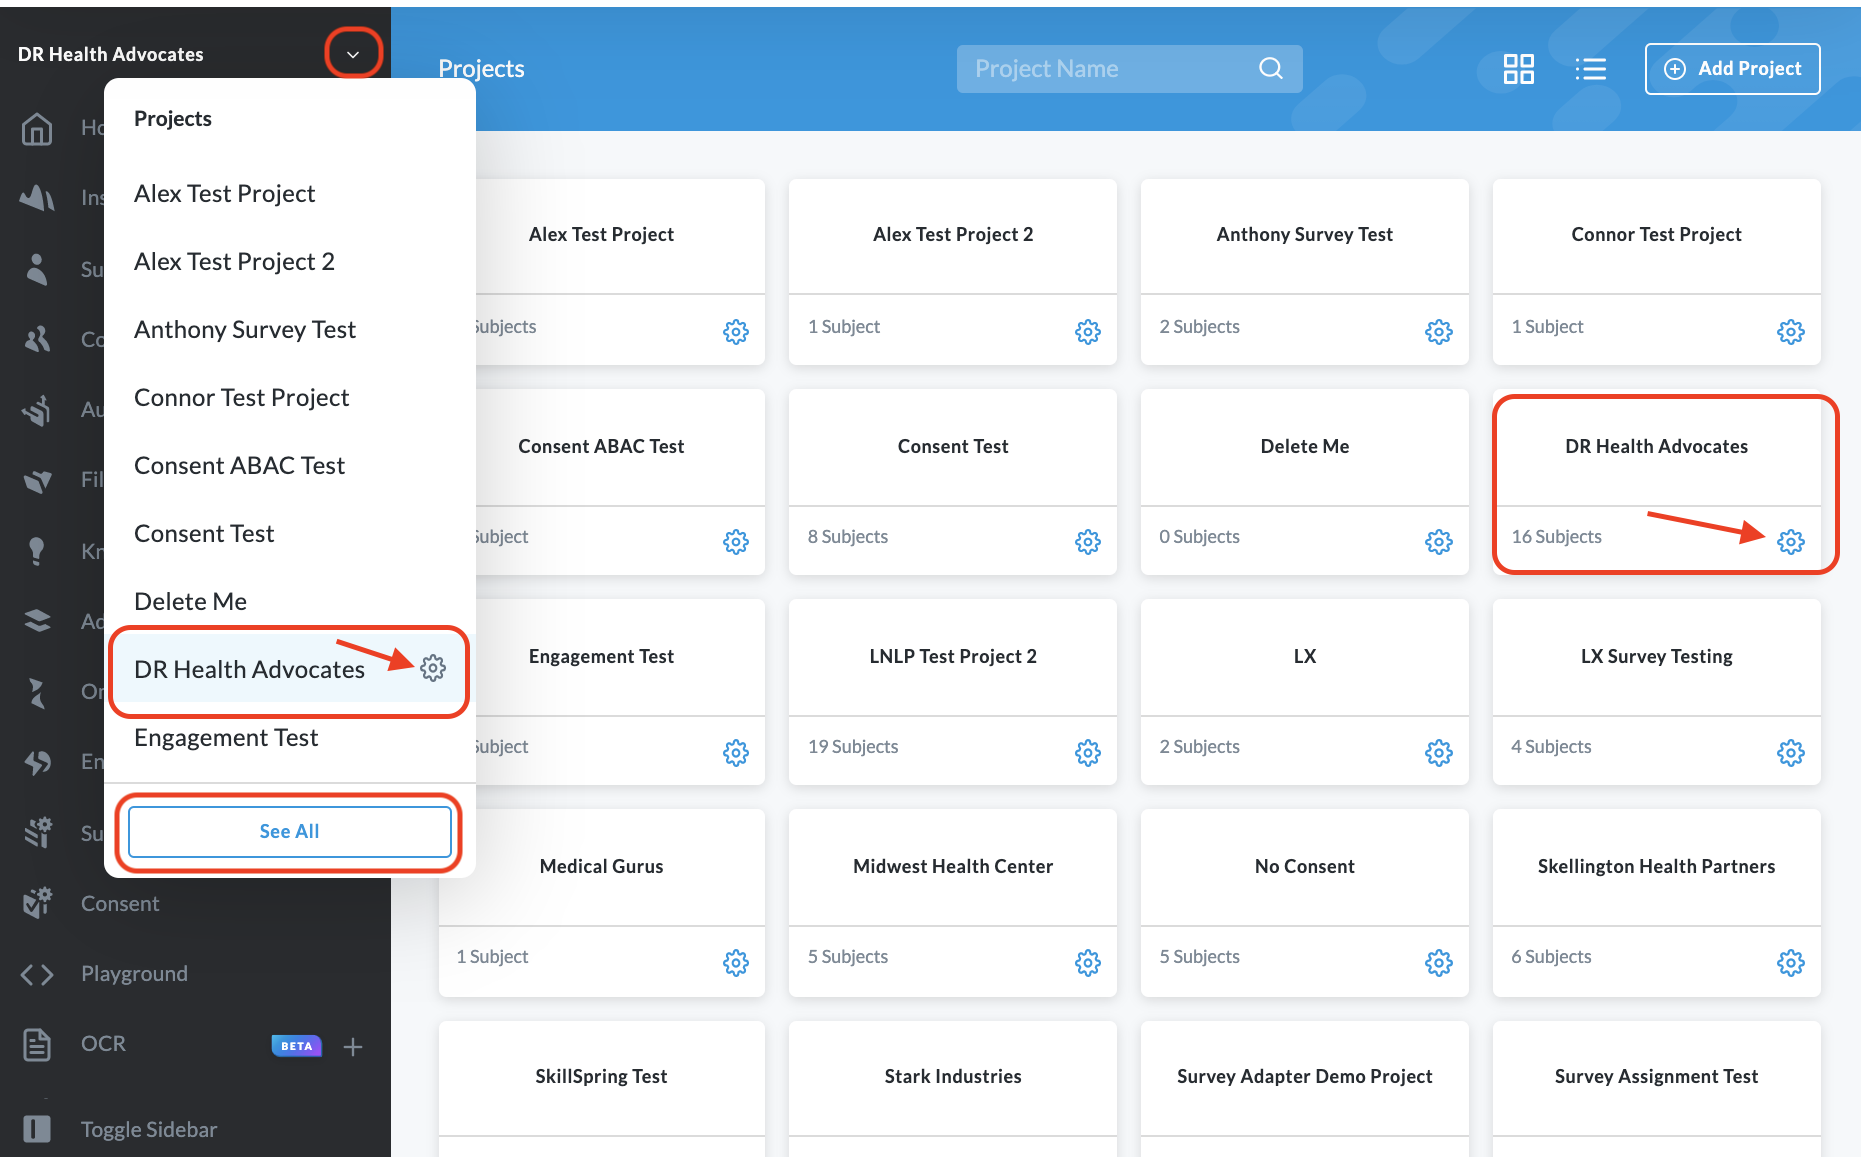
Find your project - At the top left of the LifeOmic Platform interface, click the expand chevron beside the project name. Scroll through the Projects dropdown menu and find your project.
Alternatively, you can scroll to the bottom of the list and click the See All button to open the Projects page where you can locate your project.
-
Access the Project Settings page - Click the Project settings icon beside the project name (as shown below). This will open the Project Settings page.
-
On the Project Settings page, toggle the Audit Trail switch ON to enable the flow. Then click Save.
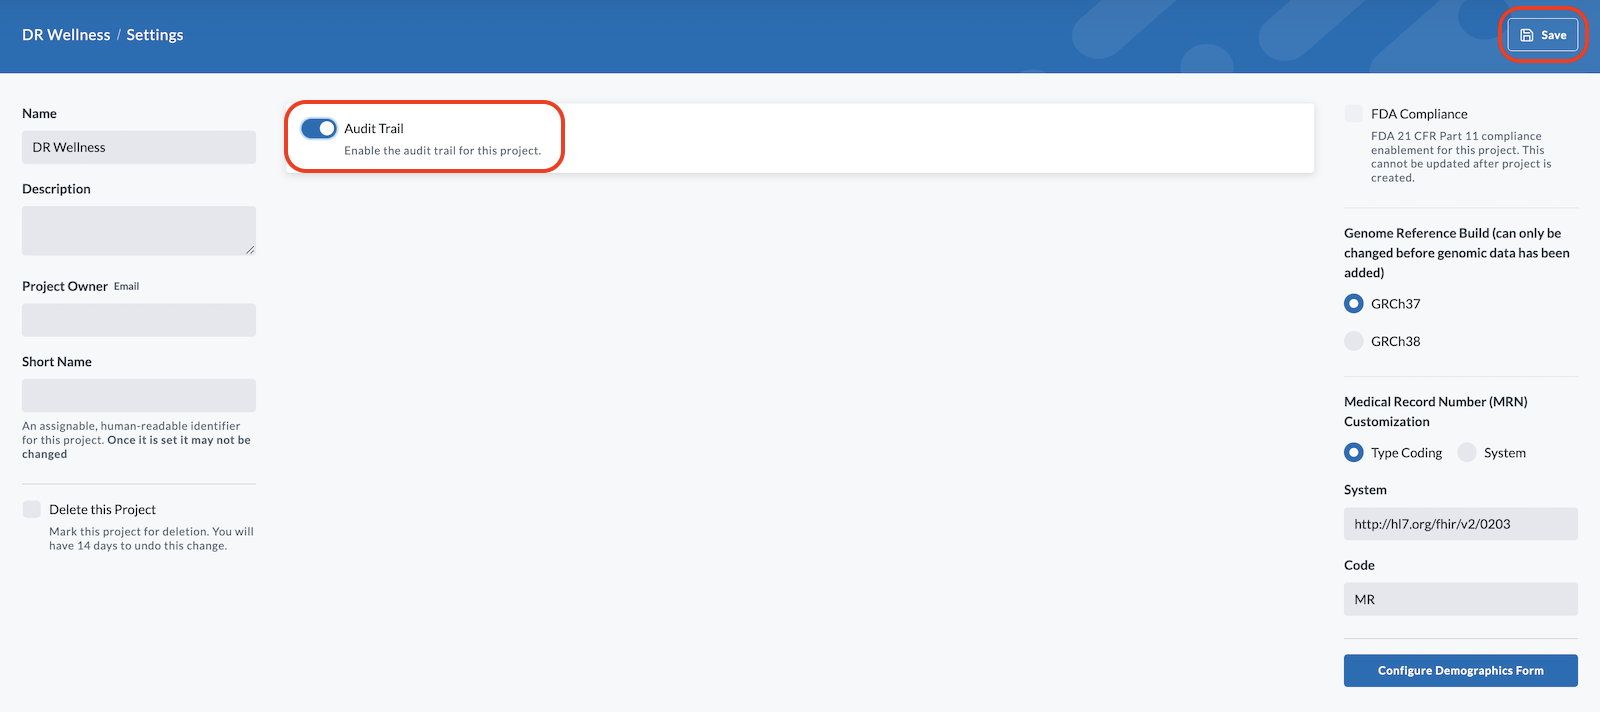
The Audit Trail is now enabled and will track all changes from this point going forward.
How to access the Audit Trail
You can access the Audit Trail through the Project Settings (step 1 of how to enable Audit Trail) or via the Audit Trail tab on the Project page.
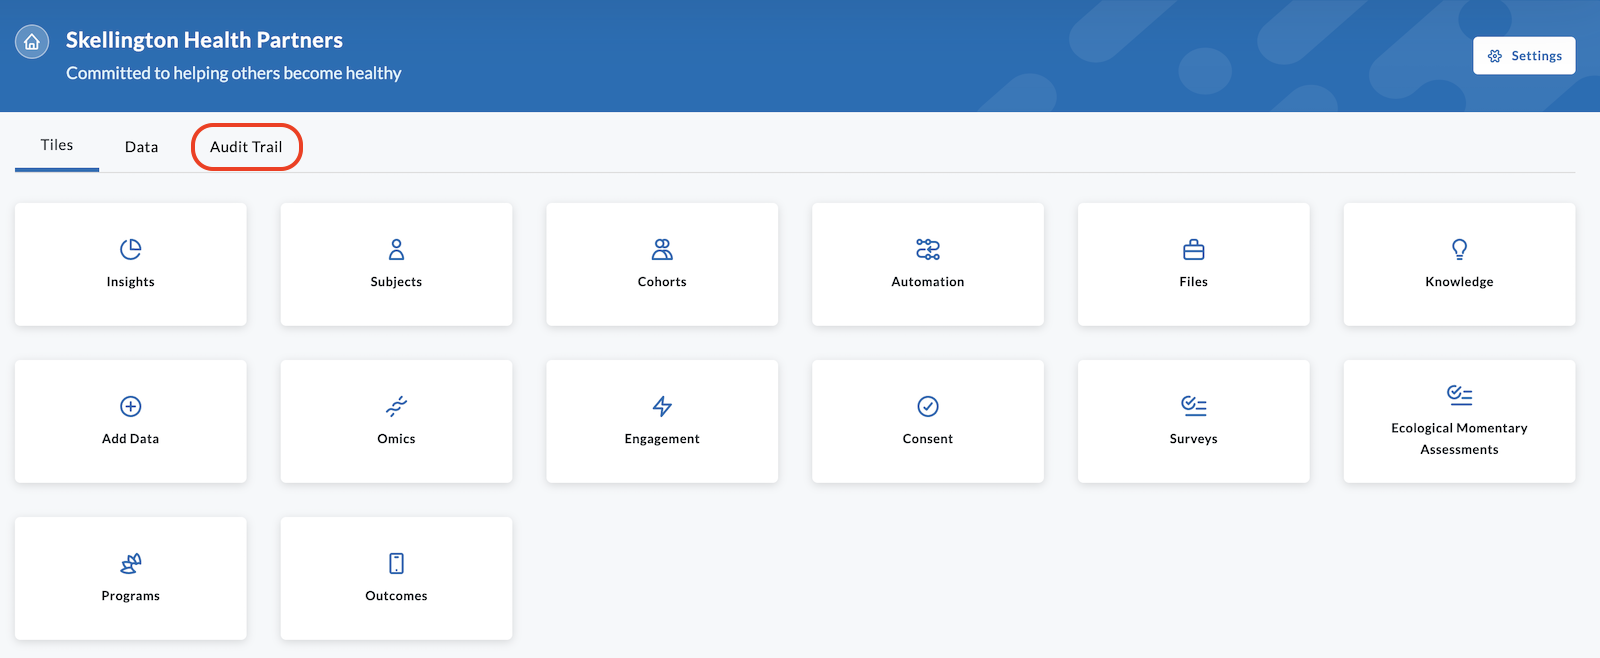
Audit Trail interface
Any data collected since enabling the Audit Trail is viewable on the Project settings page beneath the toggle button.
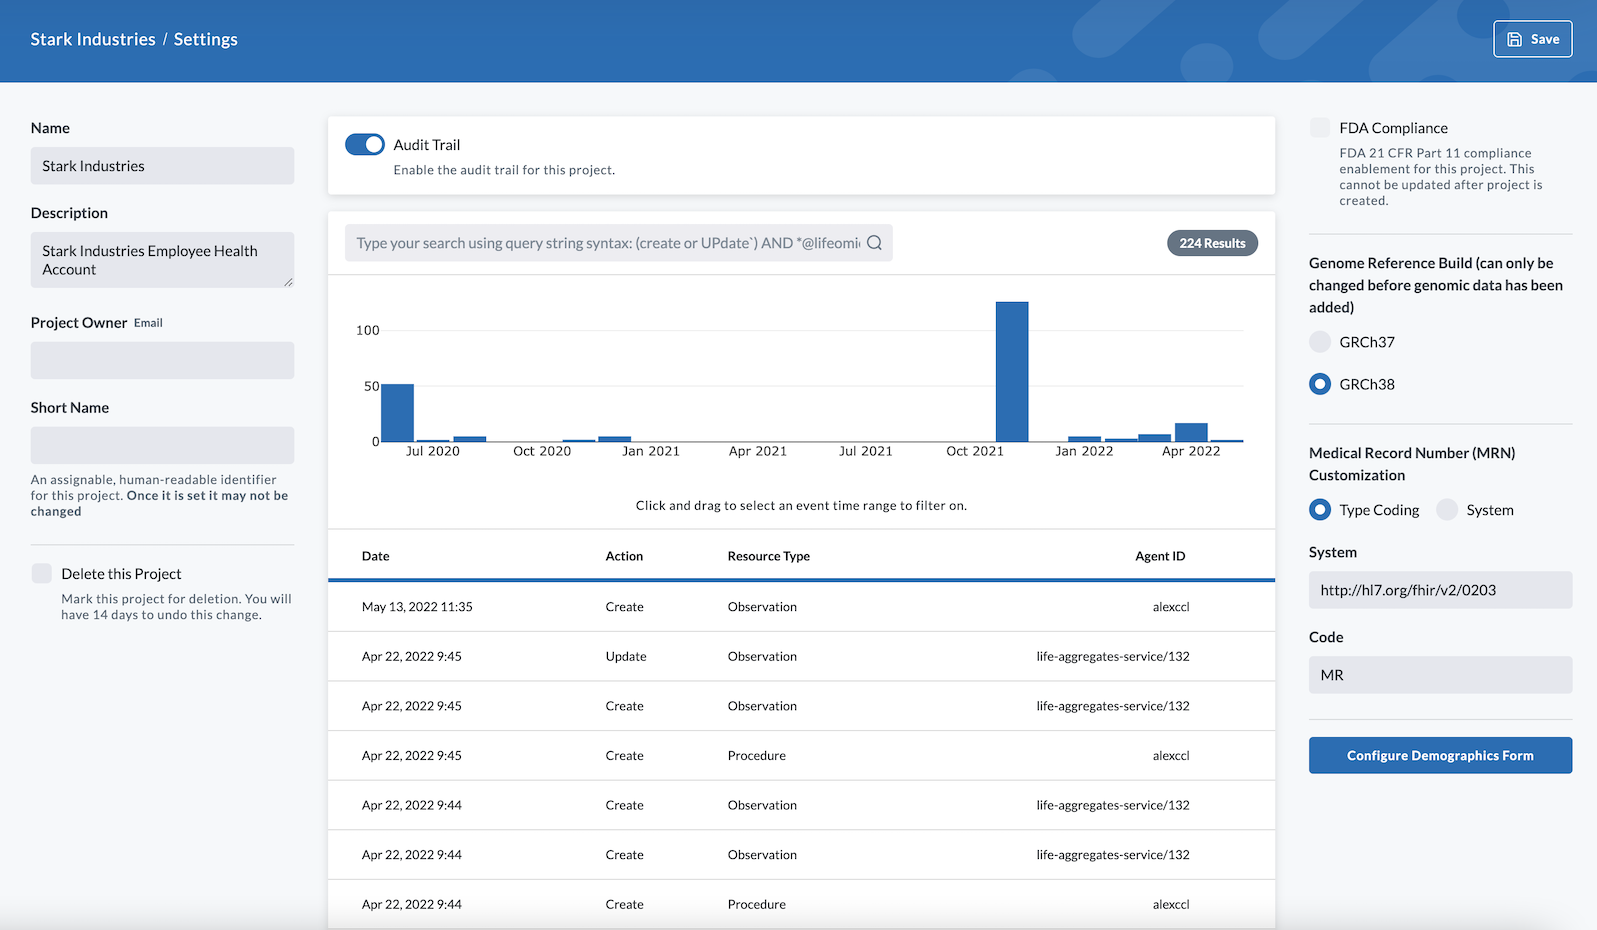
Audit Trail Search
The Audit Trail Search is a powerful search engine for finding Audit Events.
Typing in the query string syntax will help you find issues that occurred on specific dates, resource types, specific actions, or IDs. For example, typing “create” in this search box will filter the table beneath with all of the create action events. The search engine supports the boolean operations (AND, OR, NOT), exact string
matching using quotations ("), and wildcard matching using the * operator. That is, a search using “create AND condition” will filter for any events that match both create and condition.
When using the search box, the number of results changes to reflect what you are querying on, and the histogram also changes to reflect the data queried.
“Fuzzy match” is used to catch misspellings. It is often the reason your query may pull some data that relates to the search items but is not an exact match.
Audit Trail Search examples
Search for changes made to Patient FHIR resources
patient
Search for changes made by my user
"myuser"
Search for changes NOT made by my user
NOT myuser
Search for all deletions of Patient FHIR resources
delete AND patient
Search for all create or updates made by a user with a lifeomic.com email address.
(create OR update) AND *@lifeomic.com
Audit Trail Histogram
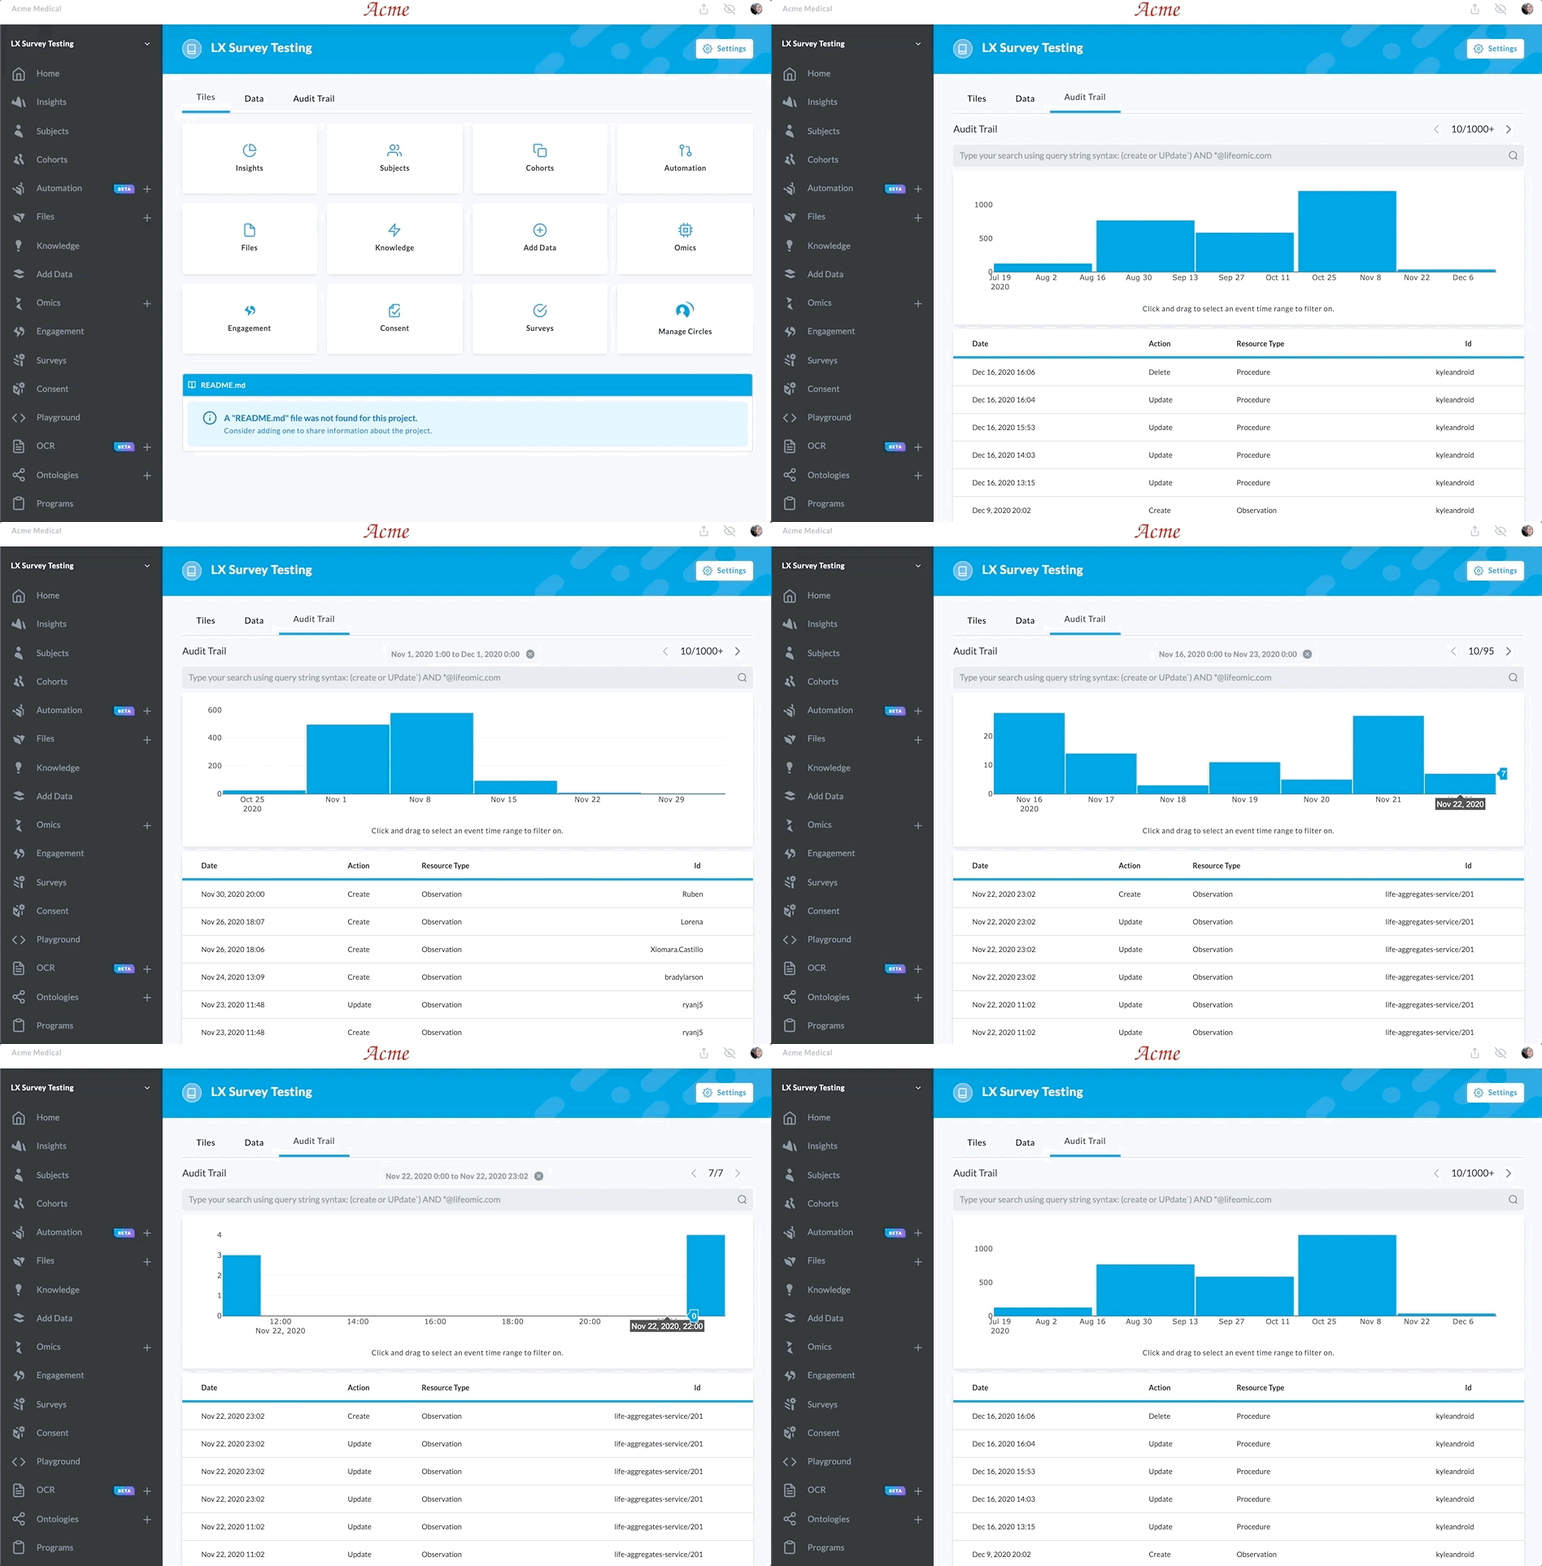
The Audit Trail Histogram is a tool that allows visualization of when Audit Events have been created over the project's history since the Audit Trail was enabled. The histogram also provides a simple way to filter Audit Events by time. If you’ve been recording for years, the histogram will scale out for readability. Clicking and dragging on the histogram allows you to zoom in by applying a time filter across the Audit Event data, as seen in the clip below.
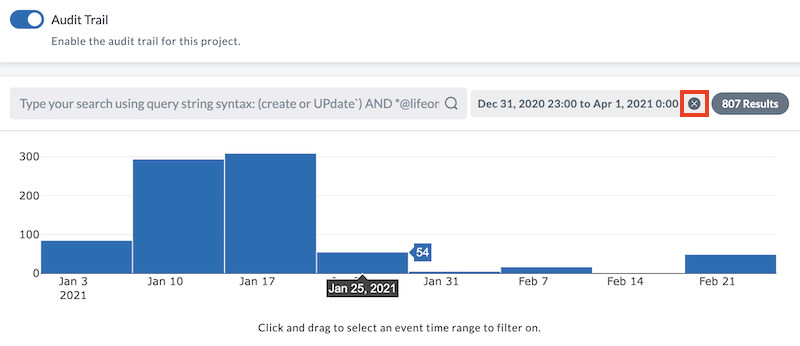
You can remove this time filter and reset the histogram to the overall view (from beginning of Audit Trail being enabled to present moment) by clicking the x on the filtered date range above the search bar.
When searching for specific events using the Audit Trail search, the graphs will change to reflect the data queried.
Table of Events and Number of Events
The number of events is displayed in a gray box in the upper right of the histogram. The total number of events is listed if no time range filters are applied. All the events are listed in the Table of Events below the histogram. Filtering changes the displayed number of results.
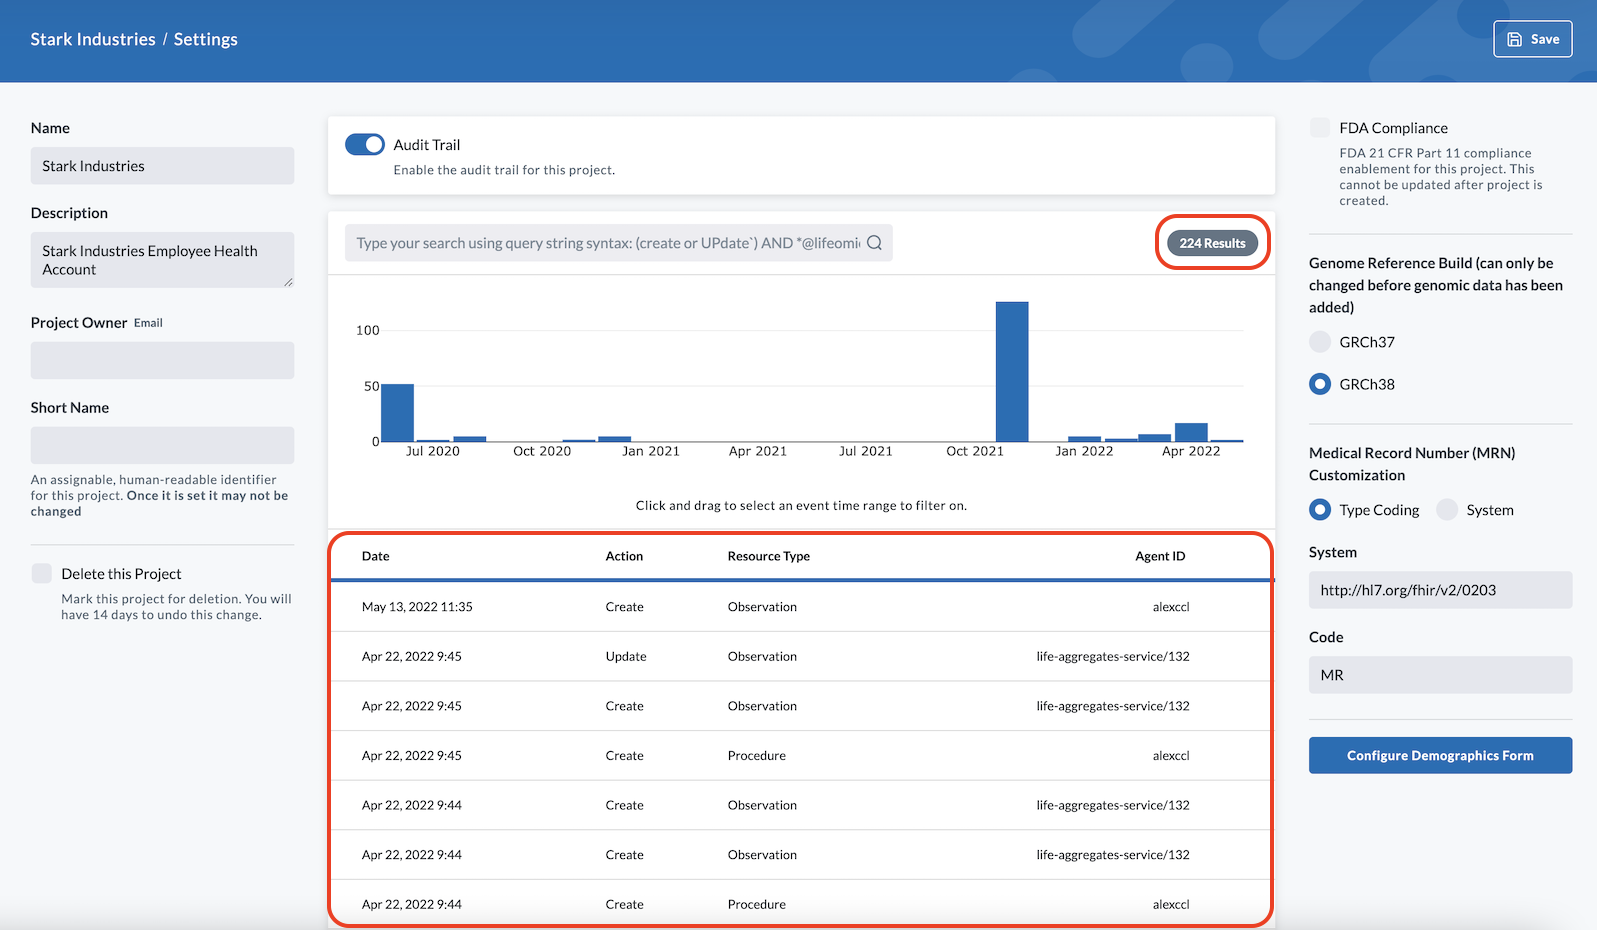
The Table of Events displays the following data:
- Date (when the event happened)
- Action (what action occurred)
- Create
- Update
- Delete
- Resource Type (what resource was affected) – There are over 50, but these are the most common FHIR resources:
- Medication Administration
- Condition
- Document Reference (OCR doc, PDF, PPT, and so on)
- Patient (name, demographics)
- Questionnaire (survey)
- Questionnaire Response (survey answer)
- Observation
- Agent ID (who performed the action)
How to view changed FHIR data
You can view the details (JSON format) of a changed FHIR resource referenced by each Audit Event by clicking on the event line in the Audit Trail table.
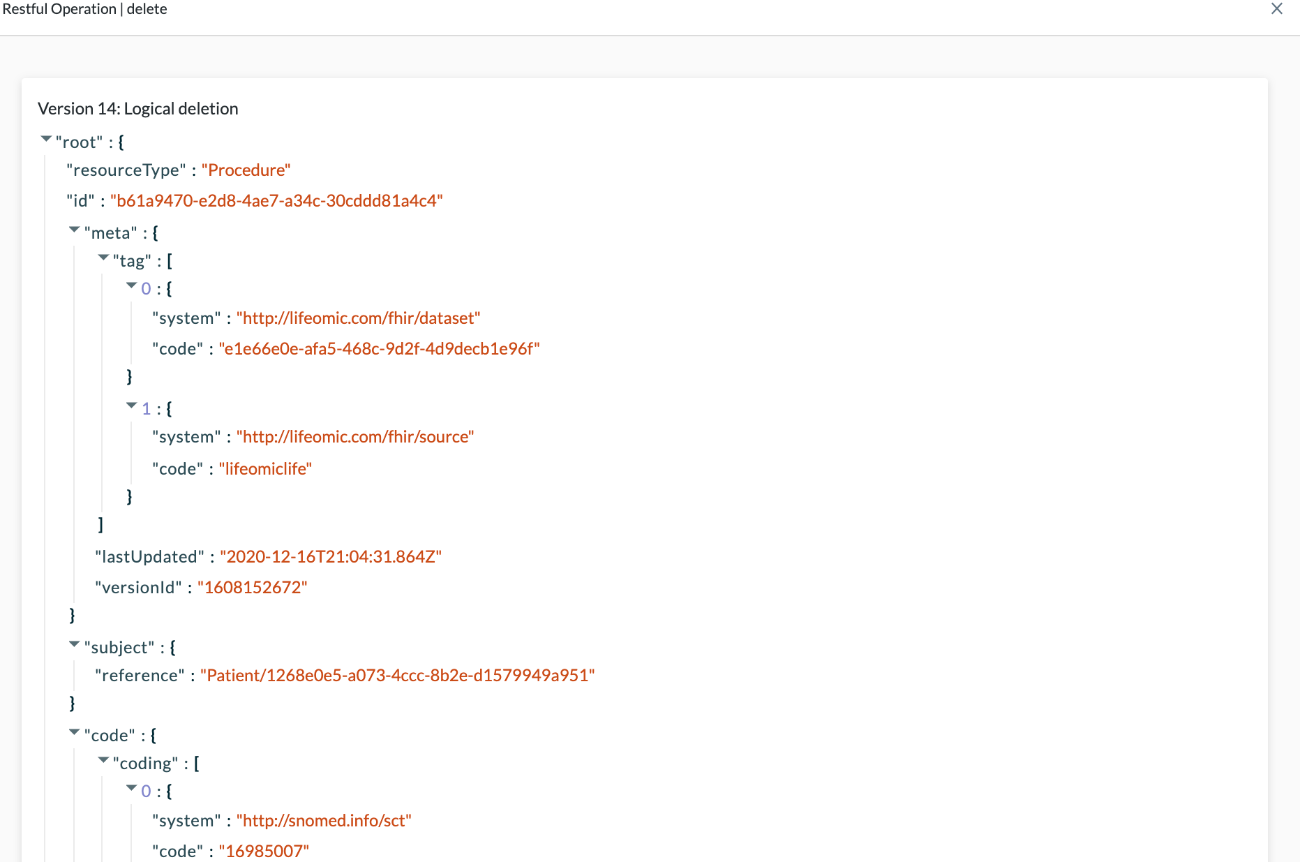
If the Audit Event refers to an updated resource, the two versions of the FHIR resource display side by side. Check the box labeled Diff View in the upper right corner of the screen to switch from JSON view to “diff view” to see the changes highlighted for easier viewing.
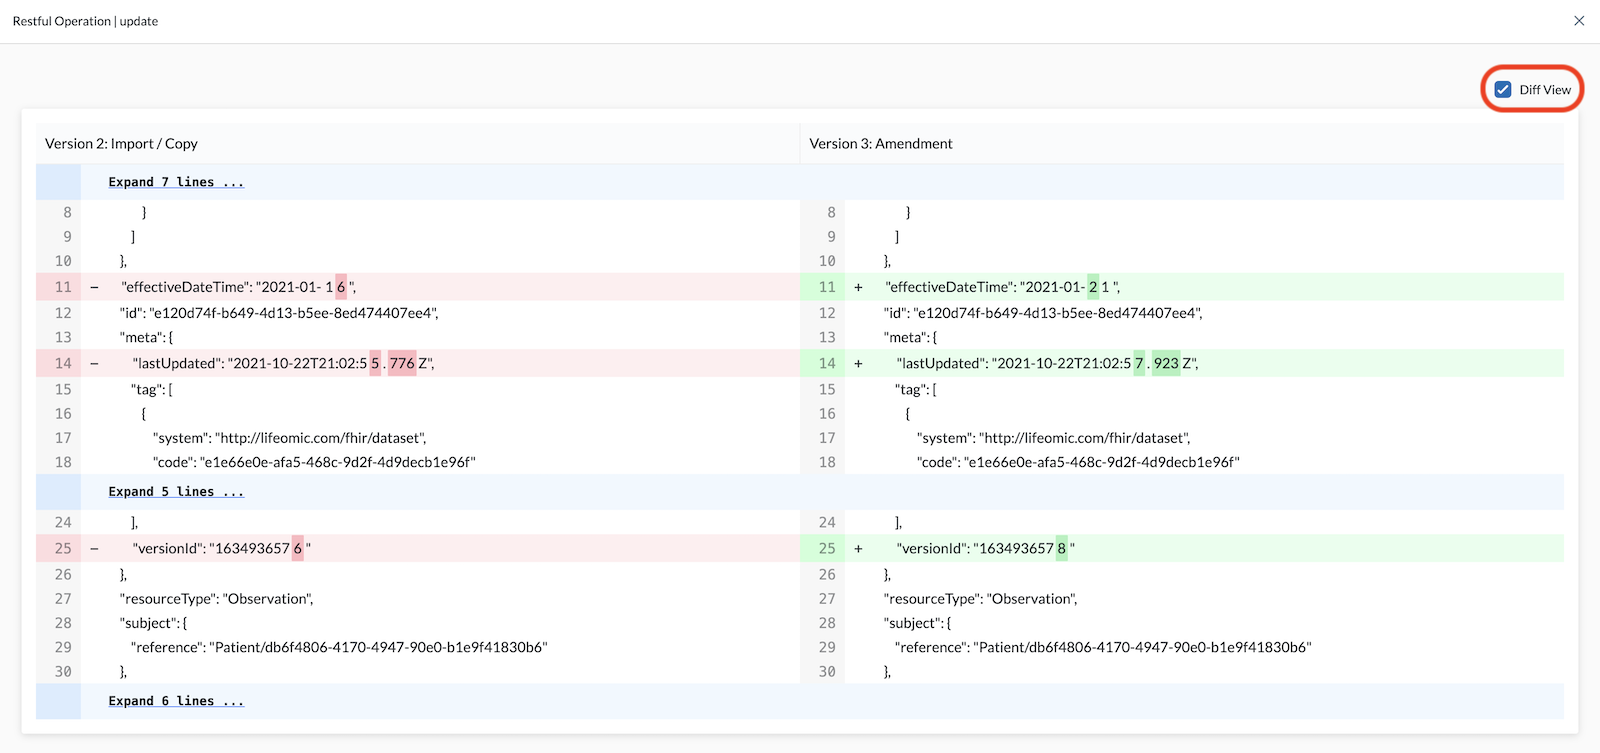
To close out of this view and return to the Audit Trail page, click the "x" in the top right corner of the page.