Creating Resources
LifeOmic Platform users can use the Create Resource feature to place different resources in the Marketplace. There are many resource types available for you to publish. For example, you can add a Program Template to publish a previously created program to the Marketplace. You can also use the App Tile to create your own apps, linking to external sites with your own curated content. Once you have followed the steps to place these resources in the Marketplace, they can be integrated with other LifeOmic products, such as the Patient Mobile App.
The resources you create can be added for consumption by those in your organization or by other LifeOmic customers. You can configure the availability, when you create the resource.
How to Create a Resource in Marketplace
Follow these steps to create a resource and place it in the Marketplace:
-
On the left side menu, click Marketplace and login.
-
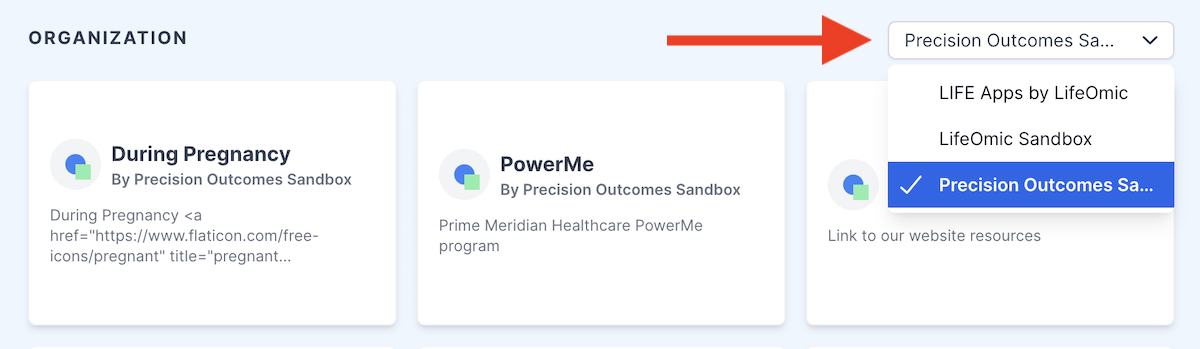
Select the desired organization from the dropdown menu.
-
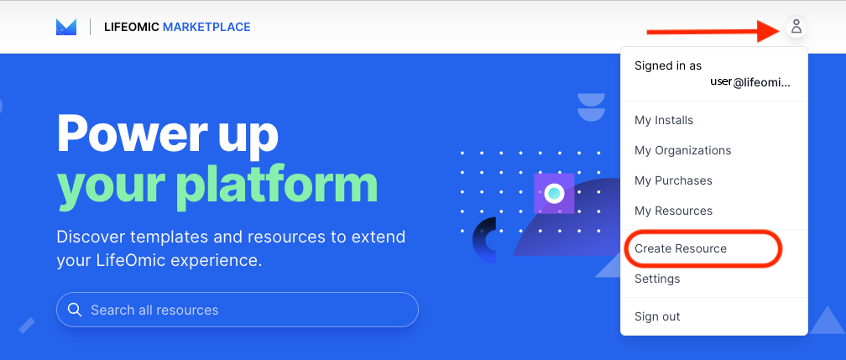
Click on the User icon in the top right of the Marketplace home screen to access the functions dropdown.
-
Click Create Resource.
noteIf you do not see Create Resource, try to select your organization from the dropdown again as you did in step two, then refresh the page and click the User icon. You should now see and be able to click Create Resource.
-
From the Resource Type selection screen, select the resource tile you wish to add.
- App Tile
- Consent
- Domain Ontology
- Insights Layout
- Notebook
- Process Ontology
- Program Enrollment
- Program Template
- Report Extractor
- Subject Search Layout
- Subject Viewer Layout
- Survey
- Workflow
-
The Marketplace Wizard walks you through the setup steps.

-
The Source section prompts you to find the resource you want to publish.
- First, use the dropdown menu to choose the source account.
- The next prompts are specific to the type of resource. Use the dropdown menu to search through what is available in that account. If you are adding an app tile, you are prompted to enter the URL of your privately hosted content. The content of the app is the website of the URL that you insert here.
- To keep the Marketplace resource available only to your organization, confirm that the Private Resource toggle is on. This is the default setting.
- Click the Next icon to move to the next step.
-
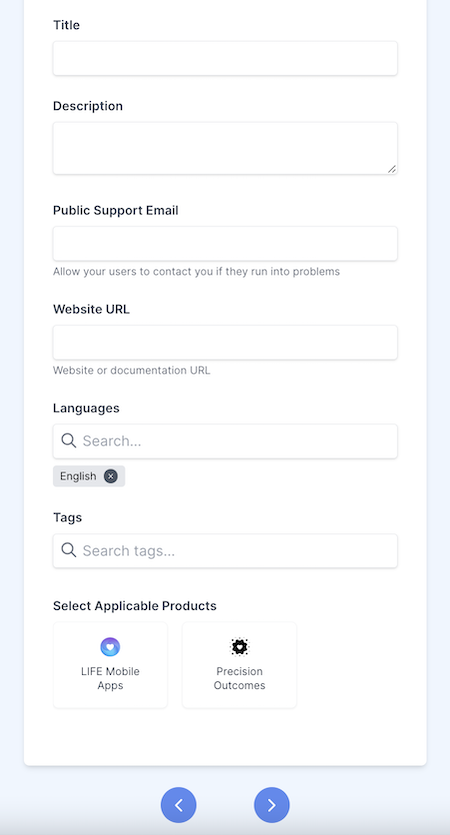
Add more information about your resource in the Details section.
- Give your resource a title (required).
- Provide a description of the resource (required).
- Enter the email address for a support person who users can contact for help (optional).
- Enter the website URL in the space provided (optional).
- Select the language (optional).
- Provide search tags (optional).
- Select the product you'd like to integrate with your resource. The products you can choose from vary depending on which resource you are creating. Users will use the product you select to access the resource.
- Click the Next icon to move to the next step.
-
Pricing is a future feature and can be skipped by clicking the Next icon to continue moving through the Wizard.
-
Adding Videos and Images are optional and can be skipped by clicking the Next icon to continue moving through the Wizard.
-
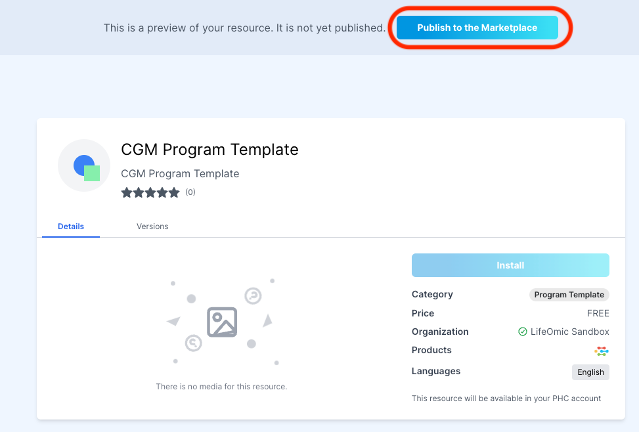
Preview allows you to see what the resource will look like once it is published. Make any necessary changes. Once you are happy with your resource, click Publish to the Marketplace to complete the setup. The example below shows this step when publishing a program template.
-
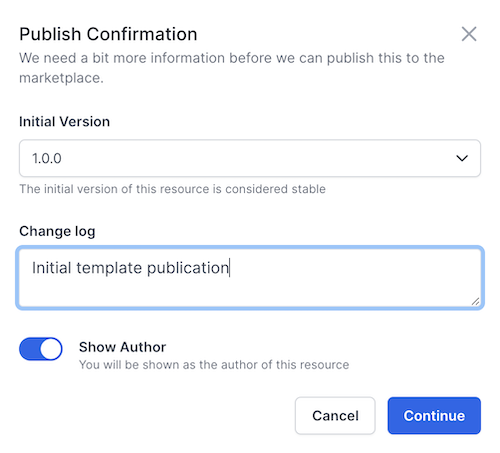
You will be presented with a popup screen that allows you to set the Version and add any Change Log notes. Click Continue.
-
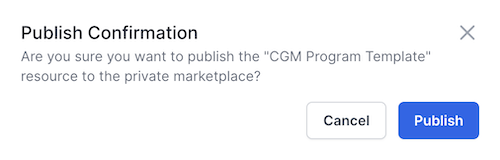
Click Publish. Your resource will be added to the Marketplace.
For more information on viewing and installing resources from the Marketplace into your account, see view and load marketplace apps.
Digital Binder App Example
You can create an app linking to an external website with custom content. An example use case could be a "digital binder" with information for subjects to refer to as they recover from a medical procedure. Rather than handing them a physical binder, you can create an app in the Marketplace that connects to the binder content in digital form.
Follow the procedure above to create a resource and select App Tile as your resource type. In the Source section of the setup wizard, enter the URL of your privately hosted content. The content of the app, or digital binder, is the website of the URL that you insert here. Once you complete the setup and publish your resource, users can integrate the app through the Patient Mobile App, and the subjects can access the information using their mobile device.
To learn more about how to add your newly created apps to the Patient Mobile App for your subjects, see Customize the Mobile App Patient Dashboard.
Visit the section on Programs to learn more about building programs and courses that you can later add to the Marketplace.